Integration Example: Unity App
Web3 Unity apps can onboard users via social login and allow authenticated users to access the Arcana wallet from within the app context by integrating with the Arcana Auth Unity SDK.
Before installing the arcana-auth-sdk package and integrating the Arcana Auth Unity SDK with the app, developers must register and configure the app using the Arcana Developer Dashboard.
Steps
Step 1: Register & Configure
Log in to the Arcana Developer Dashboard: https://dashboard.arcana.network. Register and configure user onboarding options for the app. Configure gasless transactions if required.
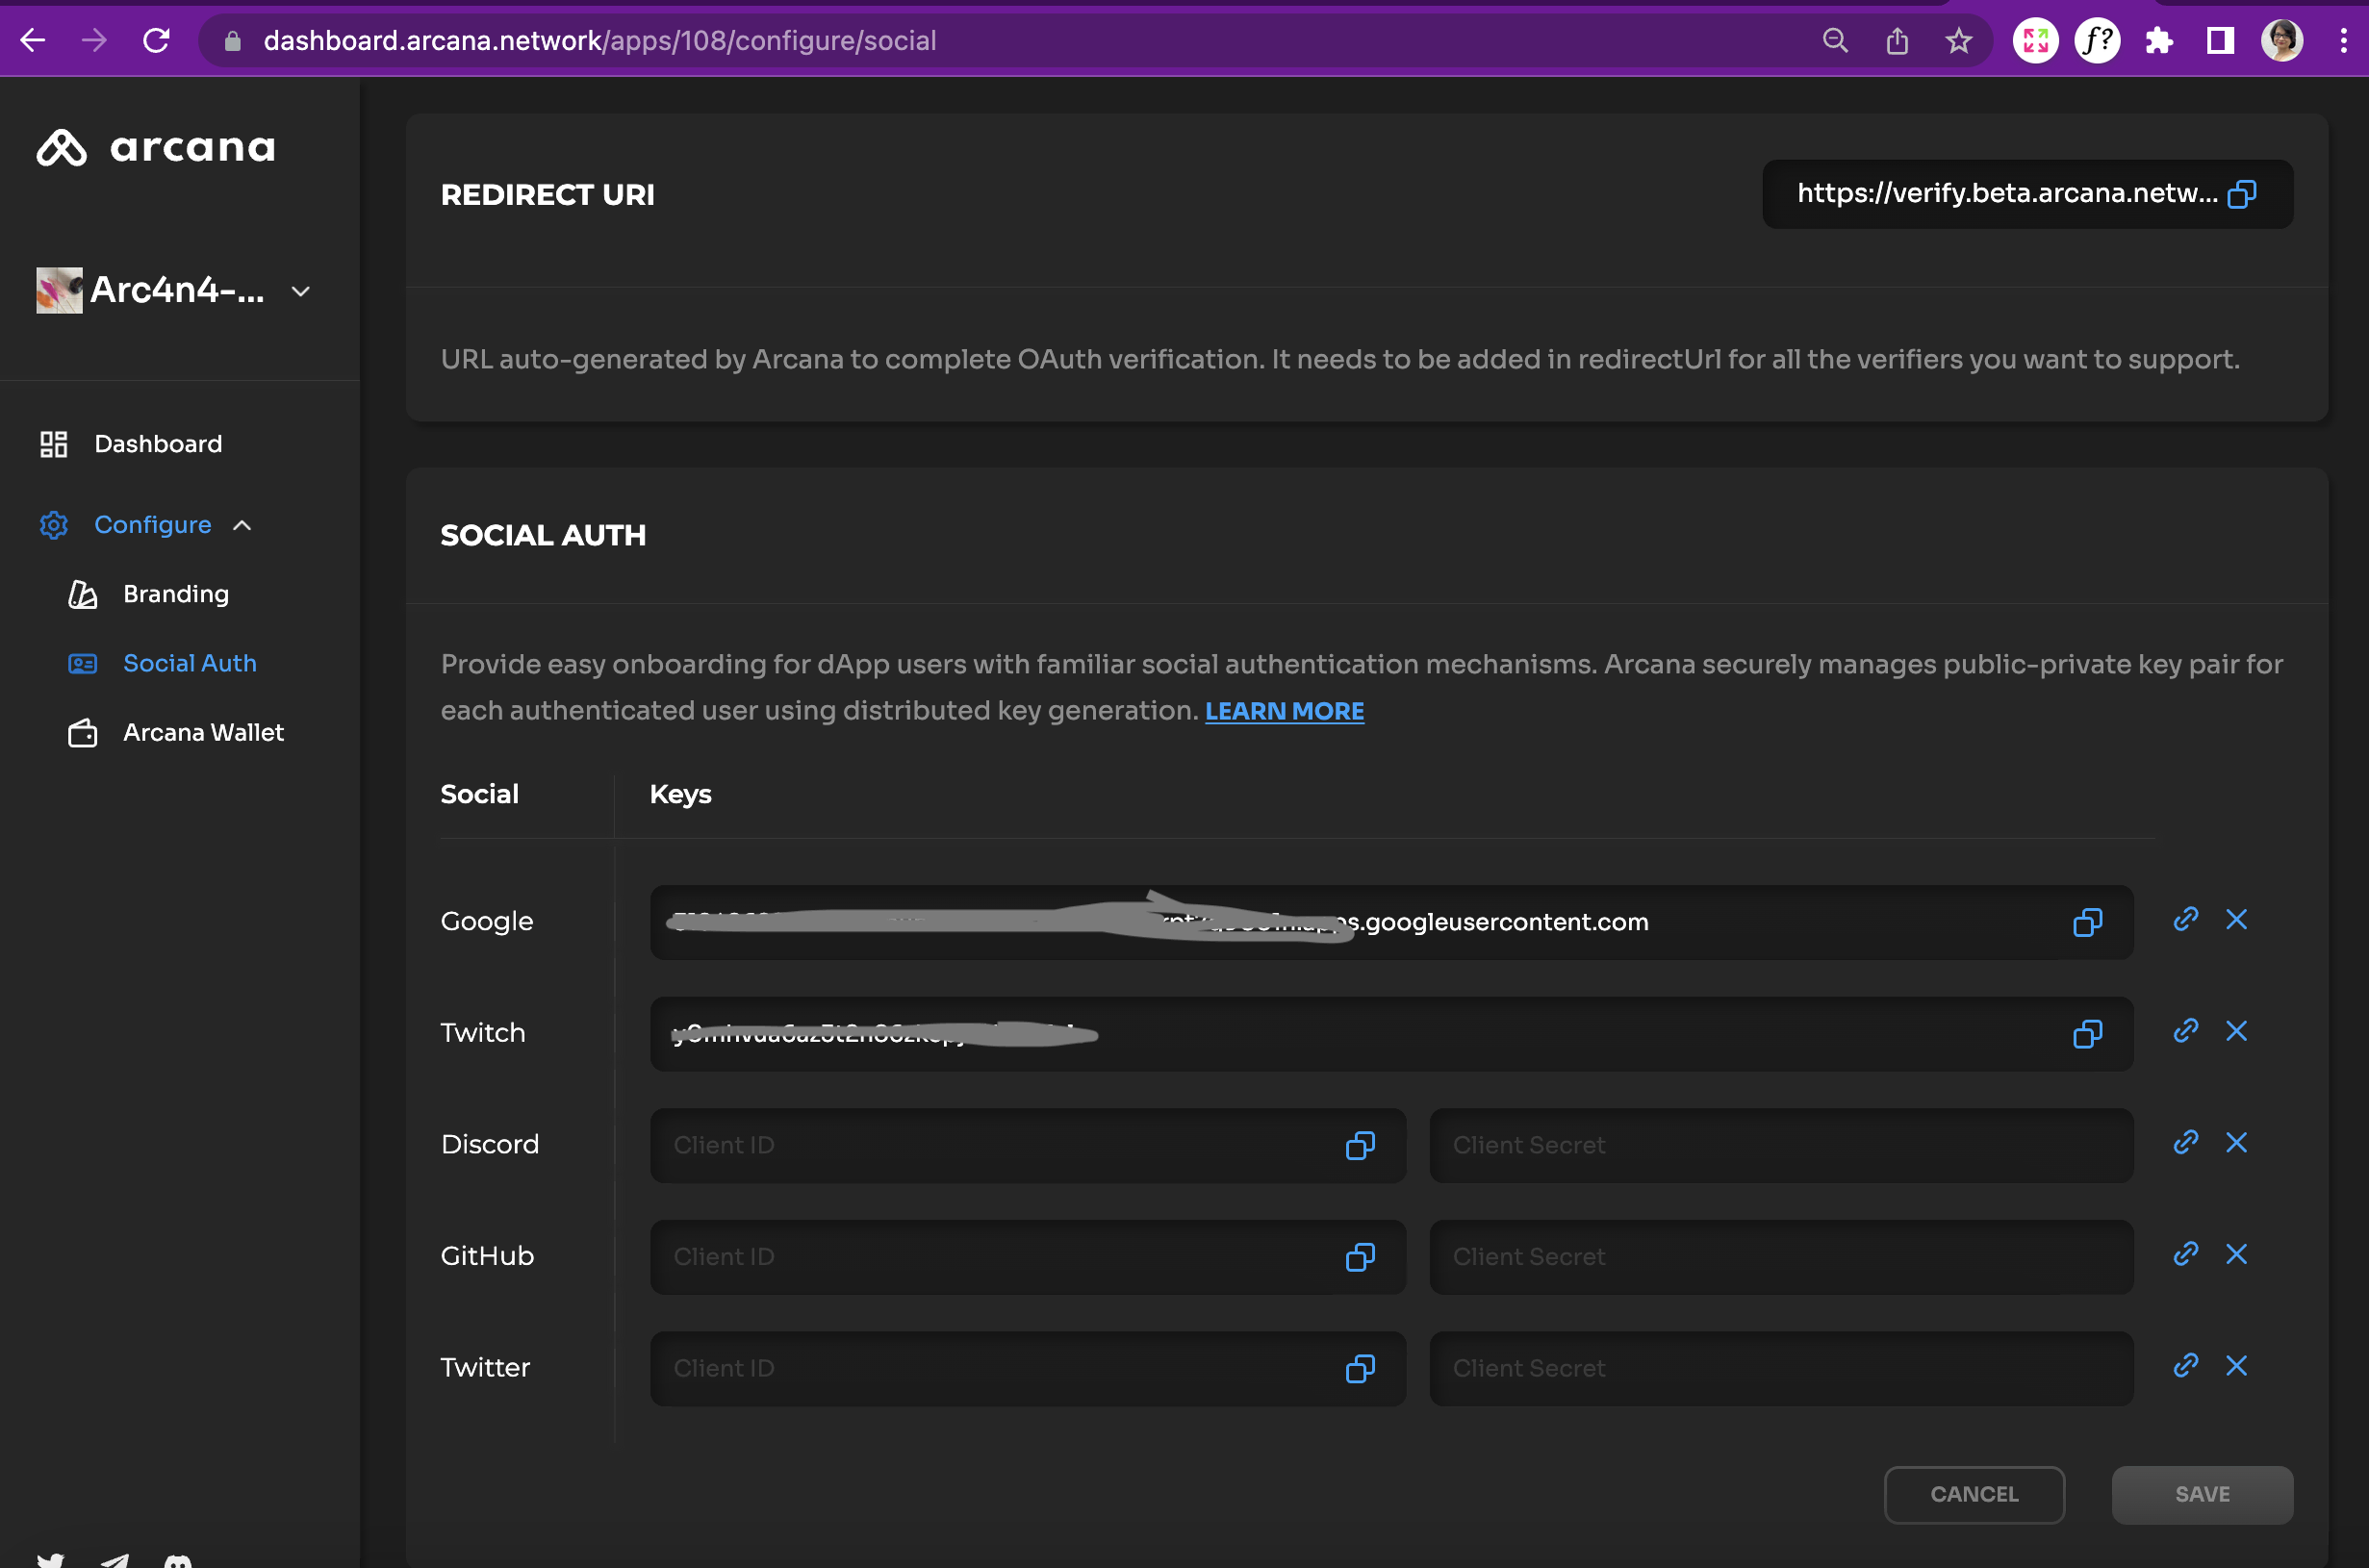
By default, a Testnet configuration profile is associated with every registered app. The Testnet profile for the app has a unique Client ID that is used later during app integration.
Mainnet Deployment
A newly registered app is associated with a Testnet configuration profile. After integration with the SDK, it can be deployed on the Testnet only.
To deploy on Mainnet, developers must create the Mainnet profile and use the Client ID assigned to the Mainnet profile to integrate the app. See [deploy-app| app deployment for details.]

Step 2: Setup Unity, Install Auth SDK
-
Install NuGetForUnity.
-
In the NuGet Toolbar at the top, click NuGet > Manage NuGet packages.
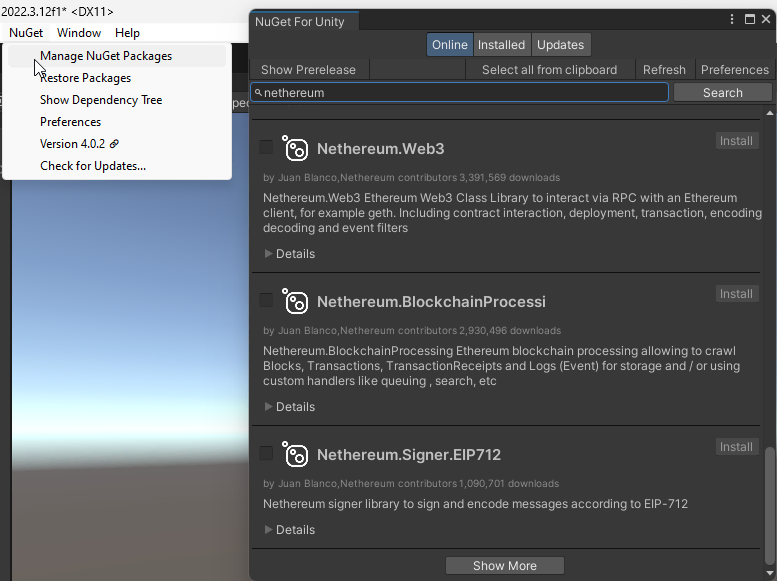
Manage NuGet Packages -
Install the following packages by STA:
Nethereum.Web3,WebsocketSharp.Core -
Use the Unity Editor Project Settings window to edit package settings for your project. Click Edit > Project Settings > Package Manager.
-
Edit Project Settings with URL https://npm-registry.arcana.network/ and set the scope to
com.cysharp.unitask, dev.voltstro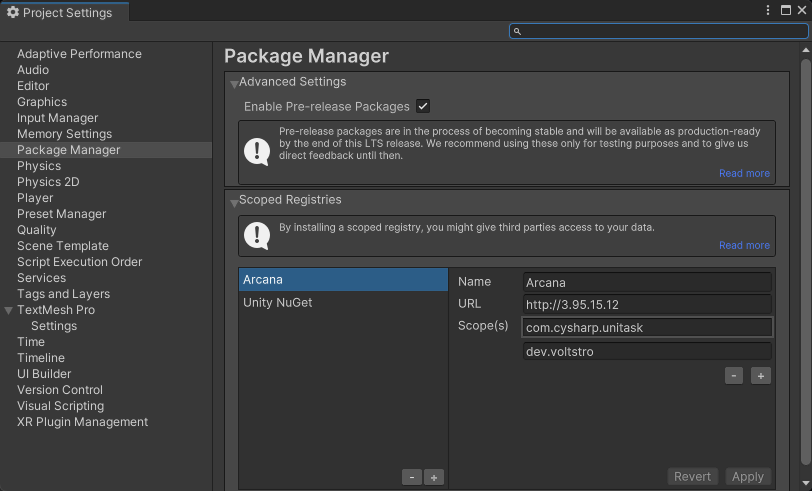
Edit Project Settings -
Add another new scoped registry with URL https://unitynuget-registry.azurewebsites.net and set the scope to
org.nuget.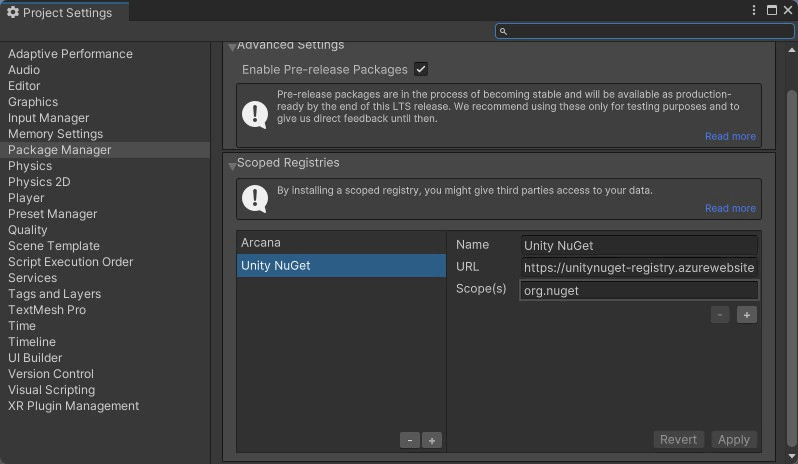
Add Scoped Registry
-
-
In the NuGet window, use the NuGet Toolbar at the top, and click Window > Package Manager > Add Package by Name.
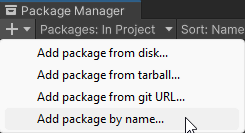
Add Package by Name -
Add the following packages:
com.cysharp.unitask,`dev.voltstro.unitywebbrowser.engine.cef-
Windows:
dev.voltstro.unitywebbrowser.engine.cef.win.x64 -
Linux:
dev.voltstro.unitywebbrowser.engine.cef.linux.x64 -
MacOS:
dev.voltstro.unitywebbrowser.engine.cef.macos.x64
-
See Unity Web Browser package list for details.
-
Download the Arcana Auth Unity SDK package: https://npm-registry.arcana.network/. Unzip the contents and copy them to the Assets folder of the Unity Project.
-
Search for ArcanaSDK prefab in the 'Project Window' of the Unity Editor. Click Assets > ArcanaSDK > Prefabs > ArcanaSDK. Drag this prefab into the project 'Hierarchy' and configure the prefab as shown here:
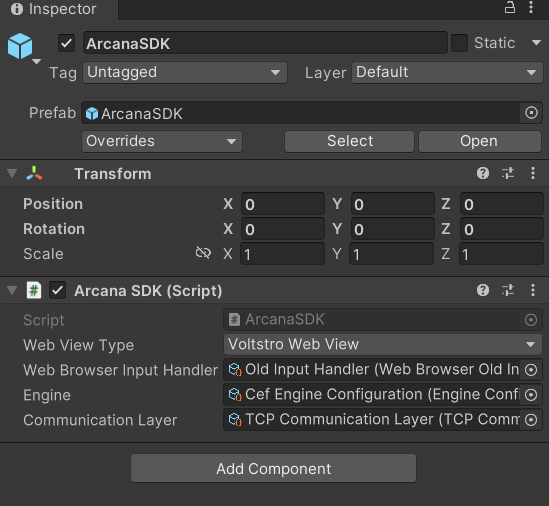
Configure Arcana Prefab
Step 3: Initialize Auth SDK
using ArcanaSDK;

await arcanaSDK.InitializeSDK(env, "unique_clientID_for_registed_app");
Step 3: Onboard Users
First, call LoginWithSocial or LoginWithOTP to onboard the user. Choose one of the supported user onboarding options such as Google, Steam, etc.
// After initializing the SDK

if (loginMethod == LoginMethod.Passwordless)
  arcanaSDK.LoginWithOTP(email);
else
  arcanaSDK.LoginWithSocial(loginMethod);
Step 4: Enable Web3 Wallet Operations
Next, call Request to make Web3 Wallet operation requests from within the app context.
responseTextField.text = "";
if (parameters.text != null)
{
  response = (await arcanaSDK.Request(new RequestParams {
      Method = method.text,
      Params = JsonConvert.DeserializeObject<object[]>(parameters.text)
  })).ToString();
}
else
{
  response = (await arcanaSDK.Request(new RequestParams {
      Method = method.text,
  })).ToString();
}
The app is ready to be deployed on the Testnet. Once a user authenticates, the built-in Arcana wallet is displayed in the app's context. Authenticated users can sign blockchain transactions.

That's all!