Gasless Settings (Third-party Wallets)
The built-in gasless feature of the Arcana Auth SDK can be used to enable gasless transactions for app users through the Arcana wallet. For enabling gasless transactions in third-party browser-based wallets supported by the app, developers must use the standalone Arcana Gasless (Standalone) SDK.
When enabling gasless transactions in the Arcana wallet, or a third-party wallet, developers must use the Arcana Developer Dashboard and set up gas tanks, whitelist gasless app operations for the supported blockchain networks.
In this guide, you will learn how to configure gasless transactions irrespective of whether you wish to use only the standalone Arcana Gasless (Standalone) SDK or use the built-in gasless feature in the Arcana Auth SDK.
Disabling Gasless
When you create a gas tank for a blockchain, it turns on the gasless feature. At the same time, the user account changes into a dual address gasless account, which links to both an Externally Owned Account (EOA) and a Smart Contract Wallet (SCW) address.
Developers cannot delete a gas tank once set up. But they can stop or deactivate gas tanks if needed. The gasless feature works only when gas tanks have funds and are active, but once the user account transforms into a gasless one, you can't undo it.
Prerequisites
-
To use the Arcana Developer Dashboard, developers can sign in using one of the supported social login providers or opt for passwordless sign-in.
- GitHub
- Twitch
- Discord
-
To deposit funds in a newly created gas tank, developer must use a browser based wallet such as MetaMask.
Steps
Login to the Arcana Developer Dashboard and follow these three steps:
Step 1. Provision Gas Tanks
Visit the 'Manage Apps' page of the Arcana Developer Dashboard. Choose the registered app for which you need to enable the gasless feature. If the app is not registered, create a new app entry by registering it and then configure gasless settings to enable gasless transactions.
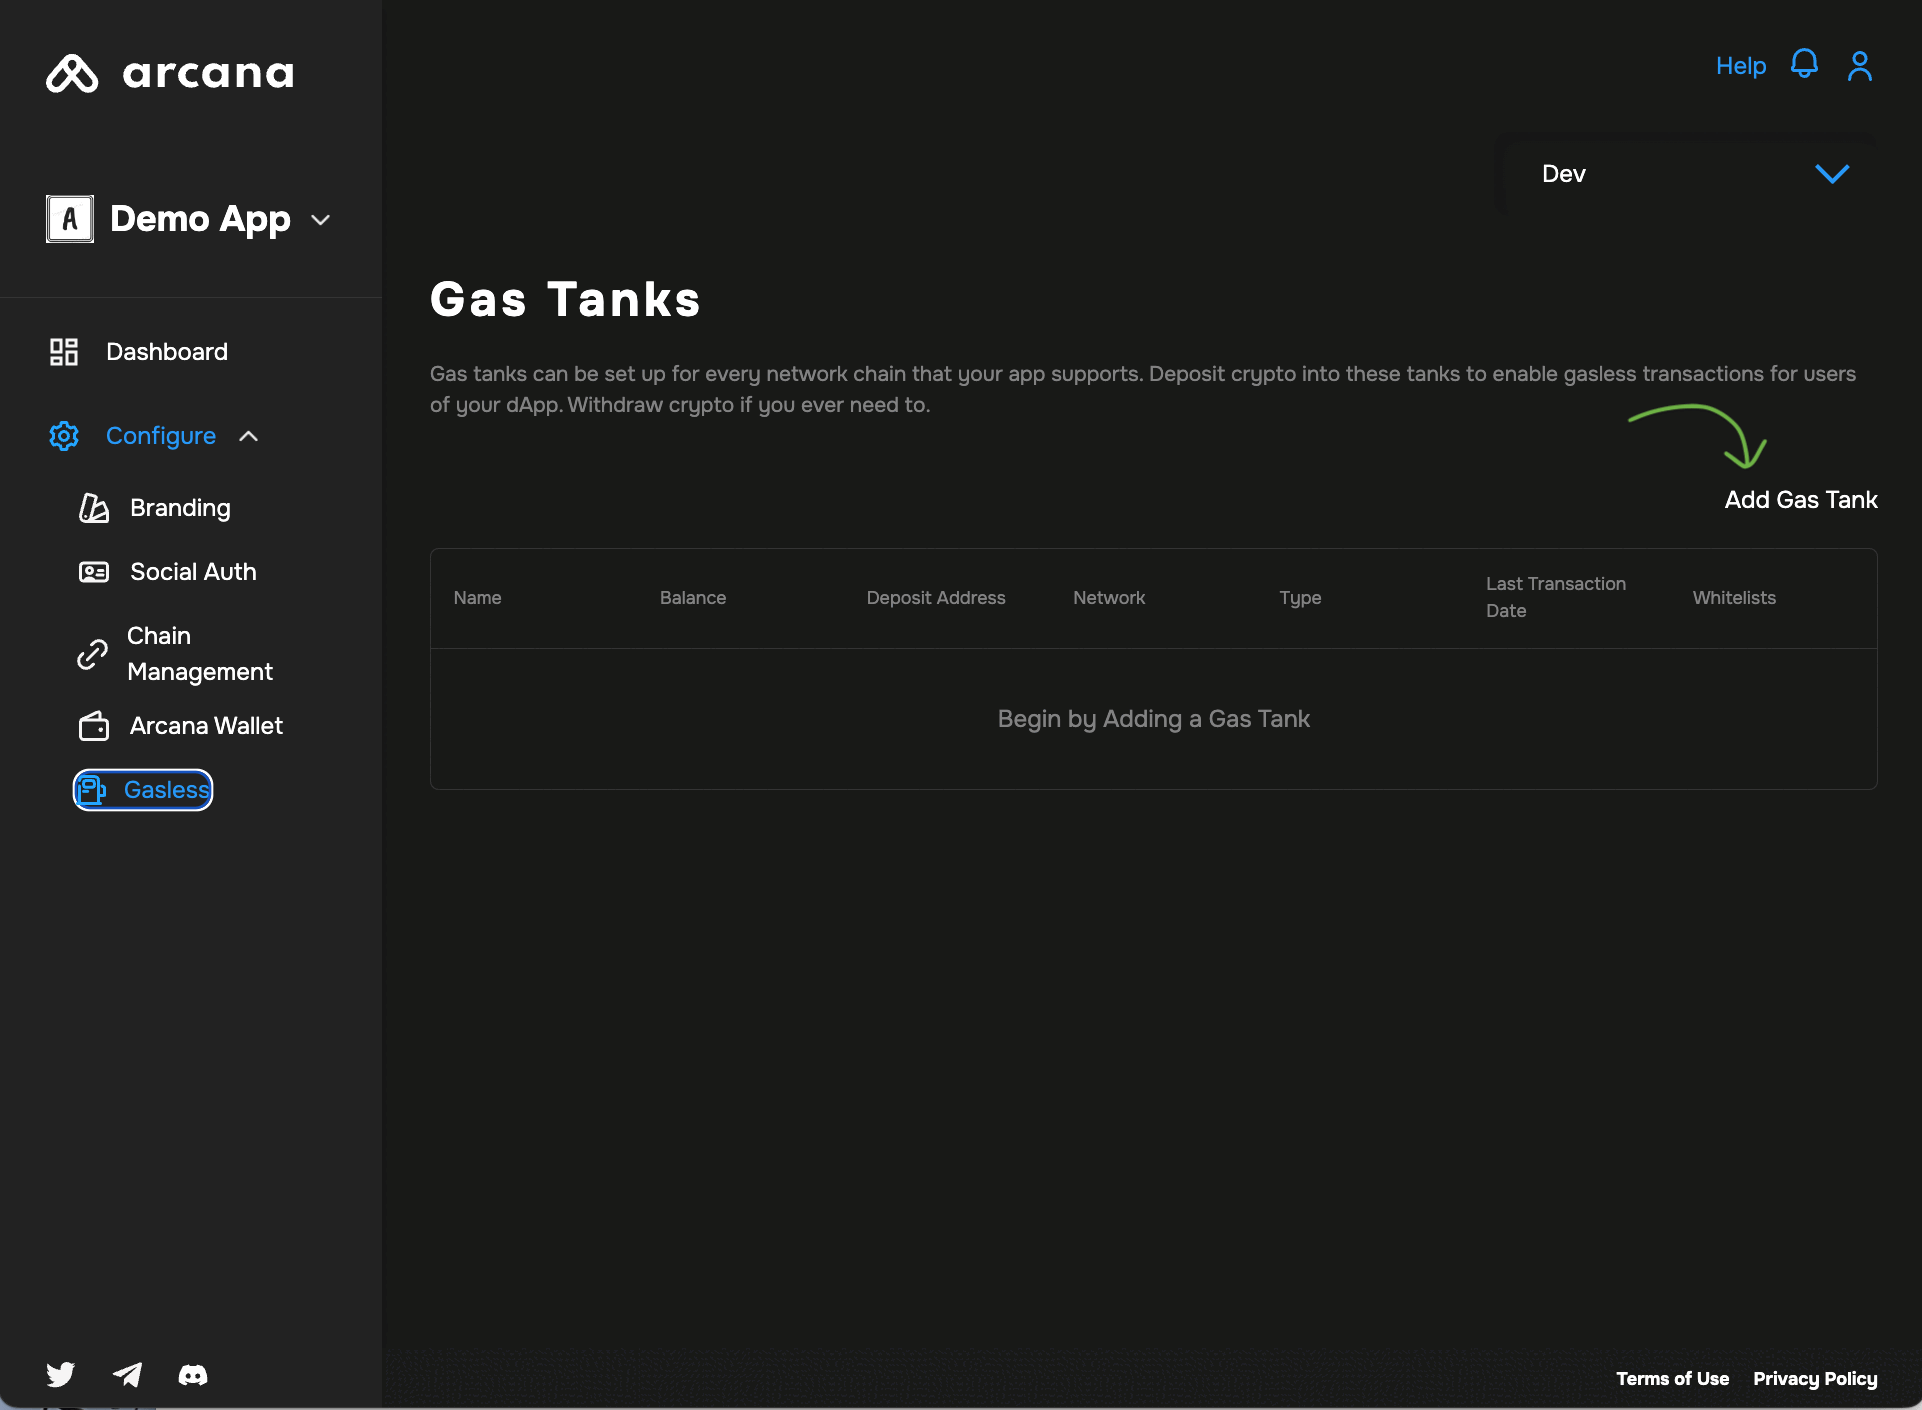
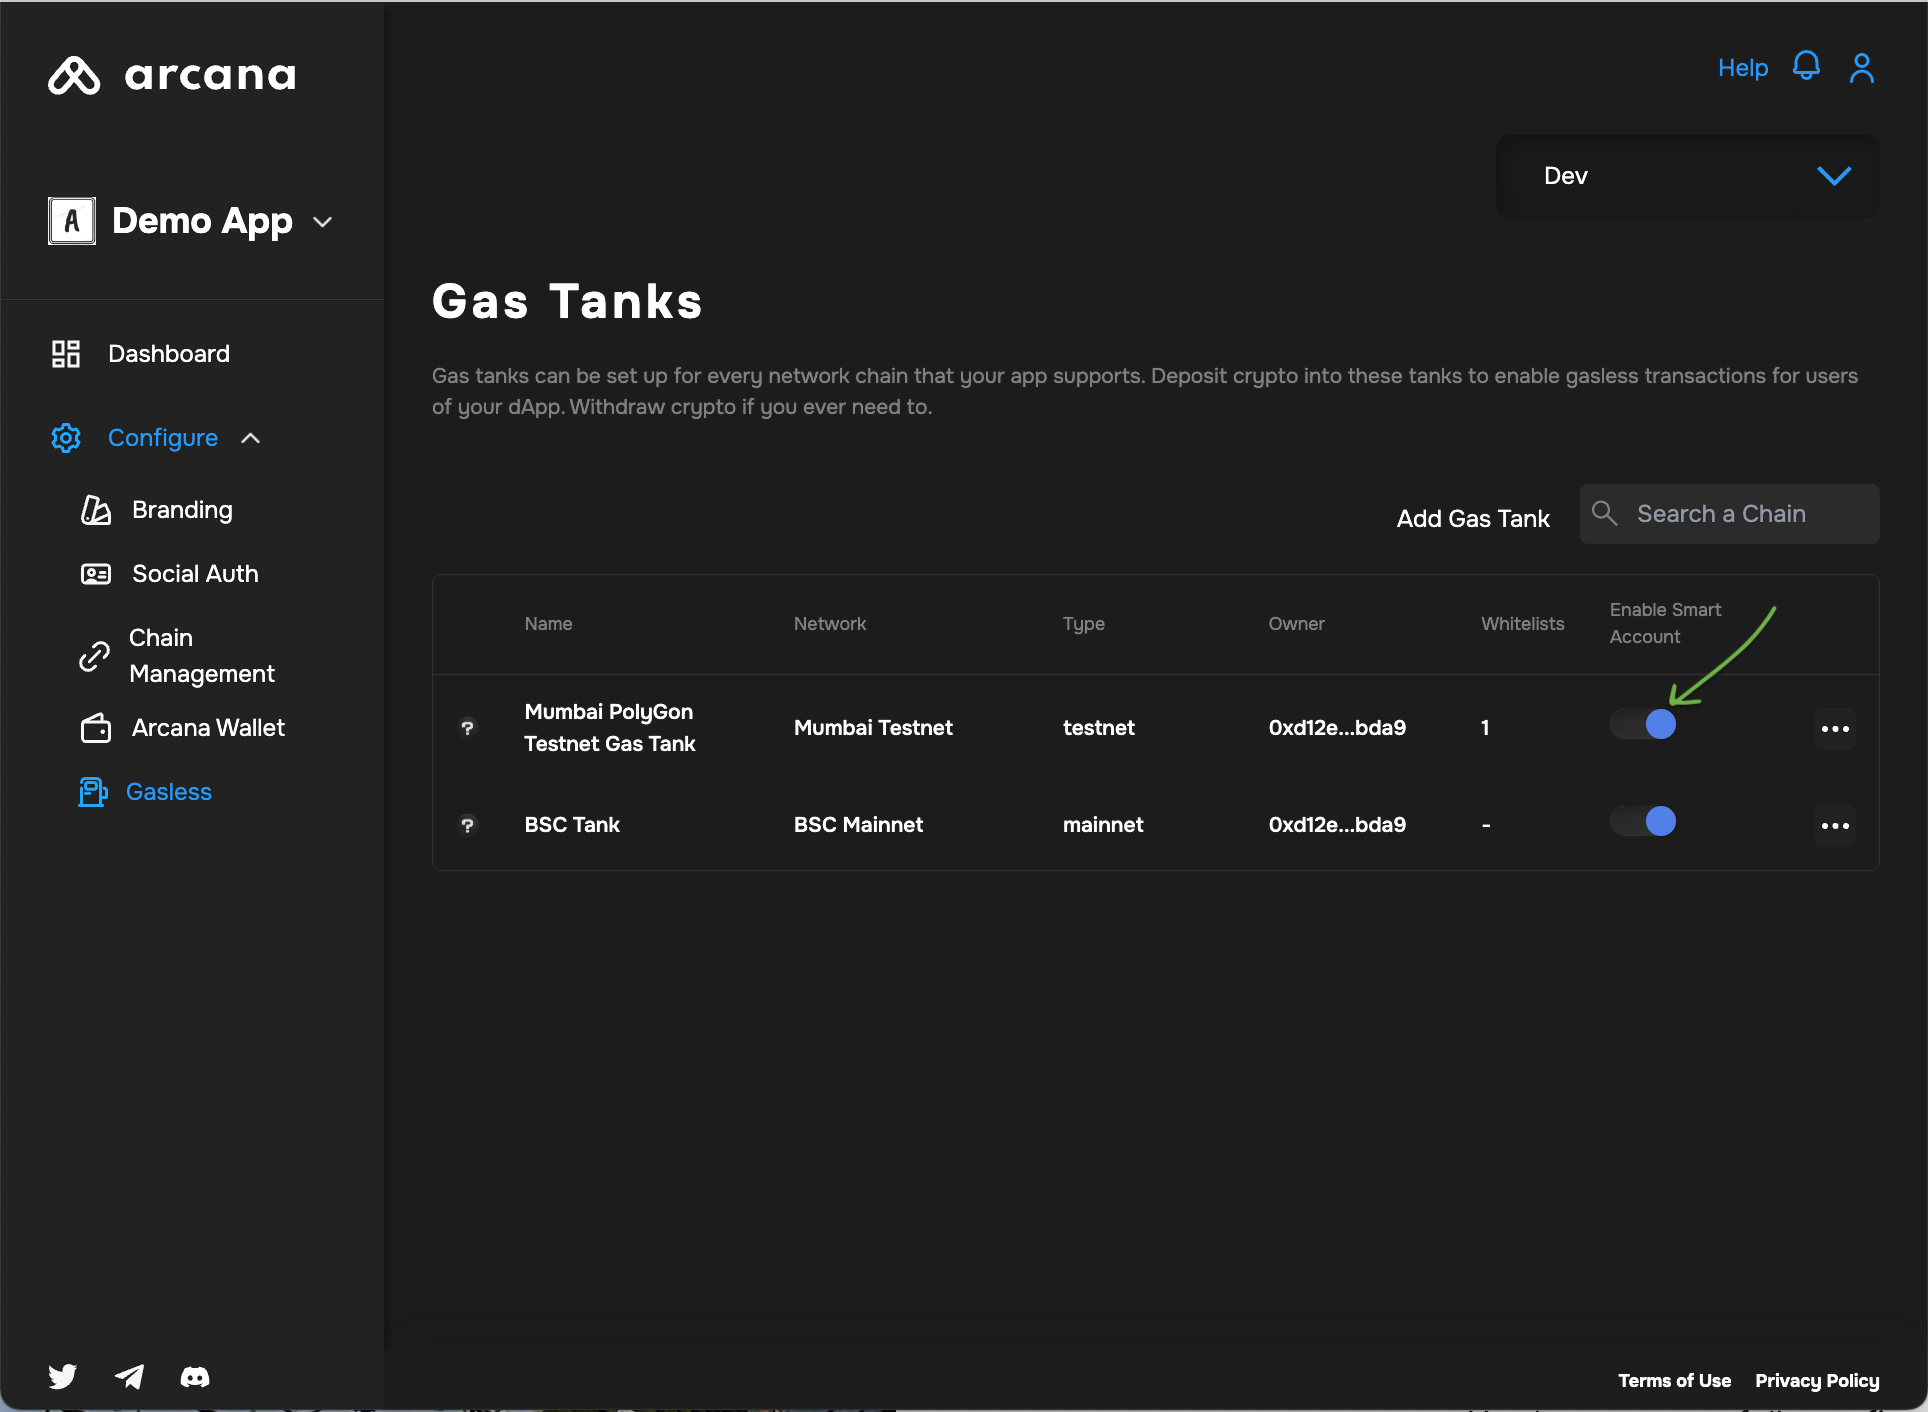
Click Configure dropdown, and choose Gasless in the LHS navigation. A registered app has no gas tanks set up by default. Select Gas Tanks to add or edit the gas tanks.
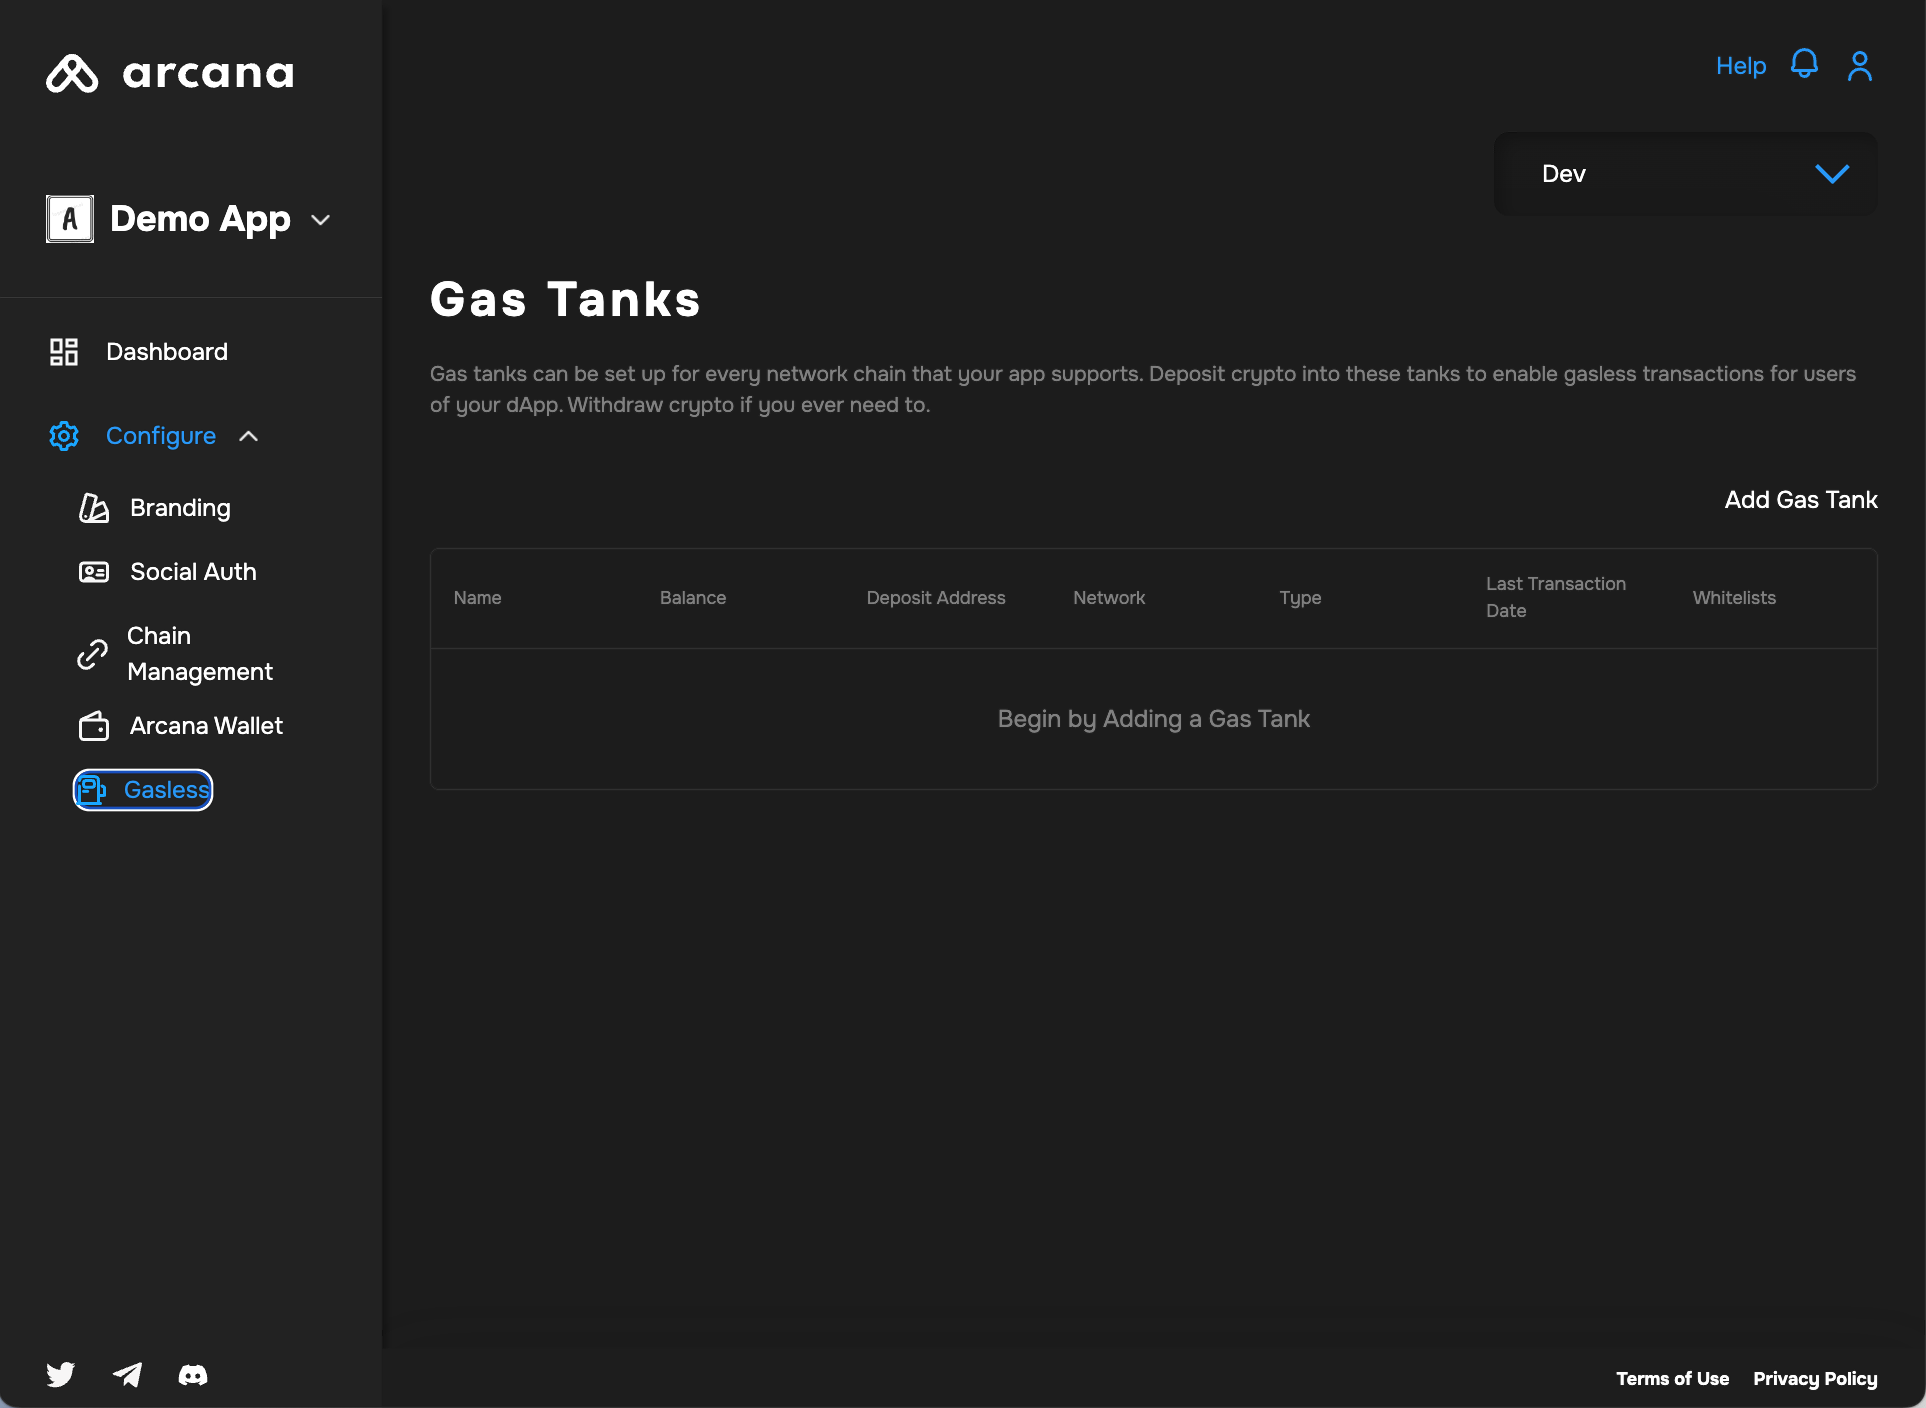
Choose the Add Gas Tank control; provide a name for the gas tank and select a chain that will be serviced by this gas tank. Refer to the list of supported chains that allow setting up the gas tanks.
Note that you can only set up one gas tank per blockchain network. Once configured, the newly added gas tank is displayed the Arcana Developer Dashboard.
Step 2. Deposit/Withdraw Gas Tank Credits
To add crypto assets to a new gas tank, the developer needs to use a browser-based wallet like MetaMask and choose an account with sufficient funds. This account is referred to as the owner's account. Anyone, including the developer or third-party sponsors, can contribute credits to the gas tank. However, credits can only be withdrawn into the owner's account.
Browser-based wallet
You can use MetaMask or any other browser-based wallet to deposit credits in a gas tank. Make sure the browser-based wallet sets the windows.ethereum variable.
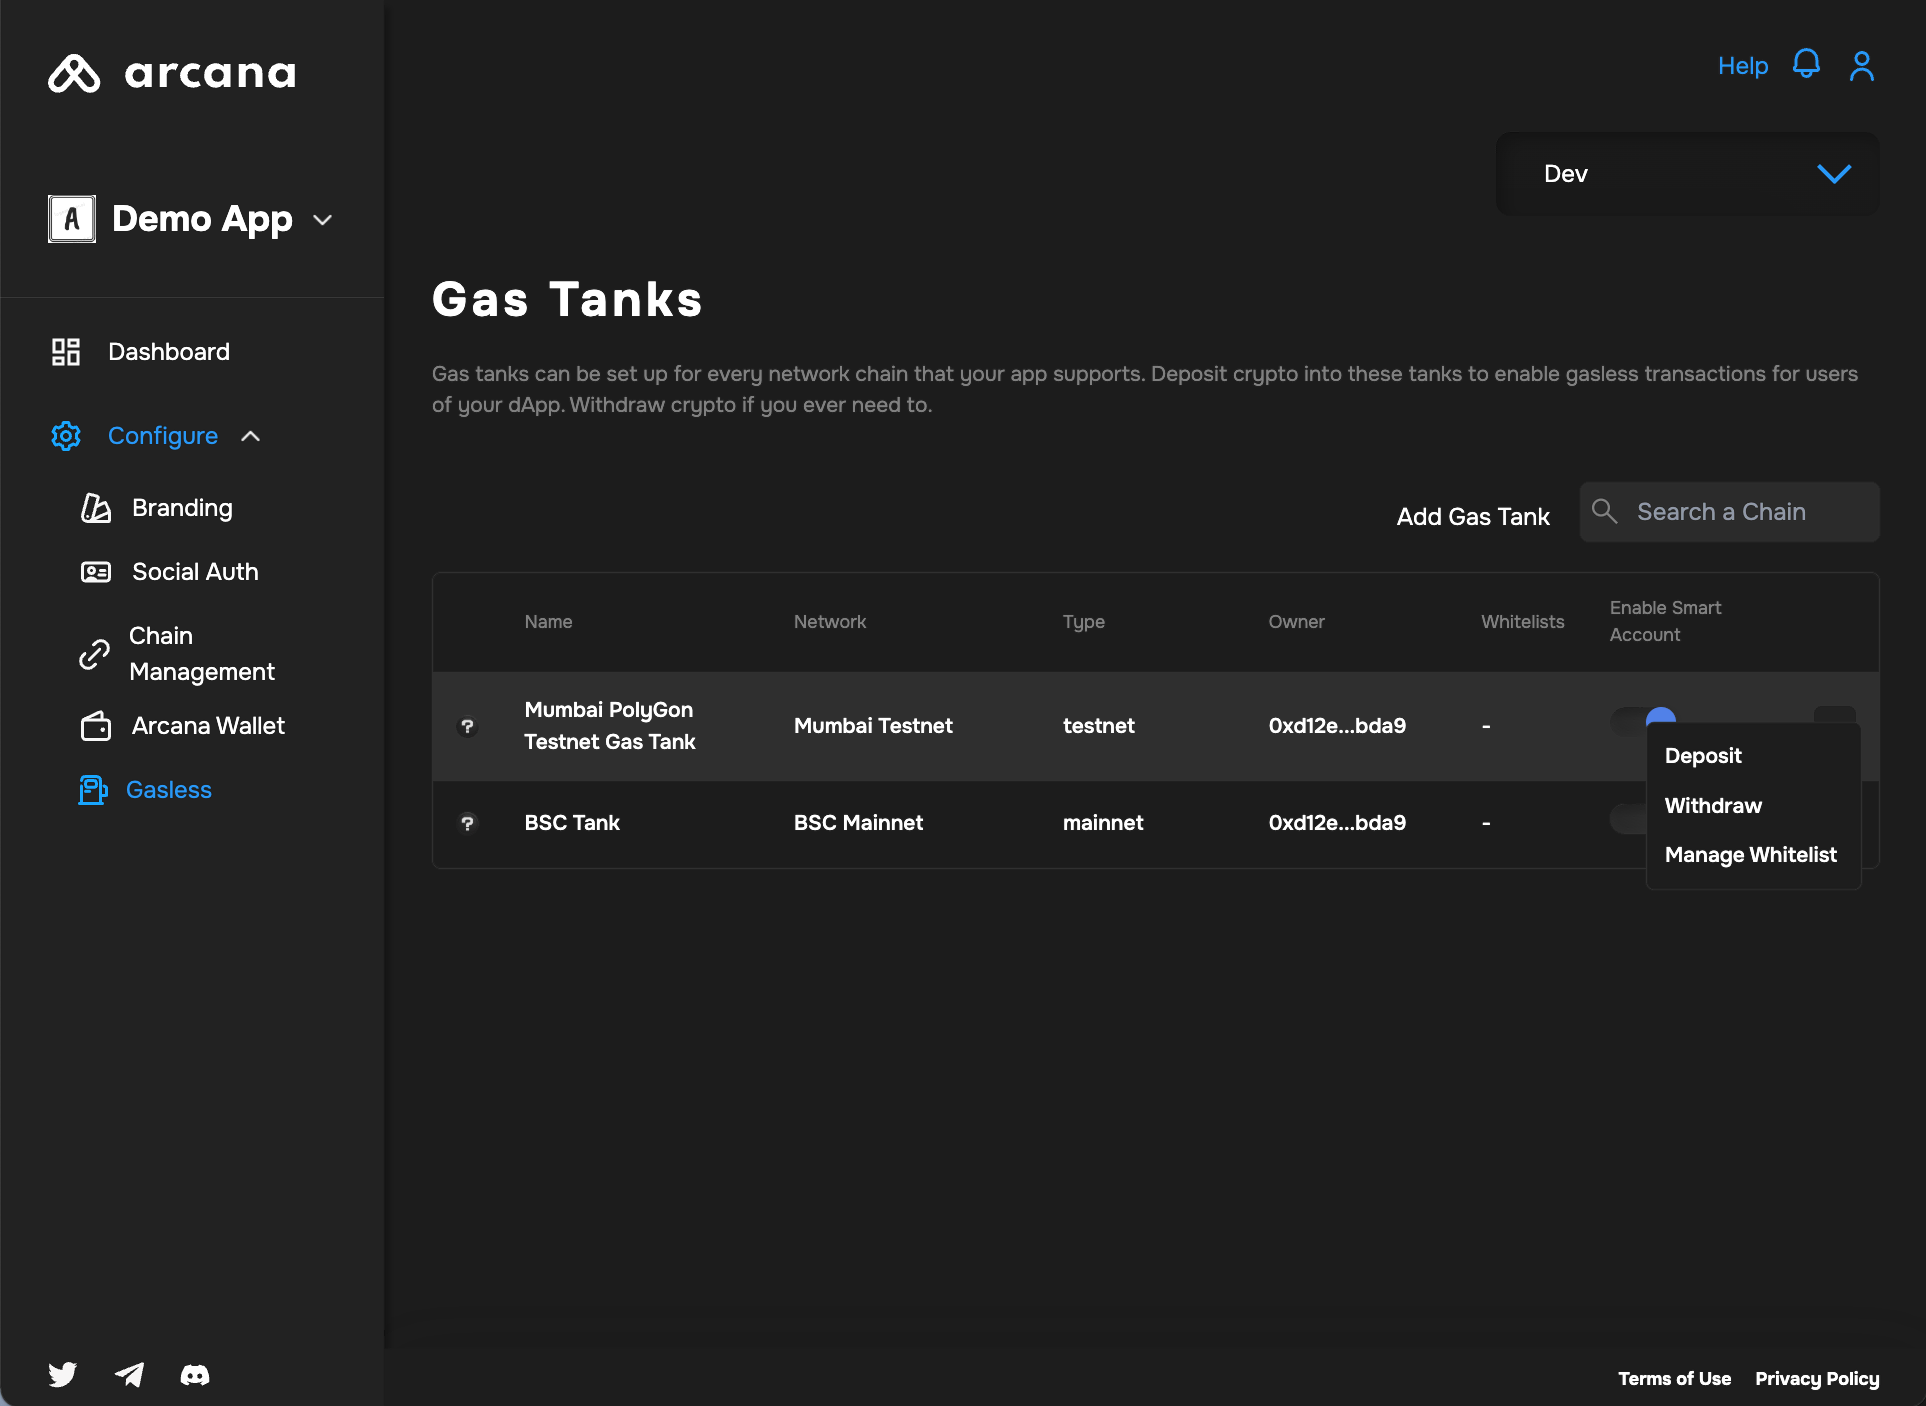
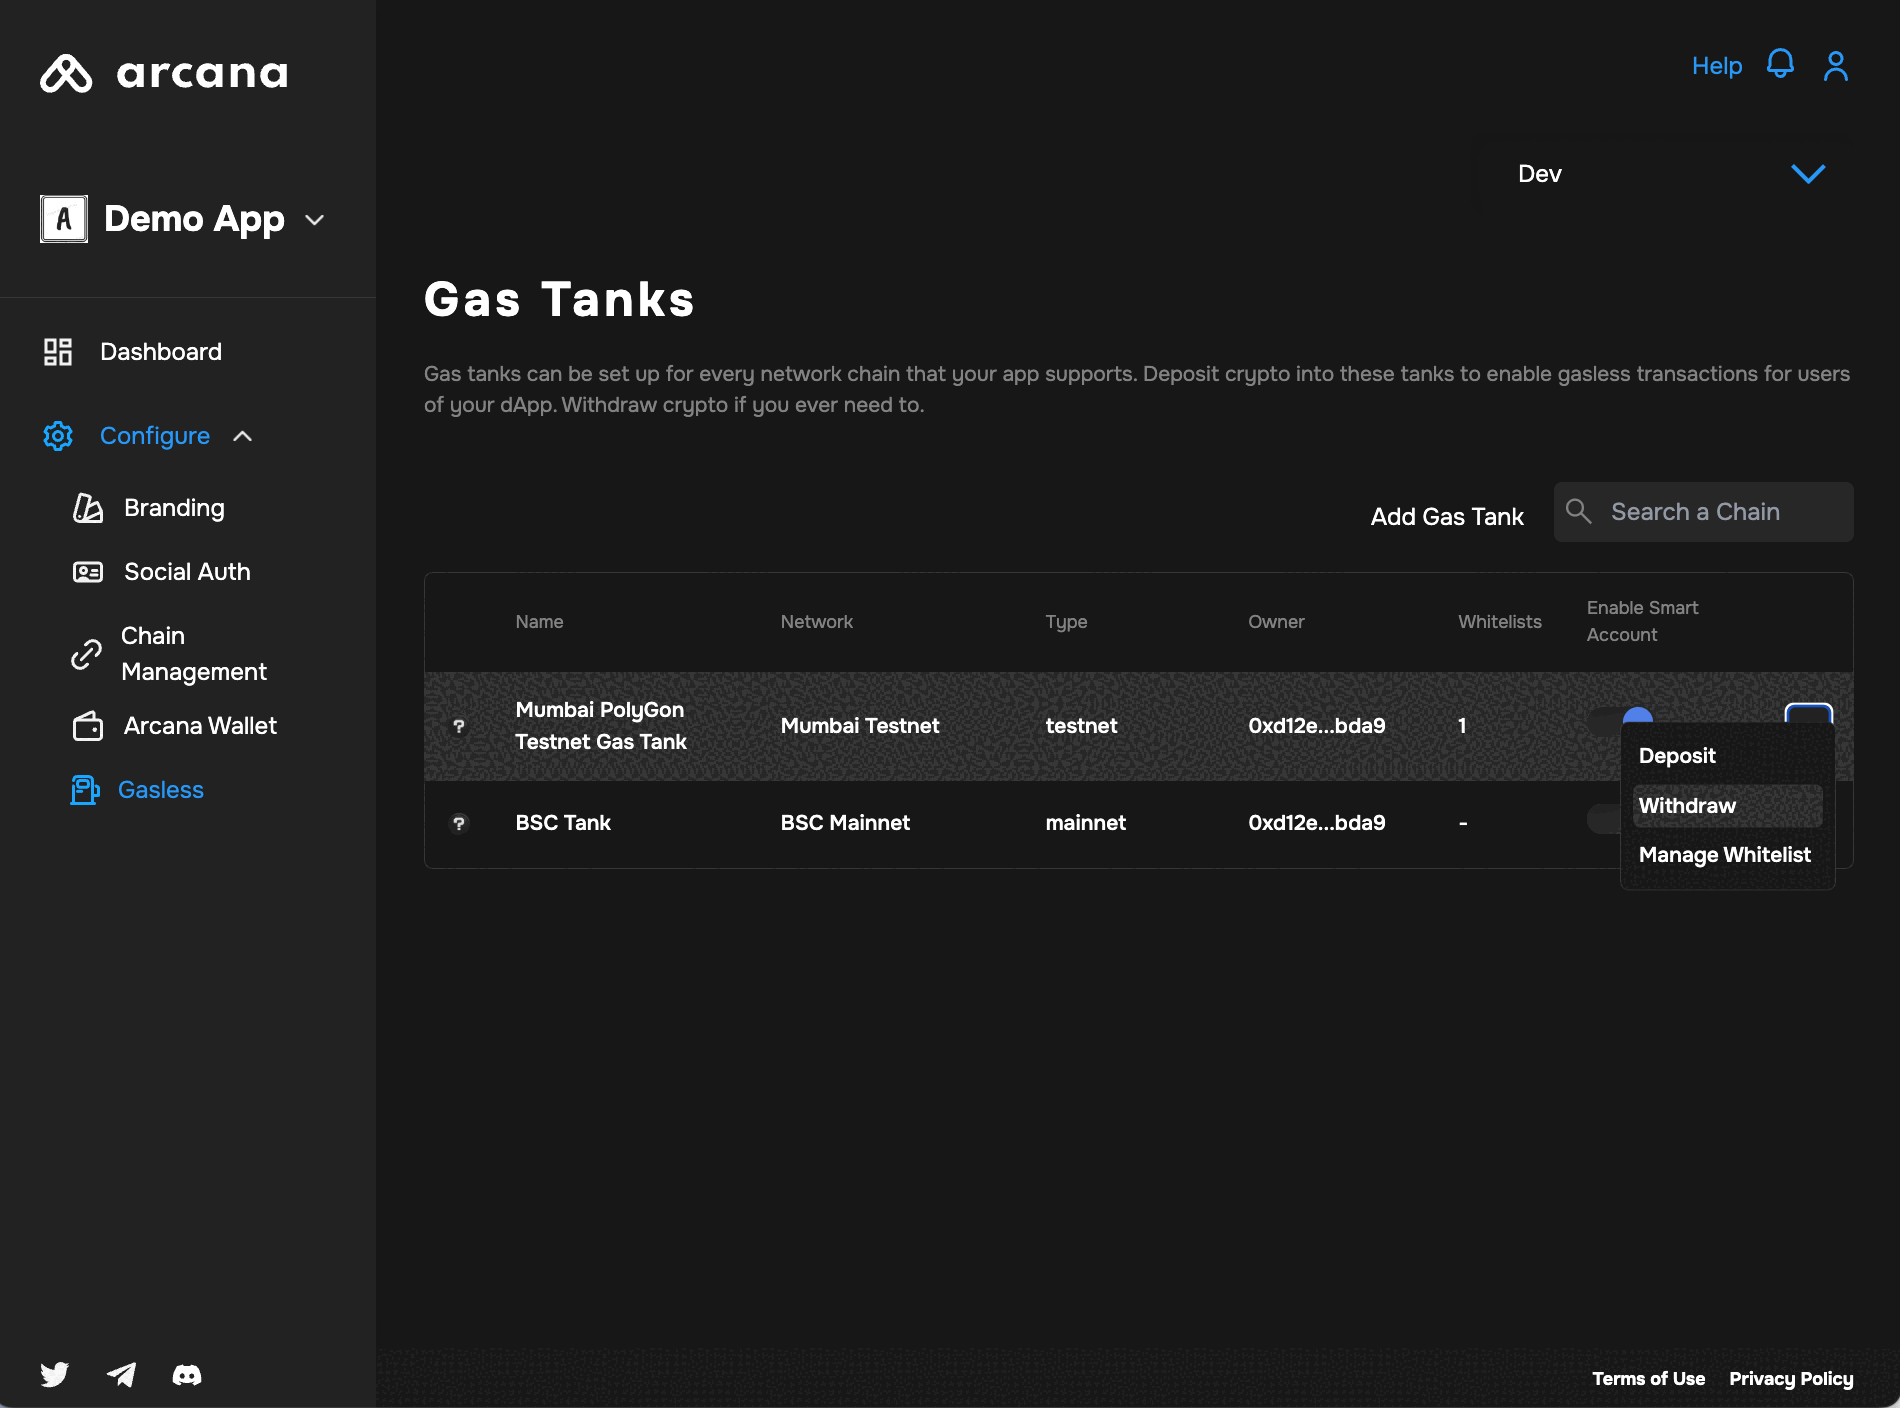
Go to the dashboard page listing all the configured gas tanks. Click 'ellipsis' in the gas tank entry and choose Deposit from the dropdown menu list:
- Deposit
- Withdraw
- Manage Whitelist
Add the amount you want to deposit, and confirm the transaction. Once it's done, you'll see your Total Deposit go up by that amount in the gas tank.

To withdraw funds, click 'ellipsis' and choose Withdraw from the menu list. Enter the amount you wish to withdraw. After successful withdrawal, the Total Amount in the gas tank goes down by the withdrawal amount and the owner's wallet address will see the withdrawn amount added.
To take out money, click the 'ellipsis' and pick Withdraw from the menu. Enter the amount you want to withdraw. When it's done, the gas tank's Total Amount drops by what you withdrew, and the owner's wallet gets the money.
Step 3. Whitelist Gasless Operations
To whitelist one or more app functions, choose Manage Whitelist and specify the following:
- Contract Address
- Contract ABI
On the right-hand side, you'll find a list of functions. Use the radio buttons to select the ones that are eligible for gasless transactions. Only these functions will enable gasless operations when users perform blockchain transactions related to them.

Optional: Pause/Resume Gas Tank
Developers can choose to pause and resume gas tank operations in the app config settings. When paused, users pay gas fees for whitelisted app operations.
Use the Enable Smart Account toggle to pause and resume a configured gas tank.
That is all! 🎉
You have successfully configured gasless operation for the application users.
What's next?
For more details, see FAQ - Gasless Transactions.
After configuring gasless, developers can refer to other app configuration settings in the Arcana Developer Dashboard and then integrate the app with the Arcana Auth SDK. If not already done, add code to onboard users and configure the embedded Arcana wallet usage and allow authenticated users to sign blockchain transactions.
See Also
- Managing Testnet and Mainnet Configurations
- Arcana Gasless (Standalone) SDK Quick Start Guide
- Arcana Gasless (Standalone) SDK Usage Guide
- Arcana Auth SDK Quick Start Guide
- Arcana Auth SDK Usage Guide
- Arcana Auth SDK Reference Guide