Deploy on Testnet/Mainnet
In this guide, you will learn how developers can deploy apps integrated with the Arcana Auth SDK and deploy it on the Arcana Testnet/Mainnet.
Already using Arcana Auth SDK?
Before deploying on the Mainnet, make sure that the app is integrated with the latest version of the SDK, v1.0.10, and tested on Arcana Testnet. If not, use the appropriate Migration Guide to upgrade.
Developers can choose to configure and deploy one instance of the app under active development on the Testnet. Once it is validated and ready for onboarding users, they can deploy it on Mainnet. It is also possible to simultaneously deploy one instance on the Testnet and a stable one on the Mainnet.
Prerequisites
-
The app must be registered and configured via the Arcana Developer Dashboard.
-
After successful app registration, a unique Client ID is assigned to the app. Save and use it for integrating the app with the SDK. A default 'Testnet' configuration profile is associated with every newly registered app. Before deploying on Arcana Mainnet, the developer must use the Arcana Developer Dashboard and copy or reconfigure the SDK usage settings to create a Mainnet settings profile.
-
Integrating an app with the Arcana Auth SDK may vary slightly depending on the app type, whether it is a vanilla HTML/CSS/JS app, a React app, or a React app using wallet connectors such as Wagmi, RainbowKit or Web3-React wallet connector frameworks. Follow the instructions in the respective integration guides and choose carefully depending on the app type.
Before Installing the SDK
Integrating an app may require installing the Arcana Auth SDK via say only the Arcana
authpackage, bothauthand app type package such asauth-react,auth-wagmiorauth-web3-react. After installing, the developer must instantiate the appropriateAuthProvider, the React componentProvideAuth, or the Wagmi/Web3-ReactArcanaConnector, as the case may be. -
Only authenticated users are allowed to sign blockchain transactions and perform Web3 wallet operations using the Arcana wallet. Before deploying the app, developers can add code to onboard users. Choose built-in plug-and-play login UI via
connectmethod or build custom login UI by calling theloginWithSocialandloginWithLink(deprecated)loginWithOTPStart,loginWithOTPCompletemethods. For details, see how to onboard users. You can also plug in additional business logic and utilize the Arcana wallet programmatically for allowing authenticated users to sign blockchain transactions.
Configure Testnet
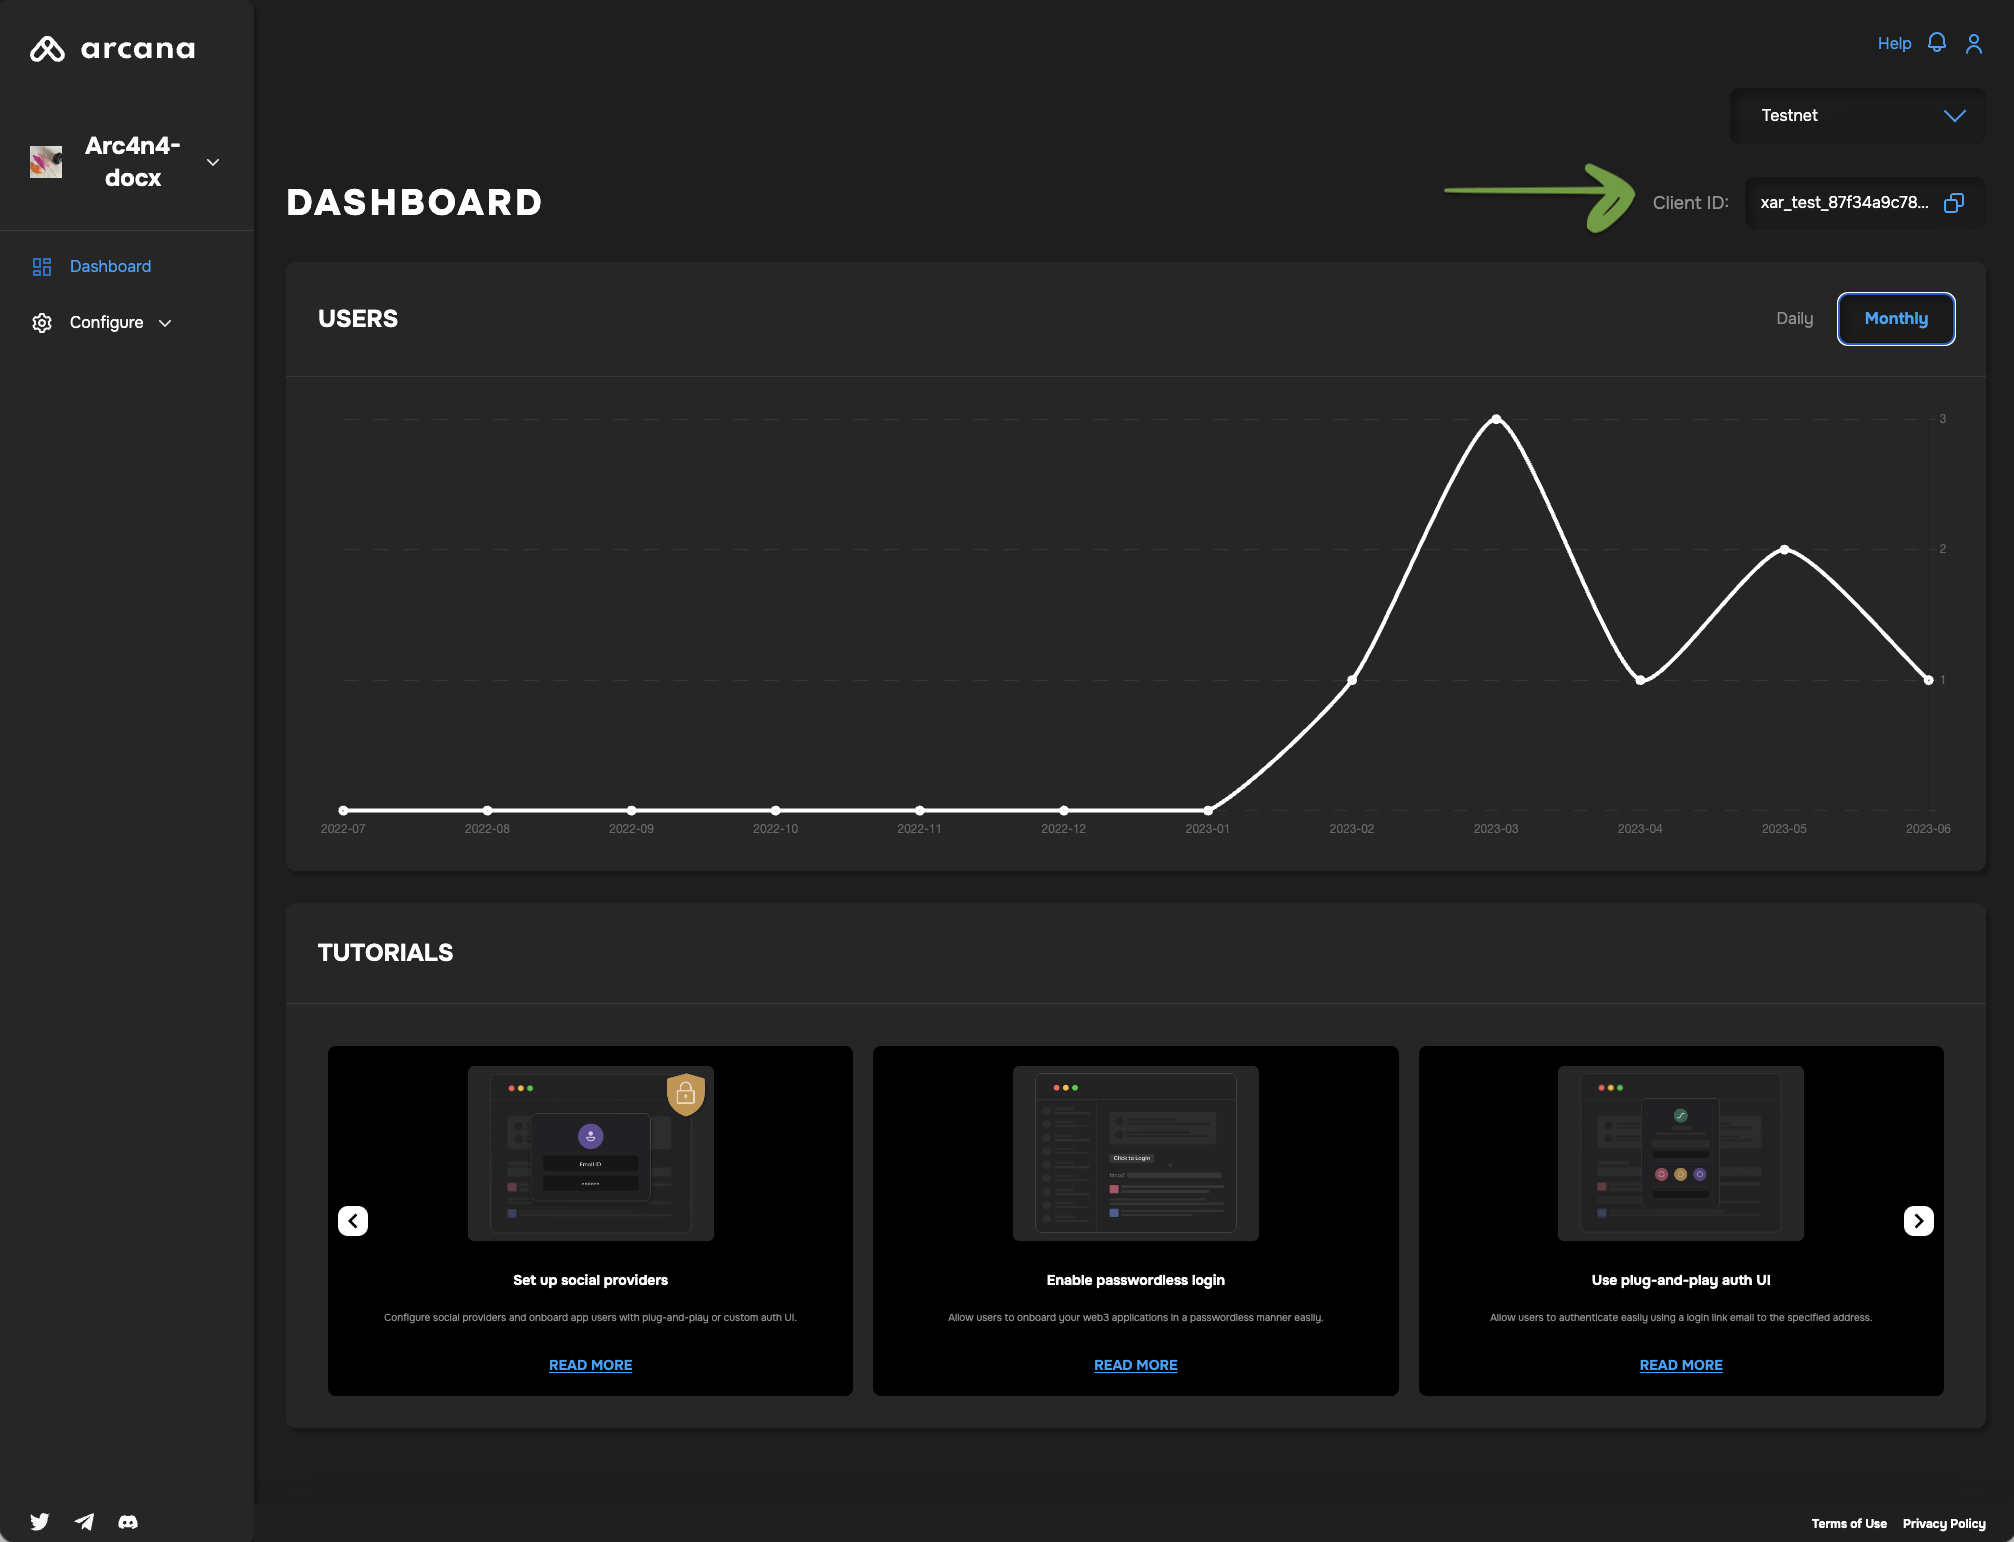
To deploy on Arcana Testnet, while integrating the app with the Arcana Auth SDK, make sure that a new AuthProvider is created using the Testnet Client ID. Refer to the Testnet configuration profile in the Arcana Developer Dashboard to view and copy the Testnet Client ID that is assigned by default when the app is registered.
For example, the code below uses the Client ID assigned to the Testnet configuration profile for the sample app:
import {AuthProvider} from "@arcana/auth";

const provider = new AuthProvider(
  "xar_test_87f34a9c7879cd4b726ba36a99e164837d70143a", {  // testnet Client ID
  // network: 'testnet',  // optional
  chainConfig: {
    chainId: '137',      // selected chain in the wallet network dropdown UI
    rpcUrl: 'https://rpc-mumbai.maticcvigil.com',  // RPC URL of the selected chain in the wallet network dropdown UI
  },
  alwaysVisible: true,
  setWindowProvider: true,
  debug: true,
  position: 'right',
  theme: 'dark',
});
Next, call the init function to initialize the newly created AuthProvider before calling any other SDK functions.
try {
  await auth.init()
} catch (e) {
  // Handle exception case
}
If you have integrated the app using the Testnet Client ID, your app is ready to be deployed on Arcana Testnet. Optionally, add the user onboarding code and logic for initiating blockchain transactions programmatically.
Deploy on Testnet
After registering the app and integrating it using the correct Testnet Client ID, you are all set to deploy and test your app on the Arcana Testnet. Simply Bring up the app. When users log in, the app will automatically use the Arcana Testnet. The wallet address assigned to authenticated the user will correspond to Arcana Testnet.
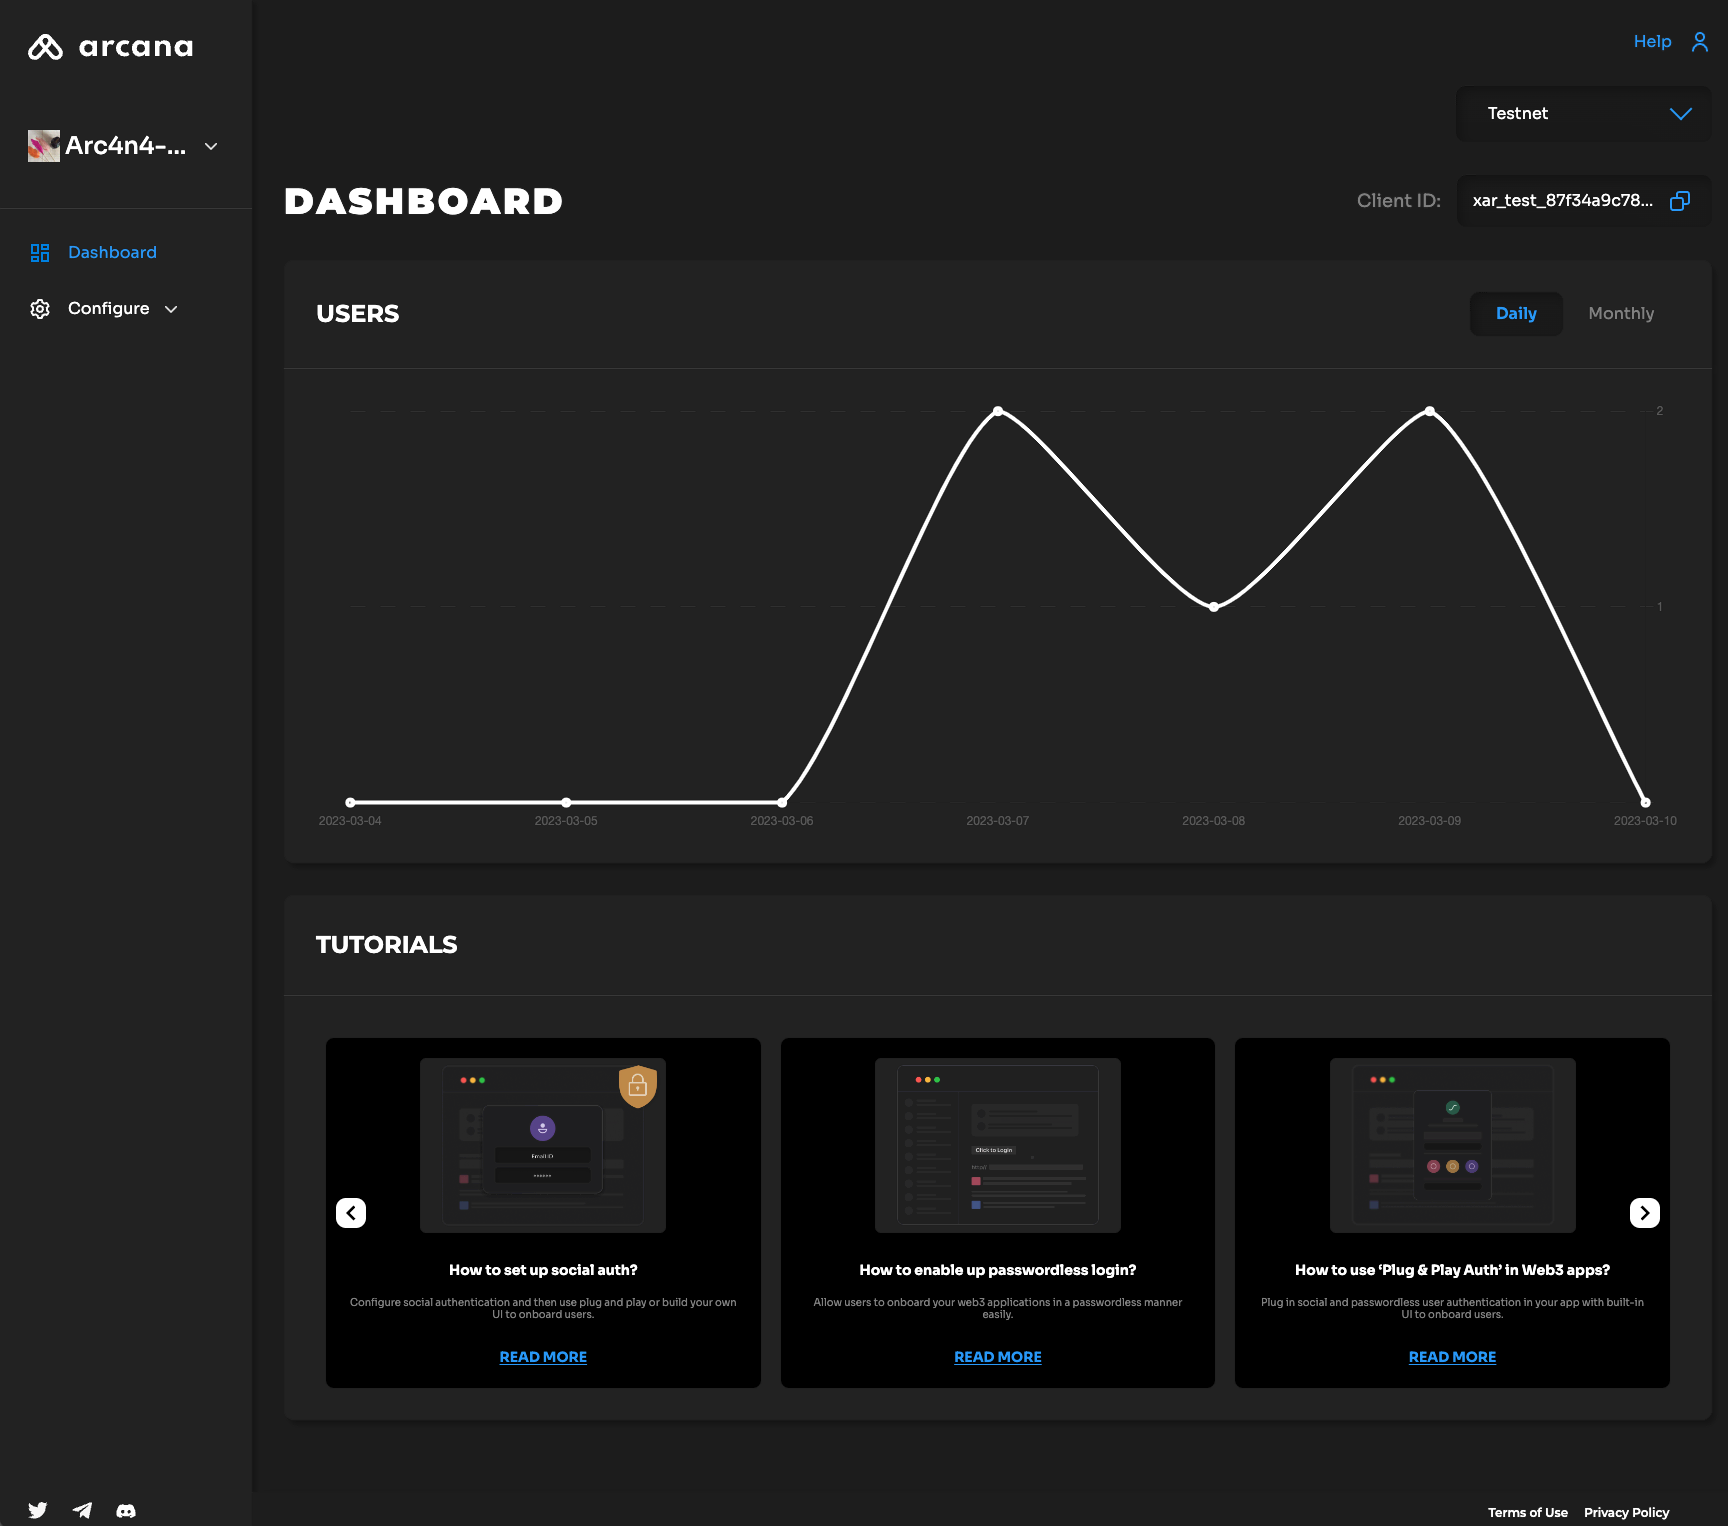
Monitor Testnet Usage
Visit the app dashboard screen in the Arcana Developer Dashboard to view the 'Testnet' configuration profile and monitor Arcana Testnet usage. The figure below shows one new user for the test app.
Configure Mainnet
Before deploying the app on the Arcana Mainnet, make sure that there exists a 'Mainnet' configuration profile for the app. By default, when you register an app, only the 'Testnet' configuration profile is created. See how to create the 'Mainnet' configuration profile section in the Arcana Developer Dashboard User Guide.
Check Mainnet Configuration Profile
You can check if a 'Mainnet' configuration profile is already created for your app by visiting the Manage Apps screen on the Arcana Developer Dashboard. Refer to the app card. Each card displays Testnet and Mainnet buttons. If the Mainnet button is disabled it means you have not created a 'Mainnet' profile for your app yet.
Mainnet configuration profile is associated with a different Client ID than the Testnet configuration. Once you have created the 'Mainnet' configuration profile for your app, copy and save the new Client ID. Use it while integrating the app with the Arcana Auth SDK. Make sure that you create the AuthProvider and specify the Mainnet Client ID. This is required to deploy the app on Arcana Mainnet.
For example,
import {AuthProvider} from "@arcana/auth";

const provider = new AuthProvider(
  "xar_live_d7c88d9b033d100e4200d21a5c4897b896e60063", {  //mainnet Client ID
  // network: 'mainnet',  // optional
  chainConfig: {
    chainId: '137',      // selected chain in the wallet network dropdown UI
    rpcUrl: 'https://polygon-rpc.com/',  // RPC URL of the selected chain in the wallet network dropdown UI
  },
  alwaysVisible: true,
  setWindowProvider: true,
  debug: true,
  position: 'right',
  theme: 'dark',
});
Next, call the init function to initialize the newly created AuthProvider before calling any other SDK functions.
try {
  await auth.init()
} catch (e) {
  // Handle exception case
}
If you have integrated the app using the Mainnet Client ID, your app is ready to be deployed on Arcana Mainnet. Optionally, add the user onboarding code and logic for initiating blockchain transactions programmatically.
Deploy on Mainnet
After registering the app, configuring it for the 'Mainnet' configuration profile, integrating the app with the Arcana Auth SDK by using the 'Mainnet' Client ID, and optionally adding code to onboard users, other business logic, your app is ready to be deployed on the Mainnet. Simply Bring up the app. When users log in, the app will automatically use the Arcana Mainnet. The wallet address assigned to authenticated the user will correspond to Arcana Mainnet.
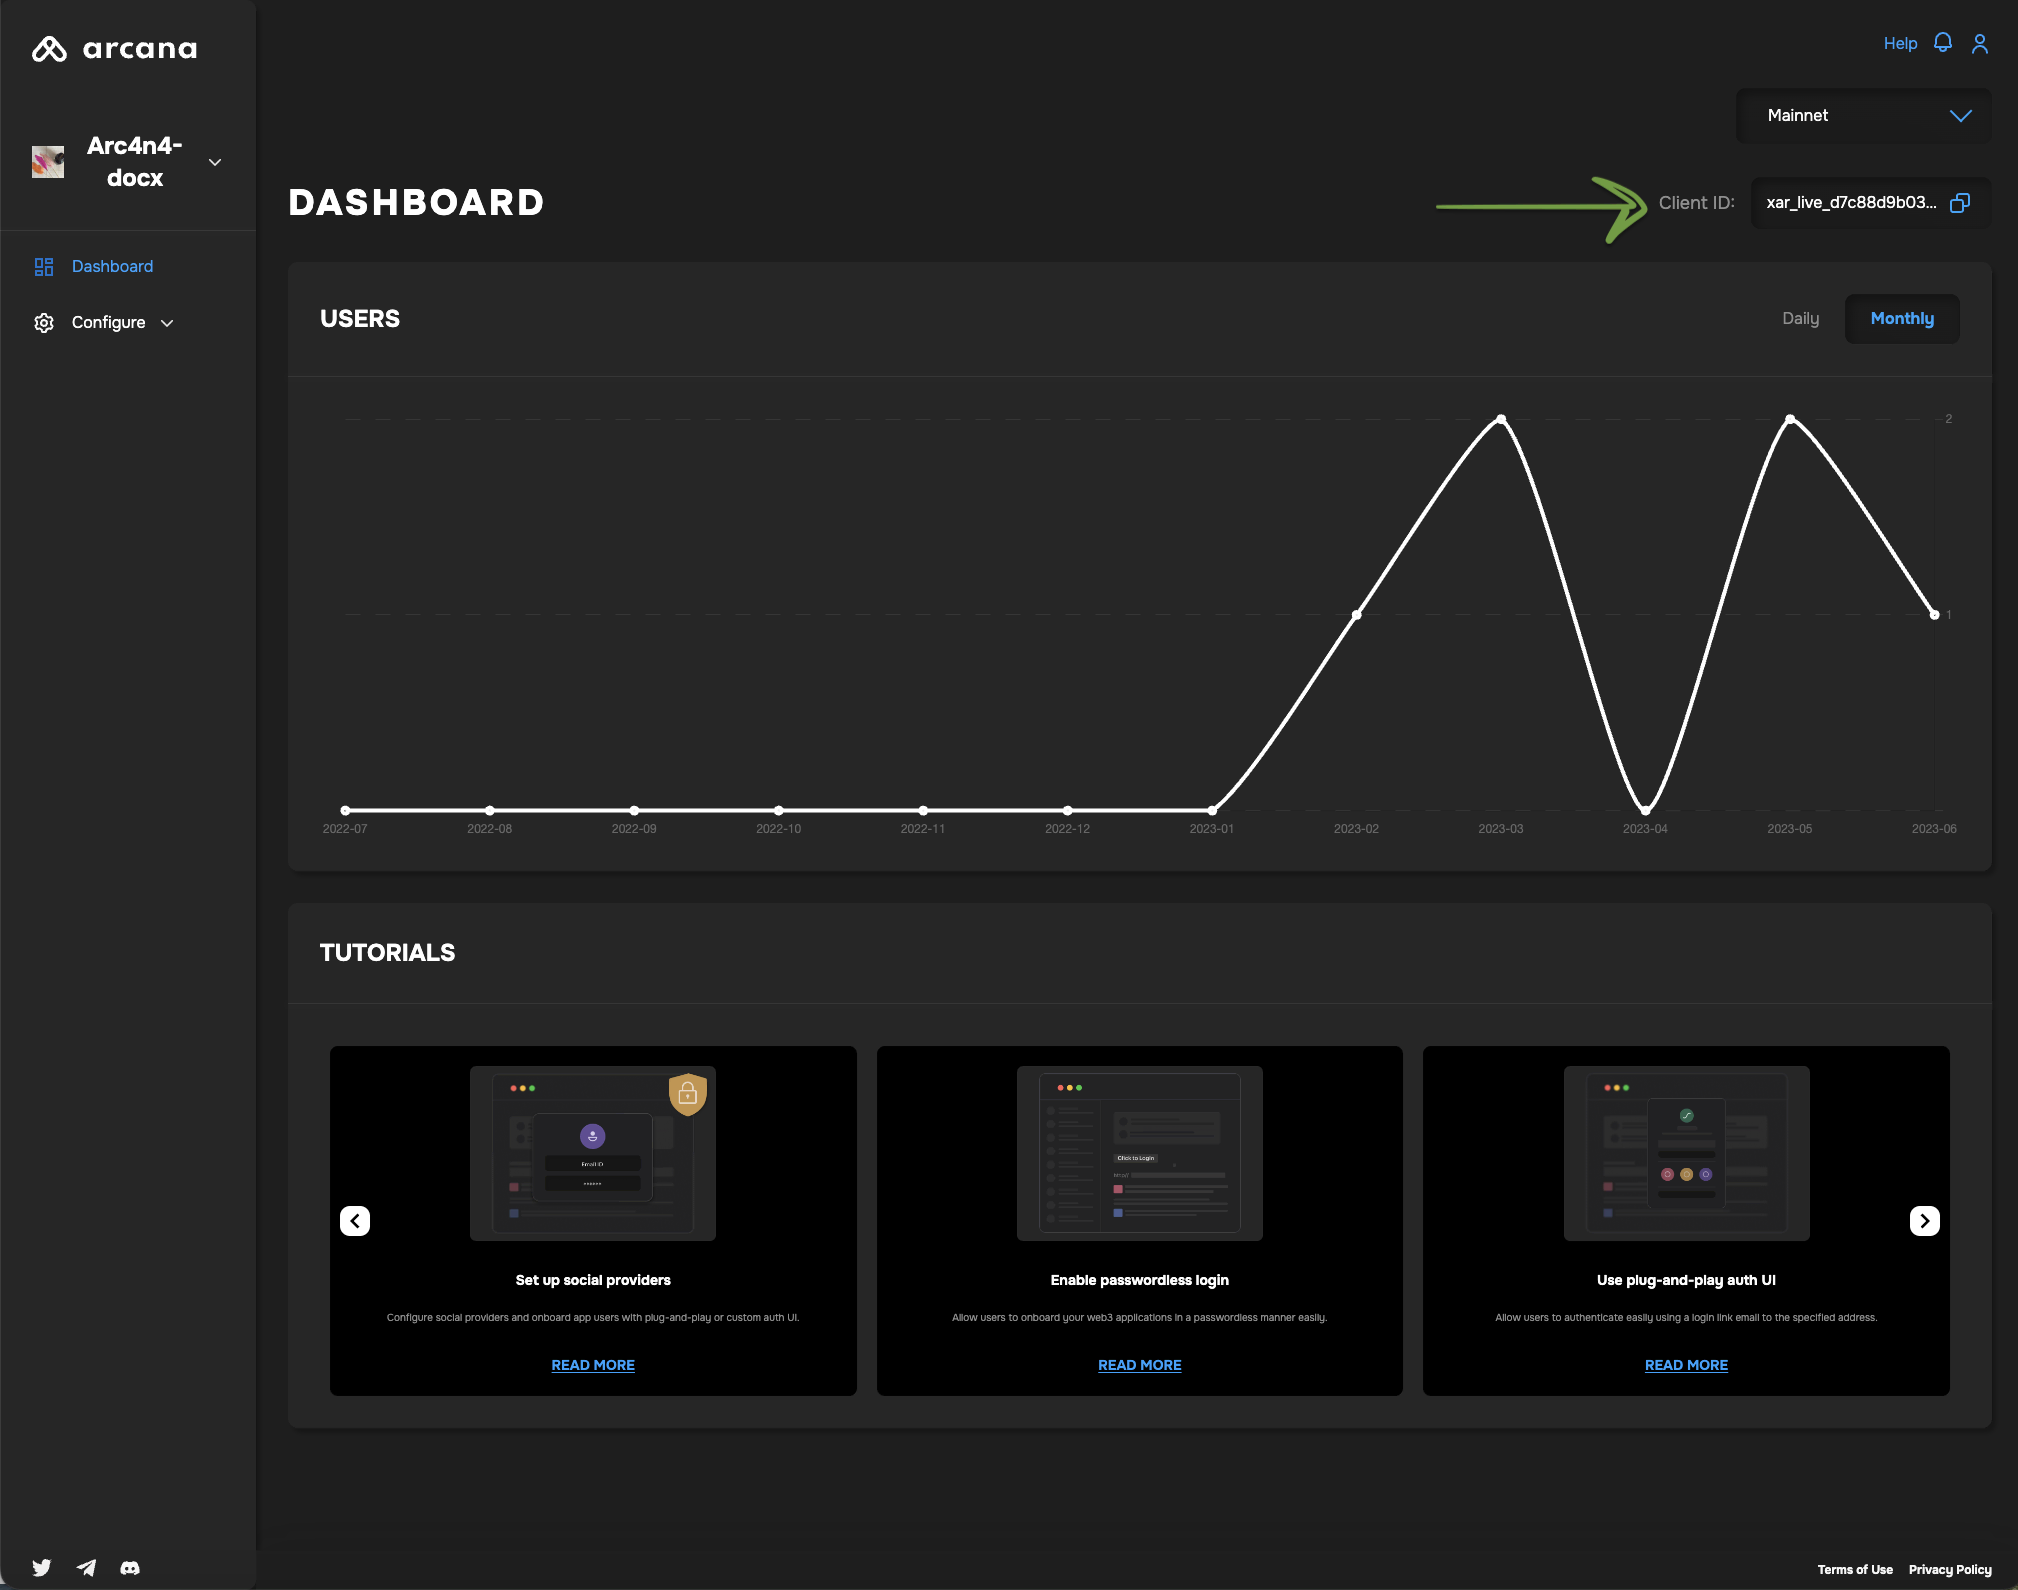
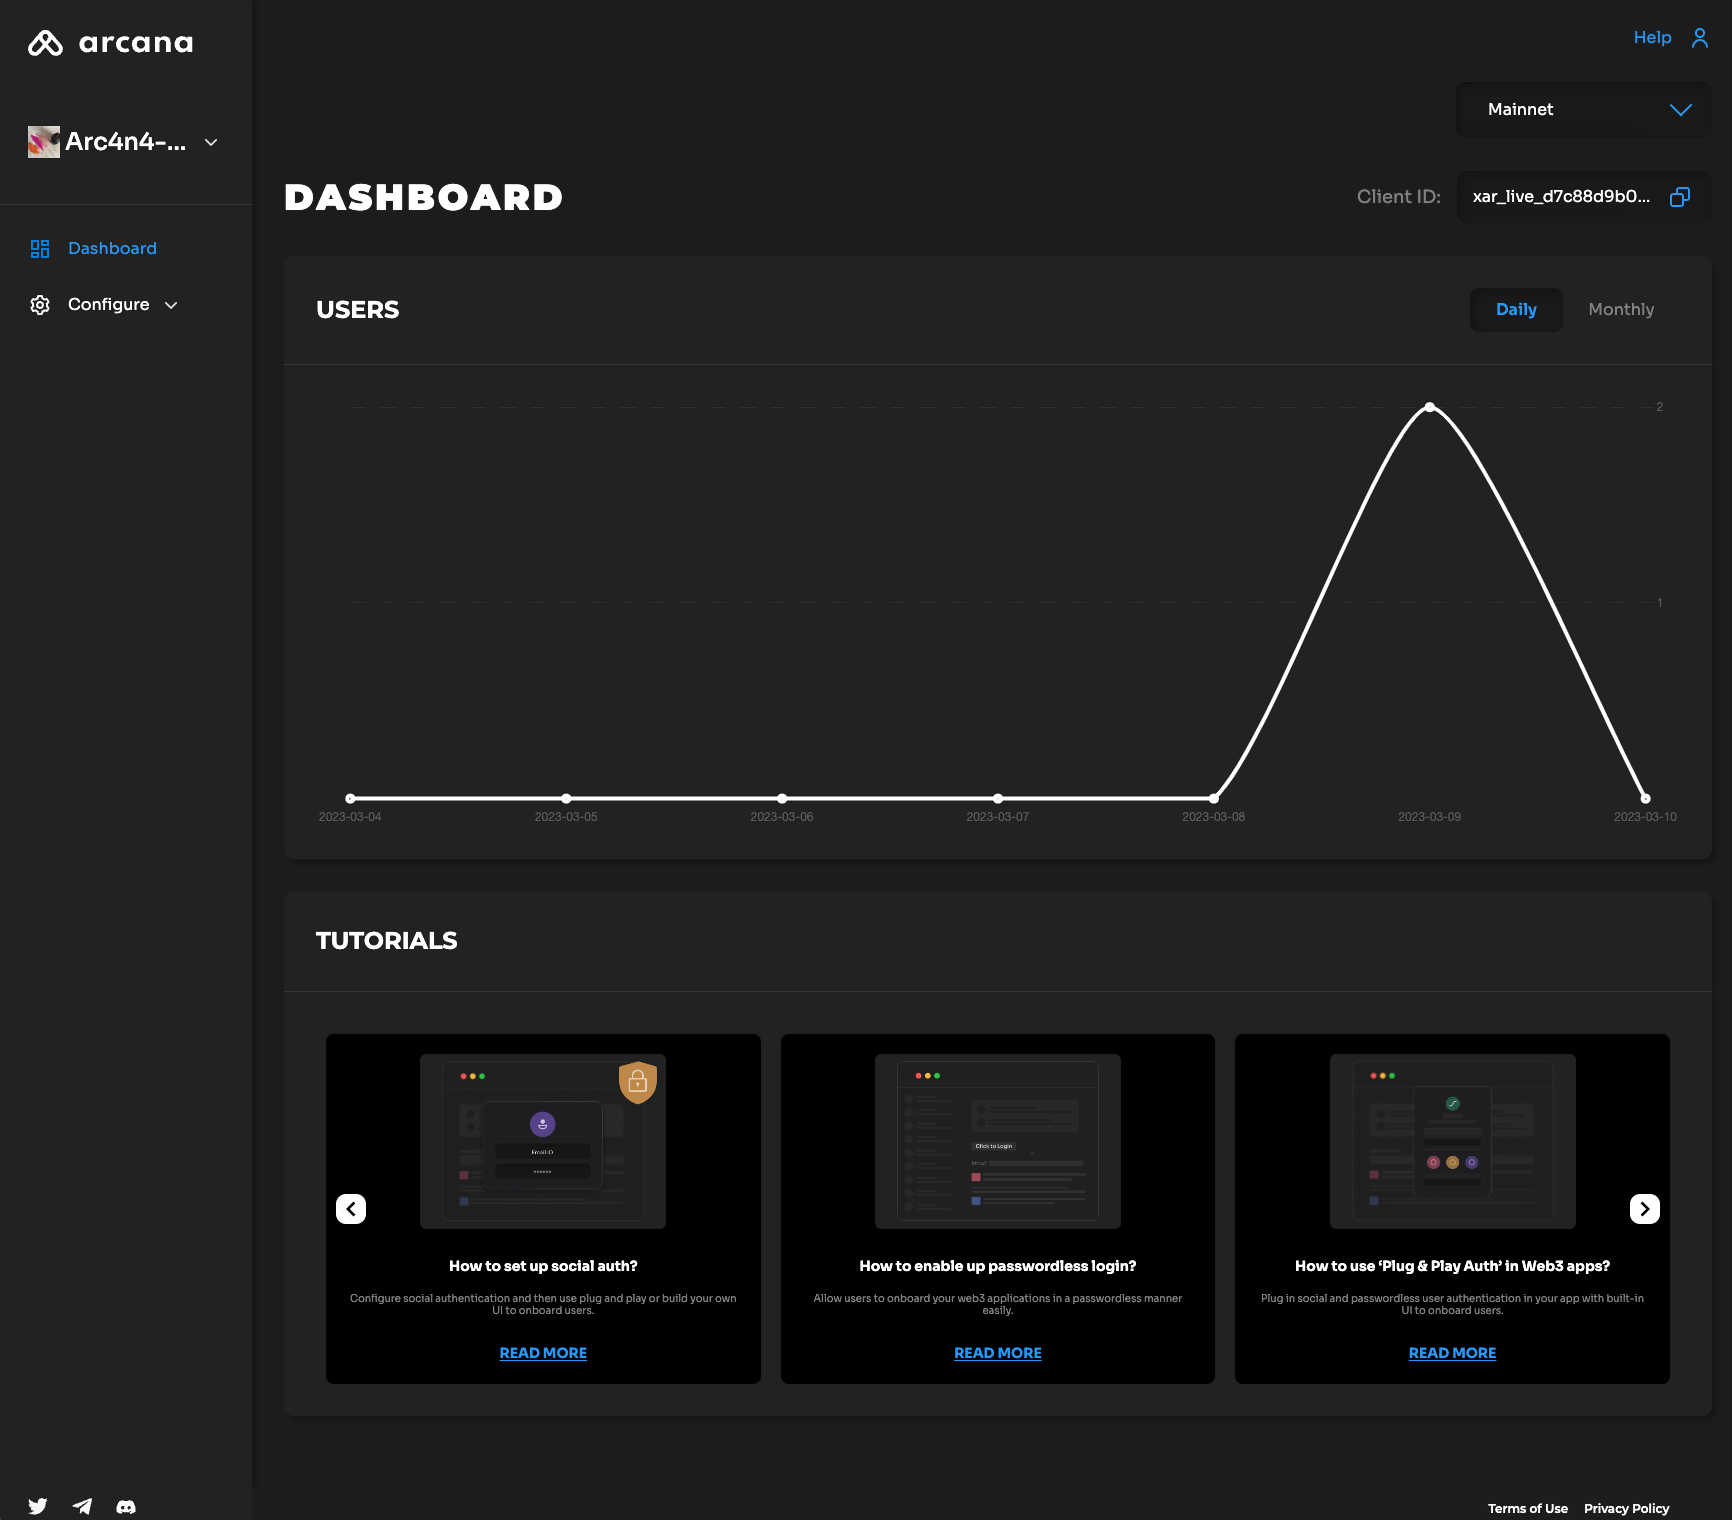
Monitor Mainnet Usage
Visit the app dashboard screen to view the 'Mainnet' configuration profile and monitor Arcana Mainnet usage. Note that Arcana Mainnet usage is tracked in terms of MAU and billed. The figure below shows one new user for the test app deployed on Mainnet.
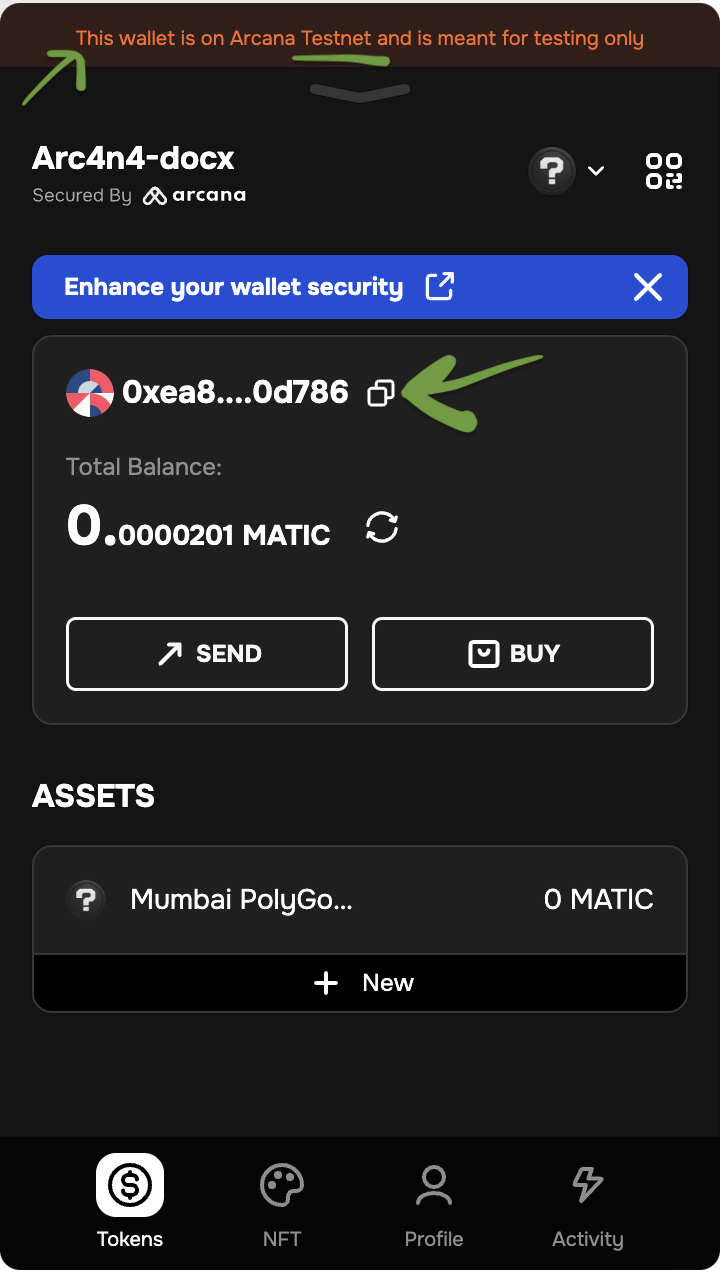
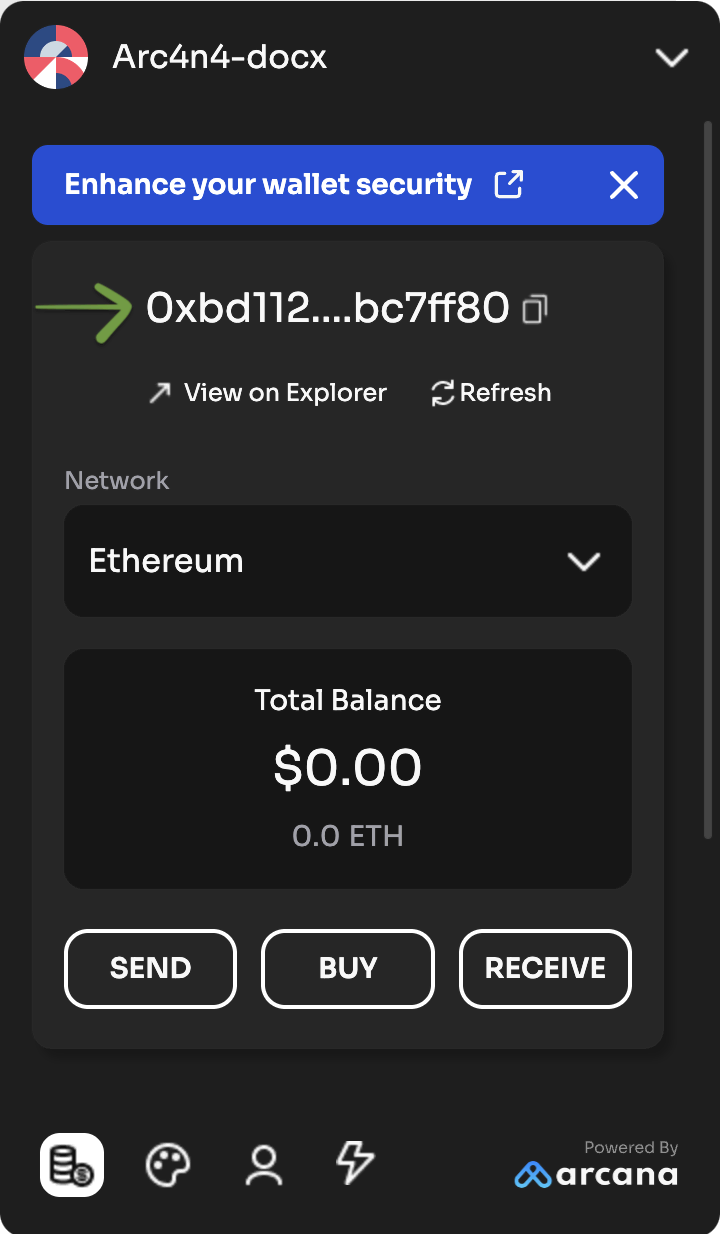
Different Wallet Address
Note that the assigned keys/wallet addresses change across Testnet/Mainnet deployments.
The authenticated users will see a different wallet address when they log on to the same app that is deployed on Mainnet.
In the case of apps using the 'Global Keys' feature, the user will see the same wallet address across apps integrated with the Arcana Auth product on the Arcana Mainnet. However, even with 'Global Keys' enabled, users will see different keys/wallet addresses for the same app deployed on Testnet/Mainnet.
That is all!