Arcana Developer Dashboard Users Guide
The Arcana Developer Dashboard allows Web3 app developers to configure user onboarding settings and tailor the blockchain signing experience for an app that integrates with the Arcana Auth SDK.
Developers must first register the app by using the Arcana Developer Dashboard and obtain a unique Client ID that is required to integrate the app with the Arcana Auth SDK.
By default, each newly registered app is associated with a 'Testnet' configuration profile. When the app is deployed, it is set to use the Arcana Testnet.
This guide will walk you through the various configuration options available on the Arcana Developer Dashboard to tailor the Arcana Auth SDK usage. For instructions on how to install Arcana Auth SDK and integrate your application, refer to the Arcana Auth Quick Start Guide.
Prerequisites
-
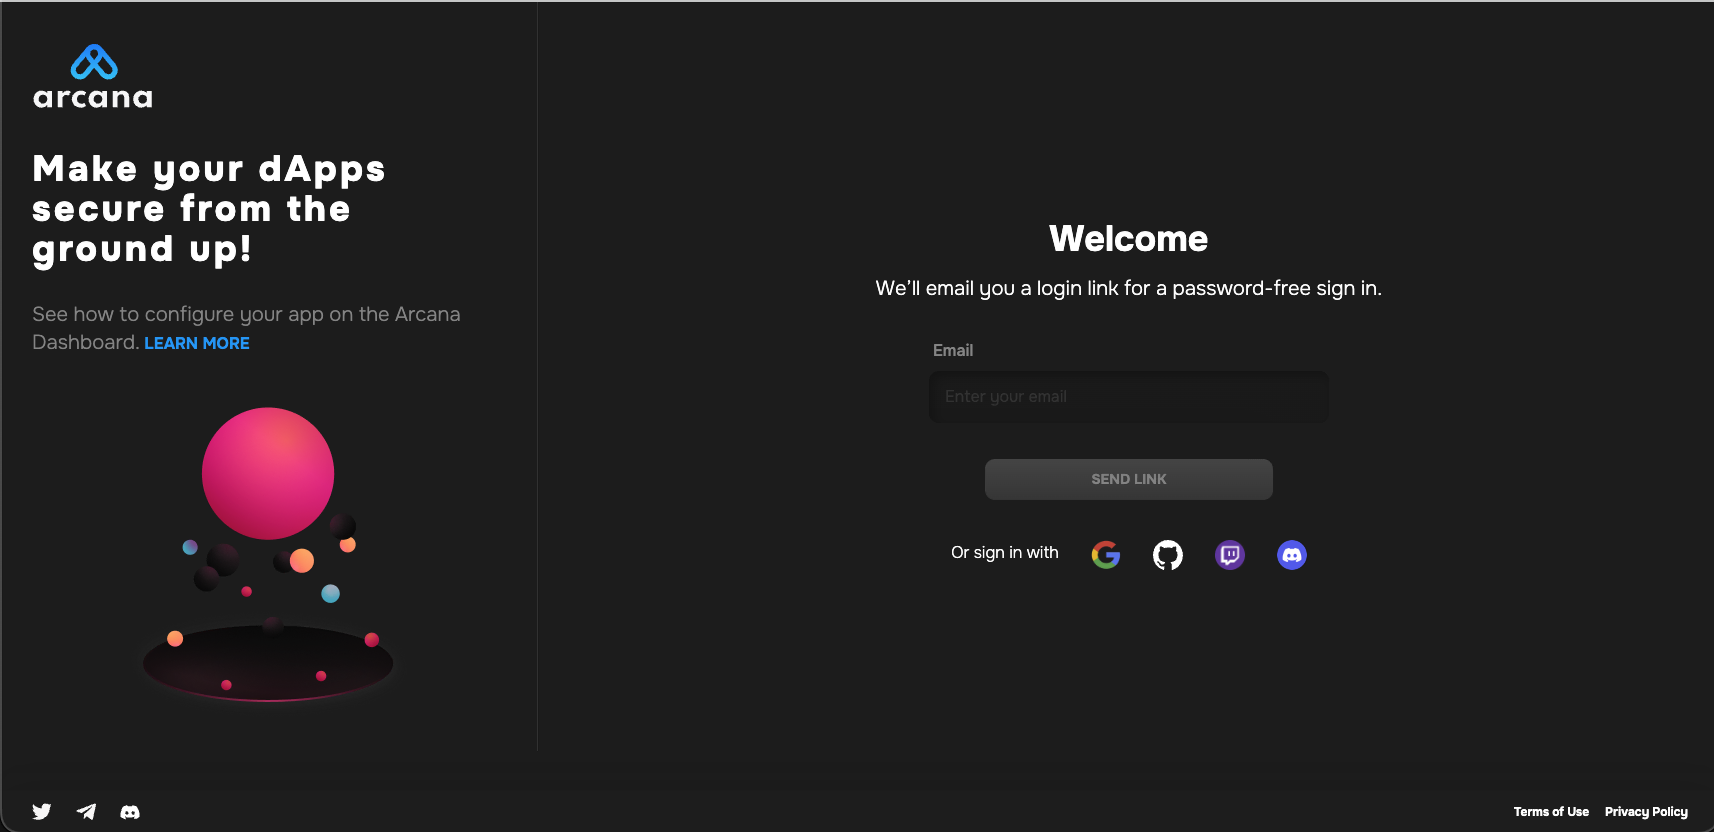
To use the Arcana Developer Dashboard, developers can sign in using one of the supported social login providers or opt for passwordless sign-in.
- GitHub
- Twitch
- Discord
Login
Go to https://dashboard.arcana.network and log in using one of the available options.
Aggregate Login
The Arcana Auth protocol aggregates multiple login identities for the user across social login providers under a single identifiable Arcana account. This enables developers to log into the Arcana Developer Dashboard through any of the supported login providers and access the same Arcana developer account and app settings.
Register Application
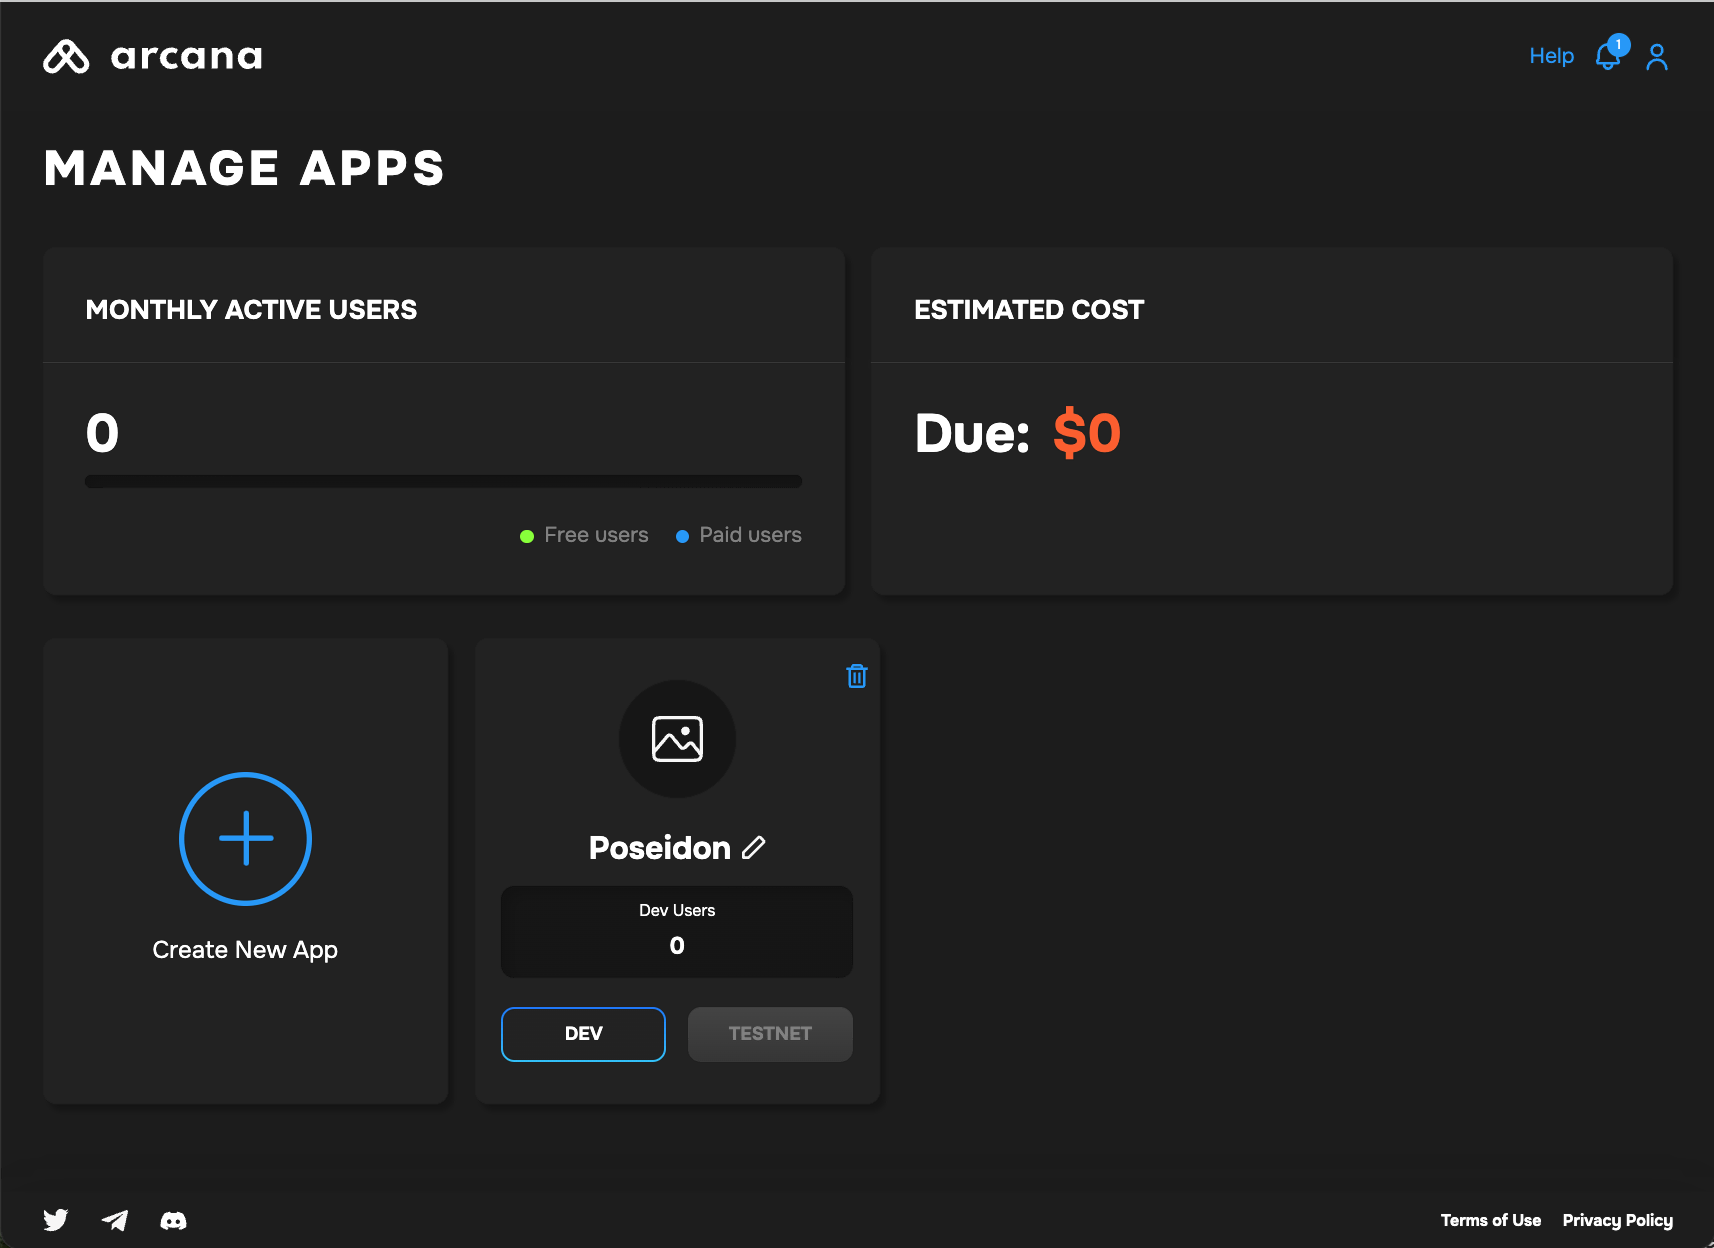
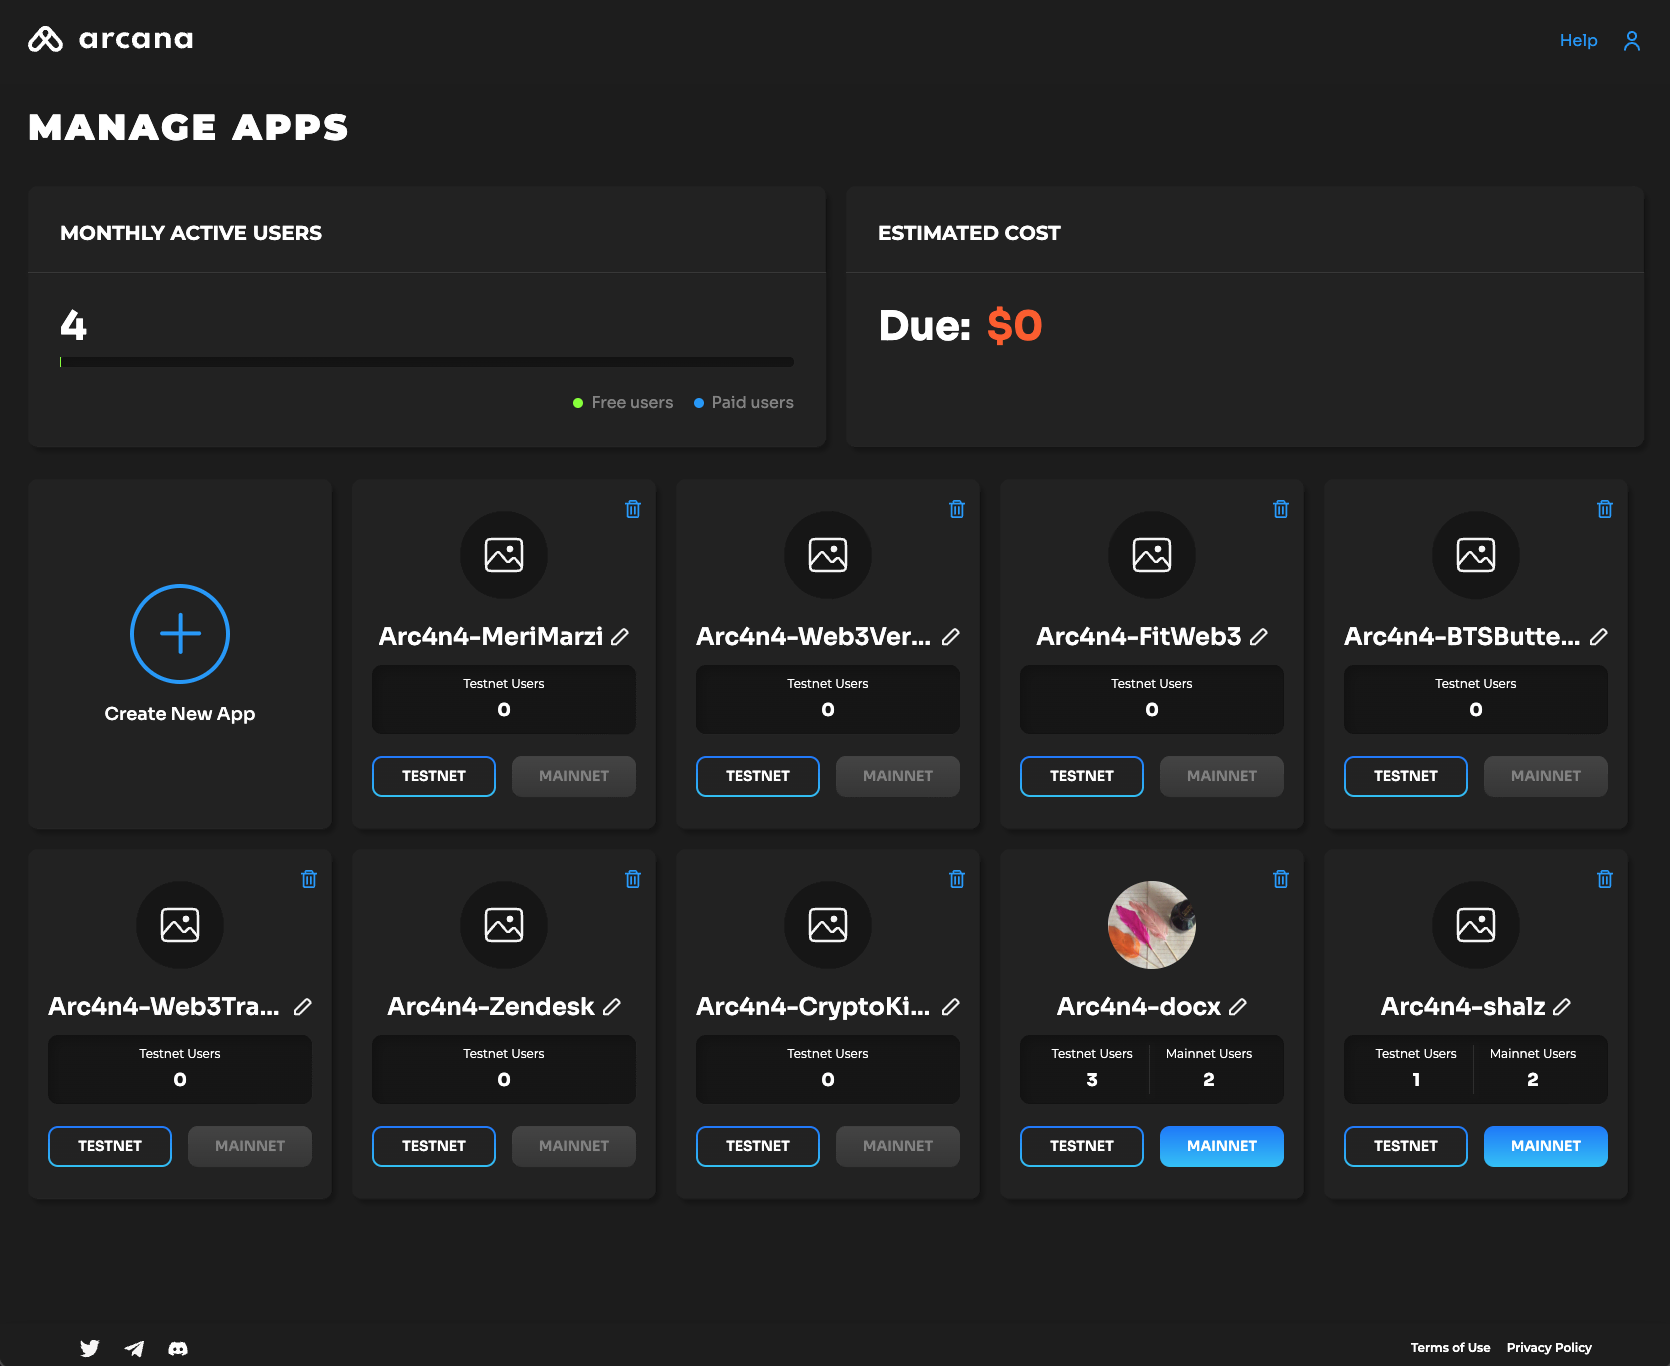
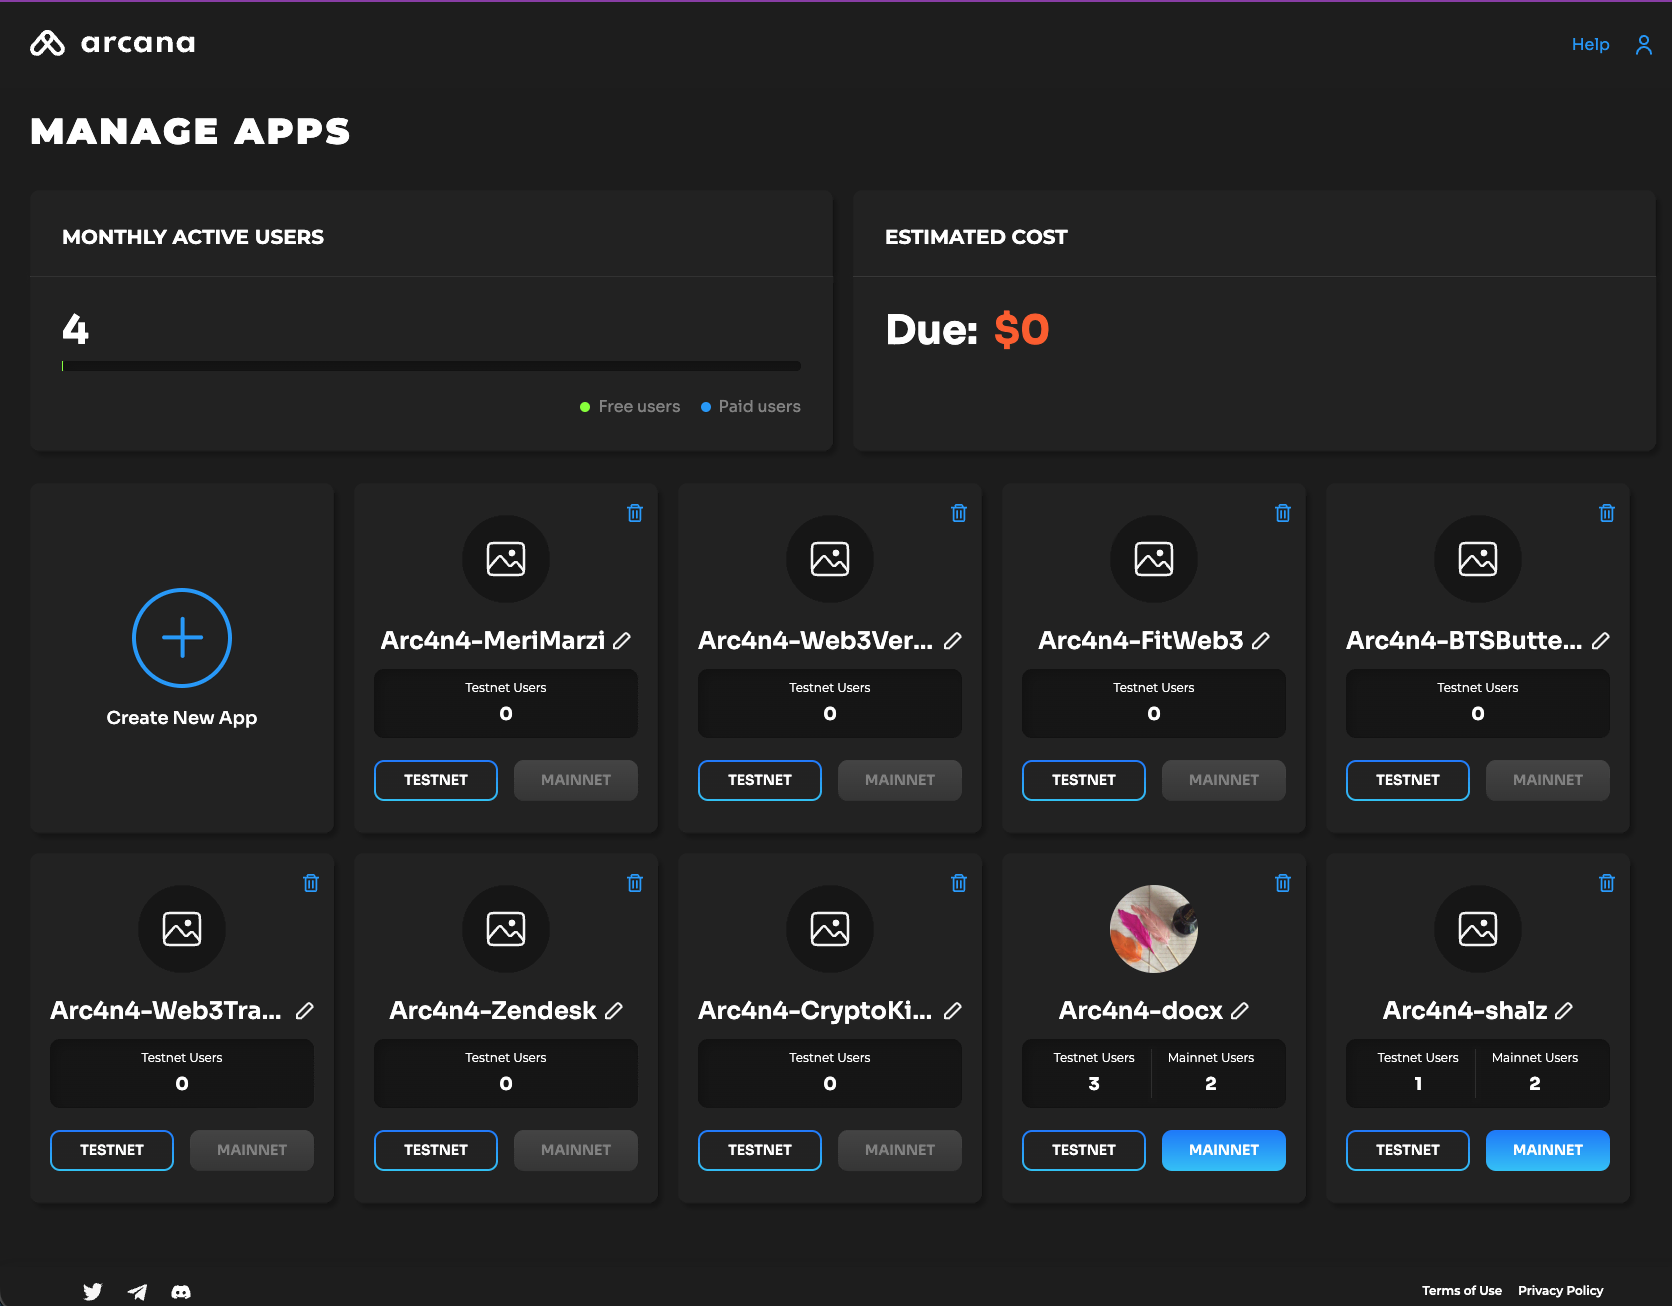
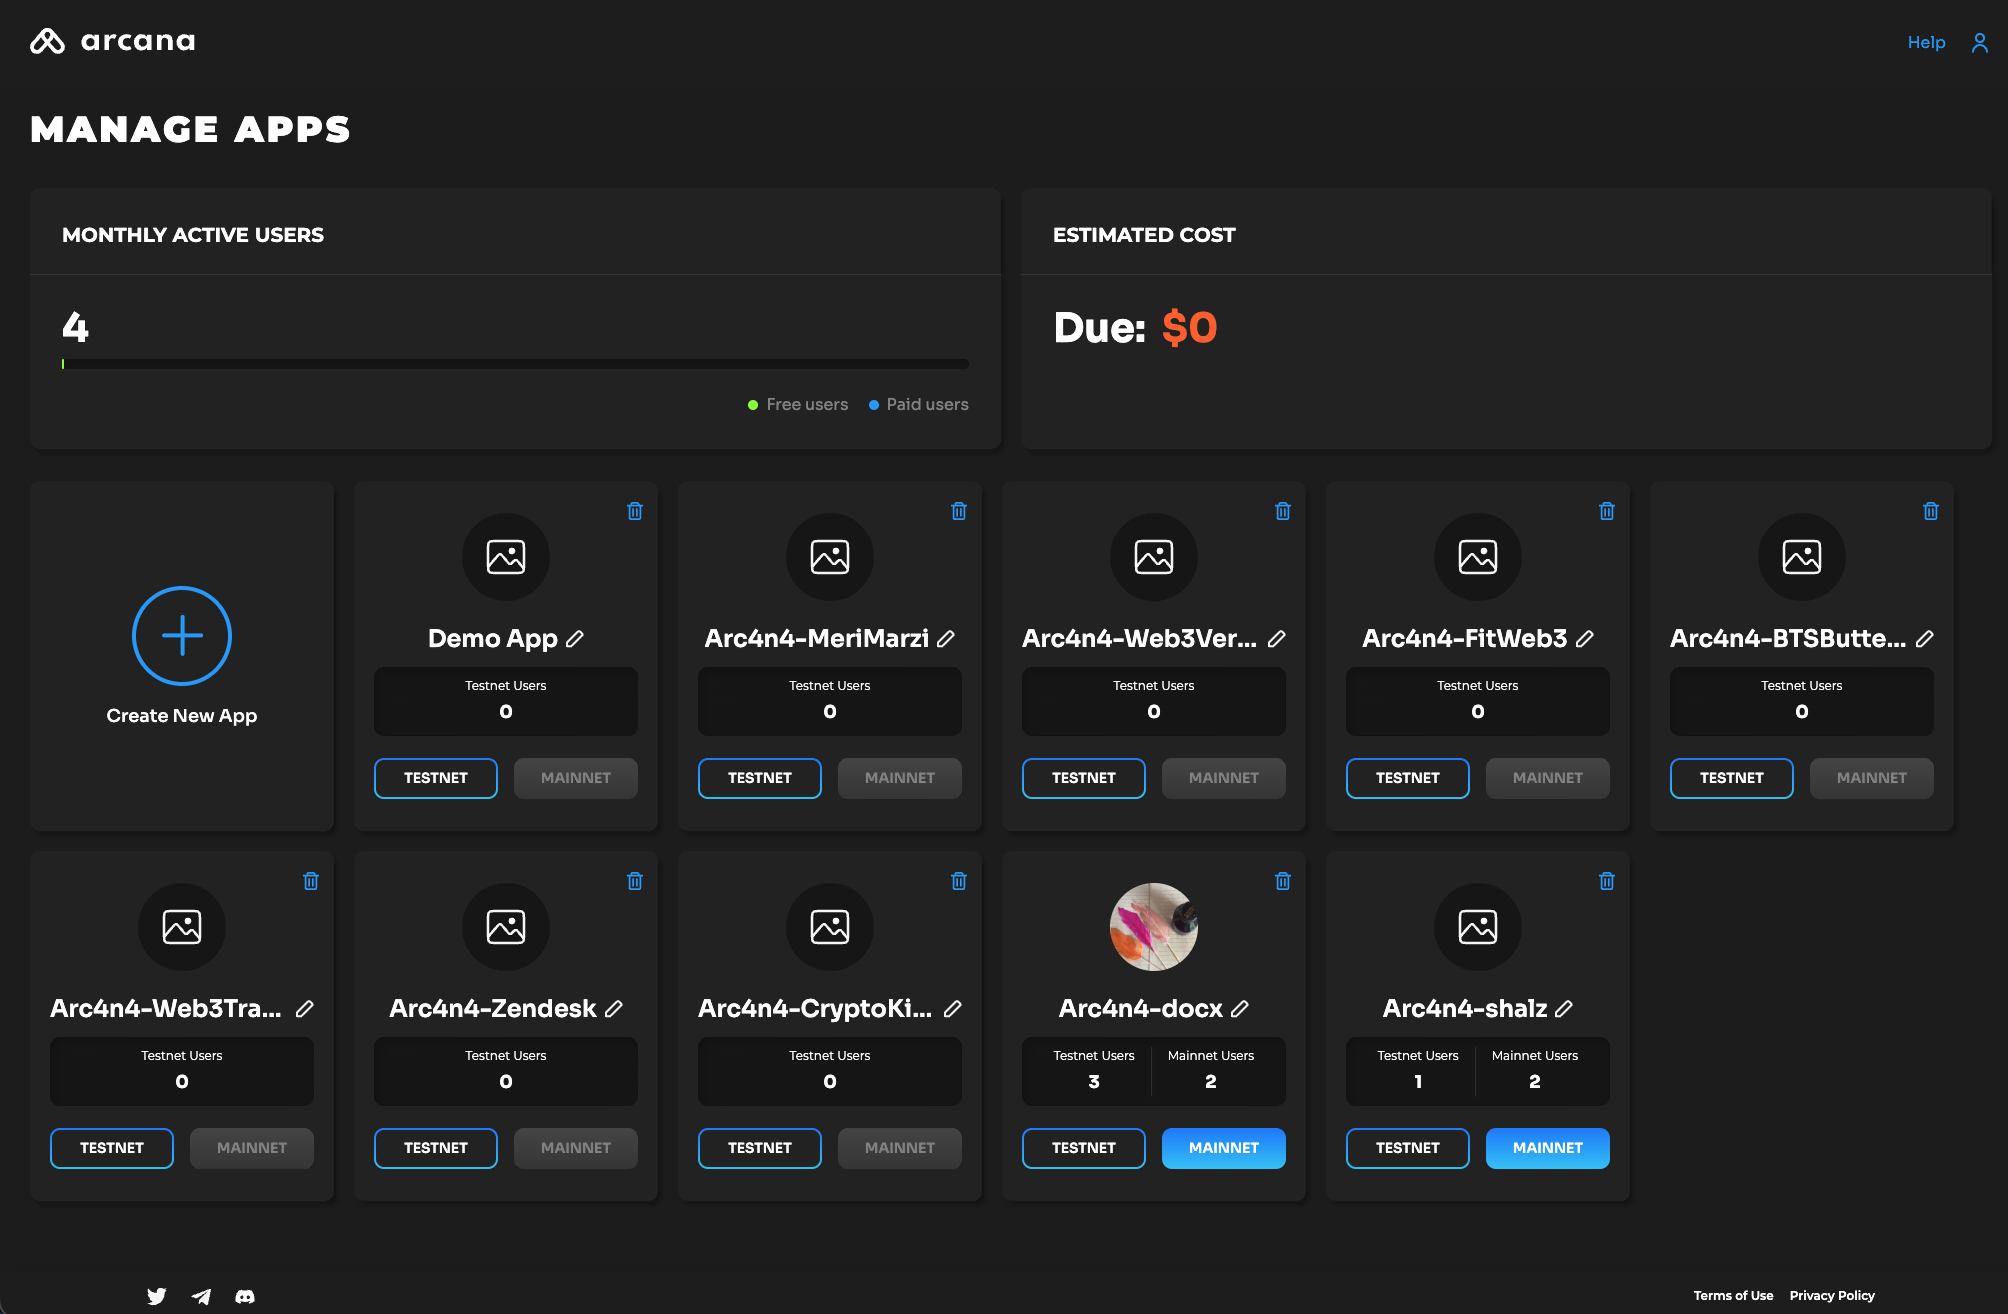
After logging in, the Manage Apps dashboard screen is displayed.
List Registered Apps
Each app registered for a developer account is represented by a card in the Manage Apps screen of the Arcana Developer Dashboard.
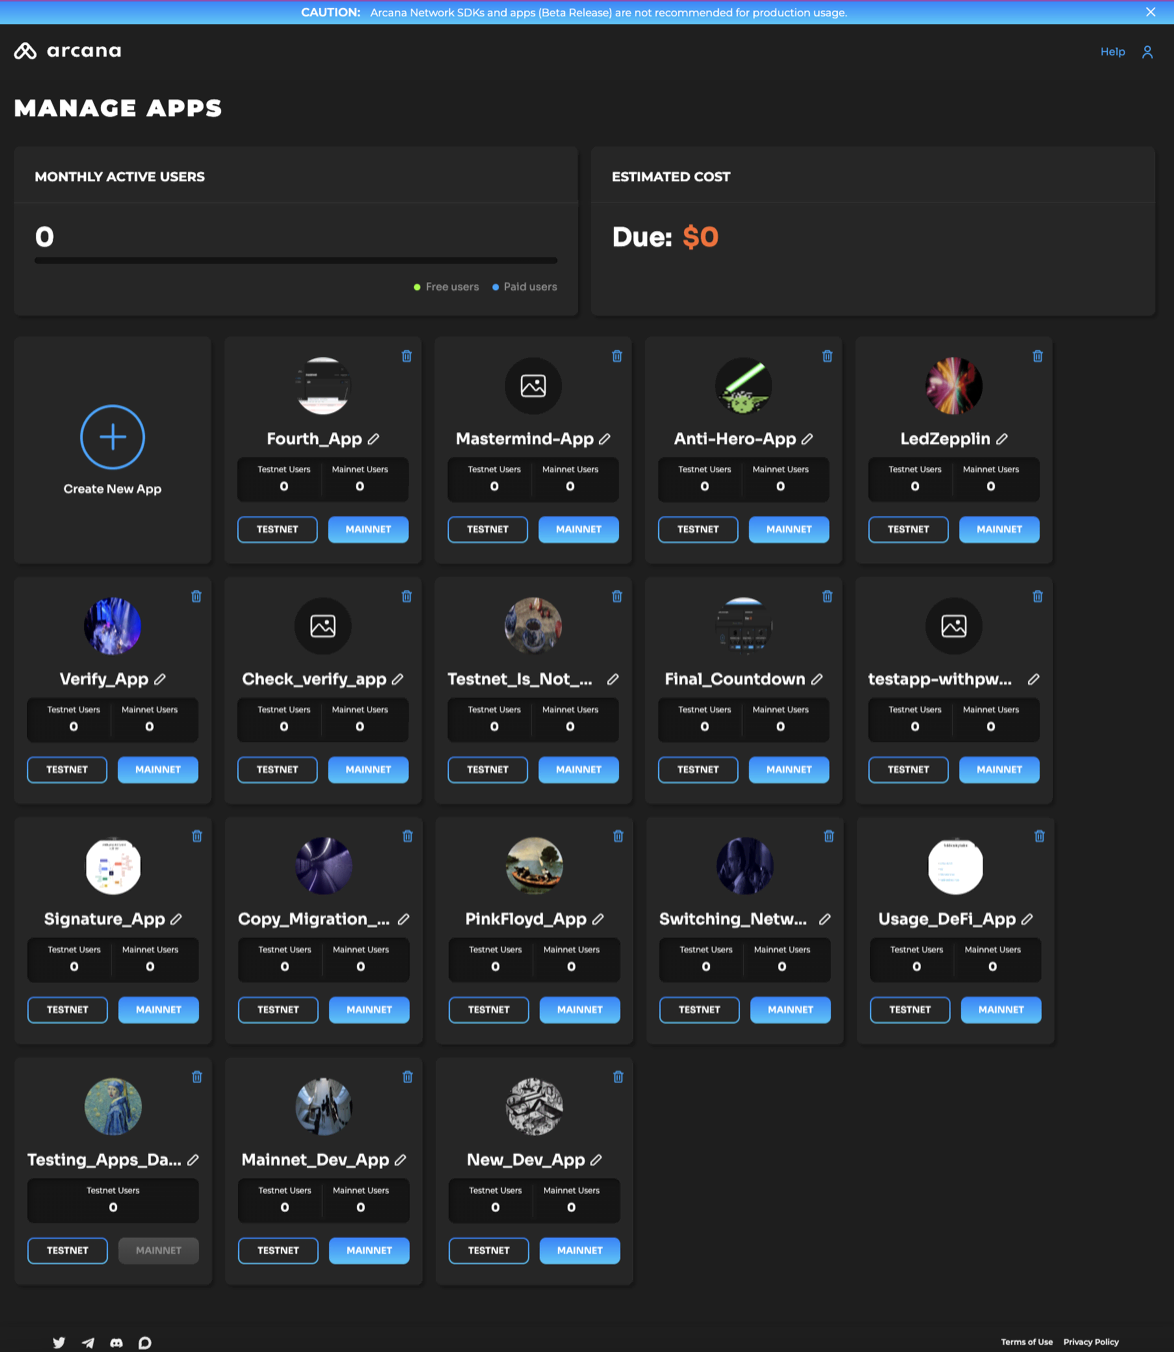
Initiate App Registration
In the 'Manage Apps' dashboard, click Create New App wizard to register a new app.
Registration Settings
To register a new app, the developer needs to provide the following settings:
- App name
- Chain Type: EVM, Solana, MultiversX
- Default Blockchain
- Wallet UI Mode
App Name
Add a unique name for the app. It can be edited later. After registration, a unique Client ID is associated with each app name. This Client ID is never changed, even if the app name is altered.
All emails related to a registered app billing or user login will mention the latest app name as displayed in the dashboard. Once an app is deleted, the Client ID is no longer valid. Creating a new app with the same name and registering it with Arcana will result in a new Client ID associated with the same name.
Edit App Name
To edit the name of a registered app entry, use the pen icon. Click Enter in the editable text field to save the changes.
Chain Type
Developers need to decide at the time of registration whether the app will use the EVM chains or one of the non-EVM chains supported by the Arcana Auth SDK.
Non-EVM Chains
When registering an app through Arcana Developer Dashboard, the choice of chain type (EVM, MultiversX, or Solana) is final. App developers can't change it later. They can switch the default chain within the same type. For example, a Solana app on Testnet can switch to Solana Mainnet or Solana Dev but not to MultiversX or an EVM chain.
Default Blockchain
The chain marked as default is the one that is selected and displayed in the wallet once the user logs into an app that is integrated with the Arcana Auth.
The default chain can be changed programmatically via the app developer once the user approves switching of the chain. Also, the user can change the default chain anytime by using the wallet UI. Chains can be switched to any one of the ones displayed in the pre-configured list in the wallet UI or in the app chain settings displayed in the dashboard.
Wallet UI Mode
The wallet UI mode setting allows the developers to choose whether they want to enable the built-in Arcana wallet UI in the context of their app or build a custom wallet UI for the app users. Note, this is a one-time setting at the time of registering the app.
By default, Arcana wallet UI is enabled for all registered apps. Selecting Custom Wallet UI option disables the built-in Arcana wallet UI altogether.
Custom Wallet UI
This is a one-time setting. It cannot be changed again later once the app is registered. When selecting the custom wallet UI option, developers must build a custom wallet UI and programmatically wire it to the appropriate JSON-RPC Web3 wallet operations. Also, there are no notifications generated by the Arcana Auth SDK when a custom wallet UI is selected. The developers must add requisite logic and code to get the user approvals for blockchain operations.
Confirm Registration
After providing all the required inputs, click Create to register the app.

A newly registered app dashboard displays Testnet configuration settings. A unique Client ID is assigned for the Testnet profile. Developers can deploy the app on the Arcana once SDK usage is configured in the dashboard and the app is integrated with the SDK.

Mainnet Deployment
To deploy the app on the Arcana Mainnet, developers need to create a Mainnet configuration profile and obtain a different Client ID. Update the integration code with this Mainnet Client ID. This step is necessary to deploy the app on the Arcana Mainnet.
For more information, refer to the Testnet > Mainnet Migration Guide.
Click Configure in the LHS menu to view and edit the configuration settings.
Settings Overview
Clicking Configure in the Arcana Developer Dashboard shows the following configuration categories:
- Branding
- Social Auth
- Chain Management
- Arcana Wallet
- Keyspace
- Gasless
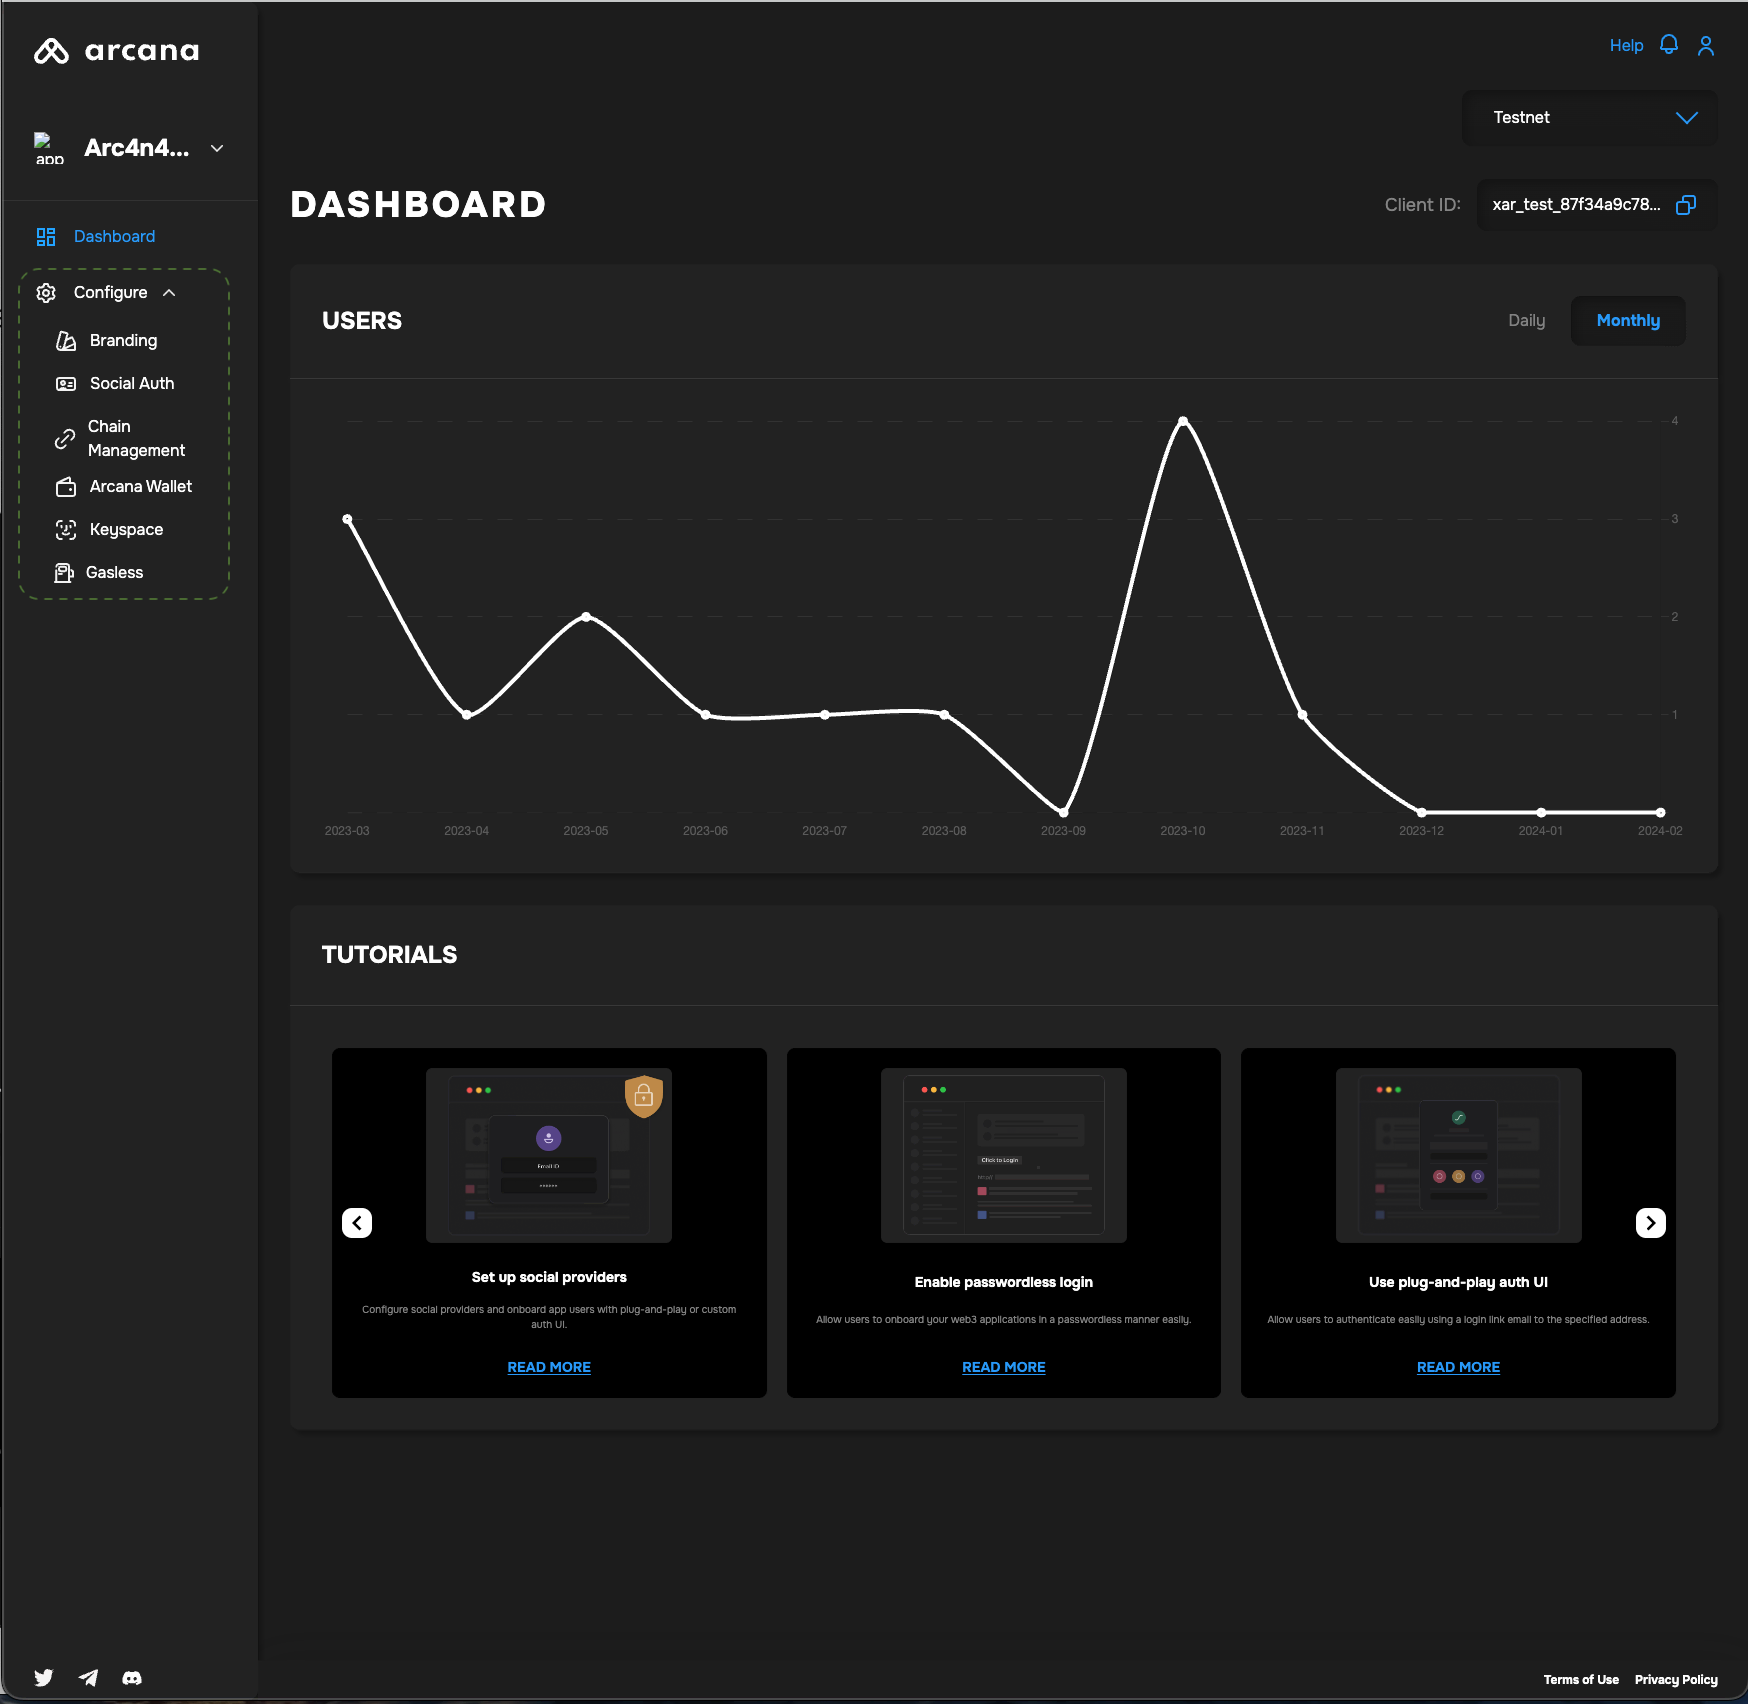
Click on the tabs below to see the various configuration settings in each category.
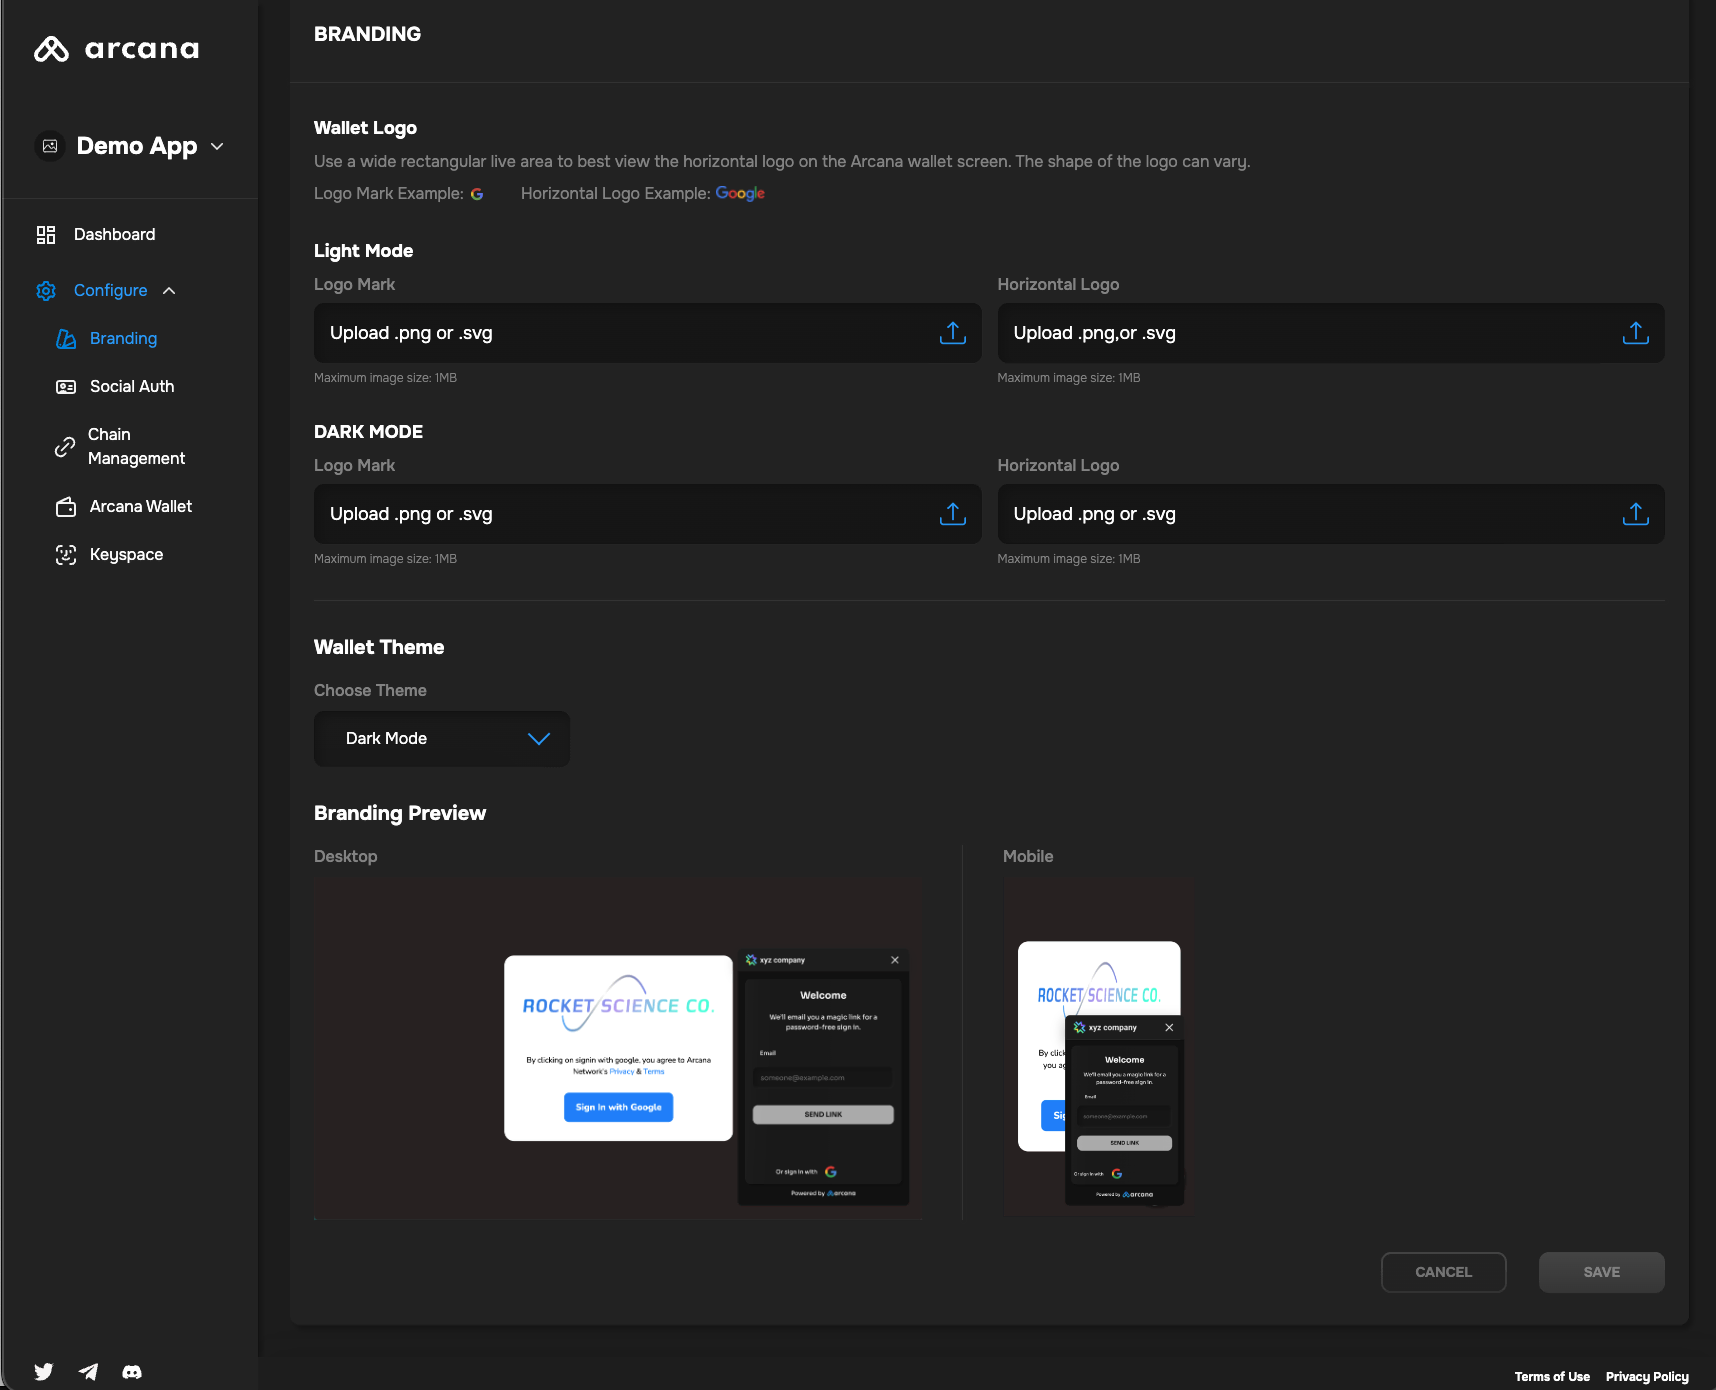
The Branding settings control the look and feel of the embedded Arcana wallet displayed in an app's context.
- Upload Logo
- Wallet Theme
The Social Auth settings manage the user onboarding experience and control which social login providers are available for app login.
- Social Auth
- Identity Access Managers
Developers can enable one or more providers for app login. Passwordless login is automatically enabled for all registered apps.
See how to configure authentication providers, for details.
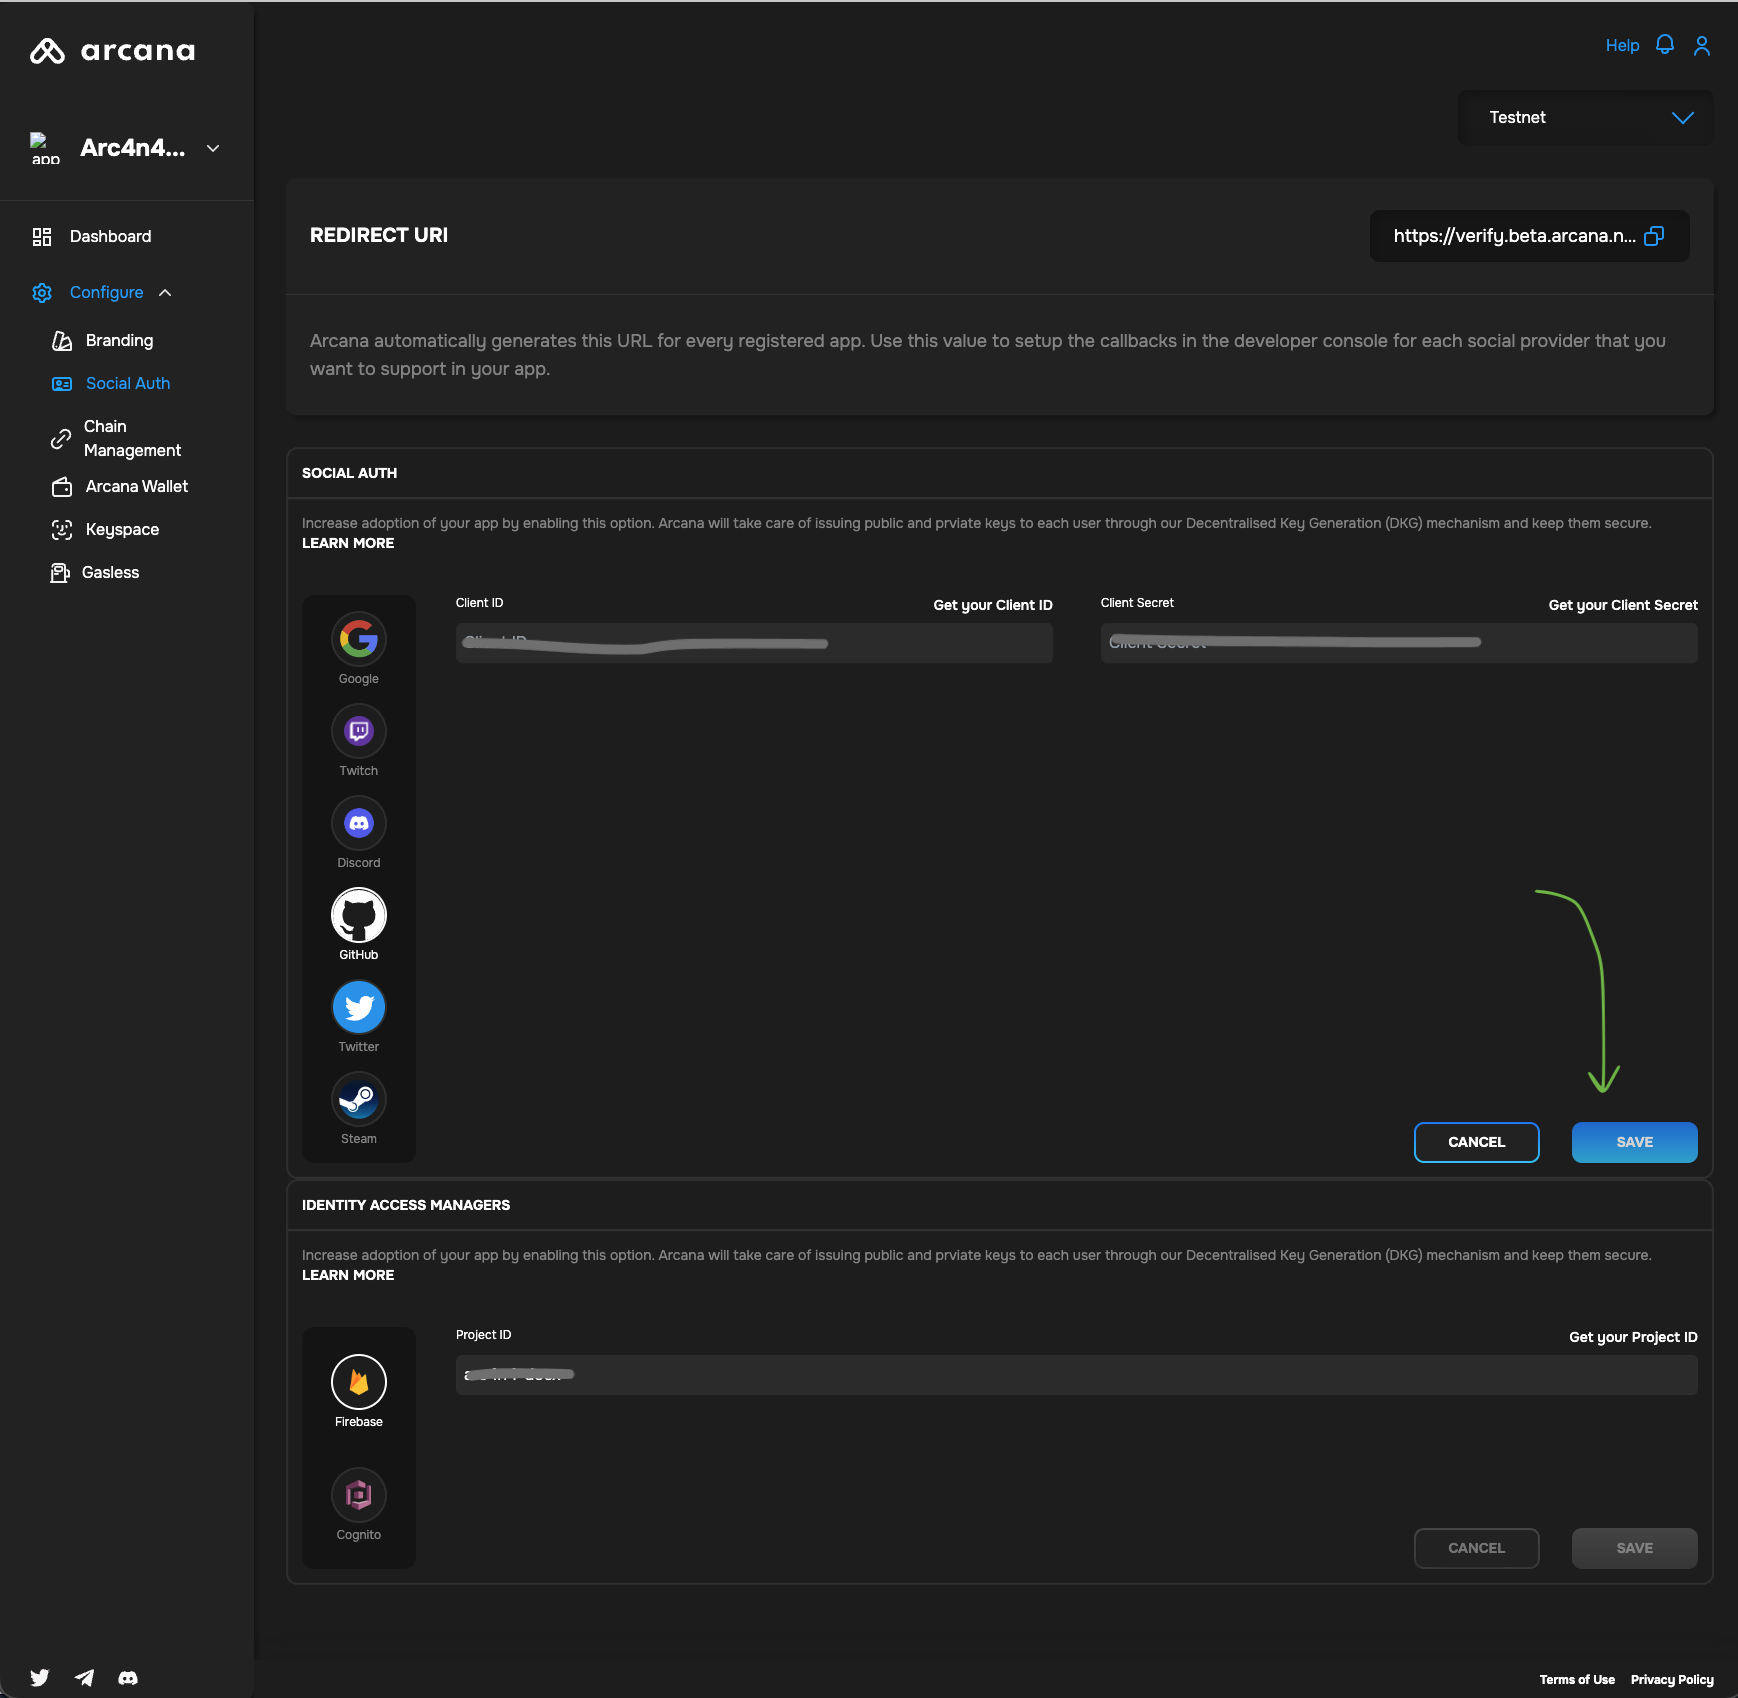
Redirect URI
The Redirect URI field in the Social Auth section of the dashboard lists an auto-generated URL. This URL value is used as input when configuring the social login providers.
The Chain Management settings control which chains will be displayed as the default active chain in the wallet from the list of pre-configured chains available out of the box for apps that integrate with the Arcana Auth SDK.
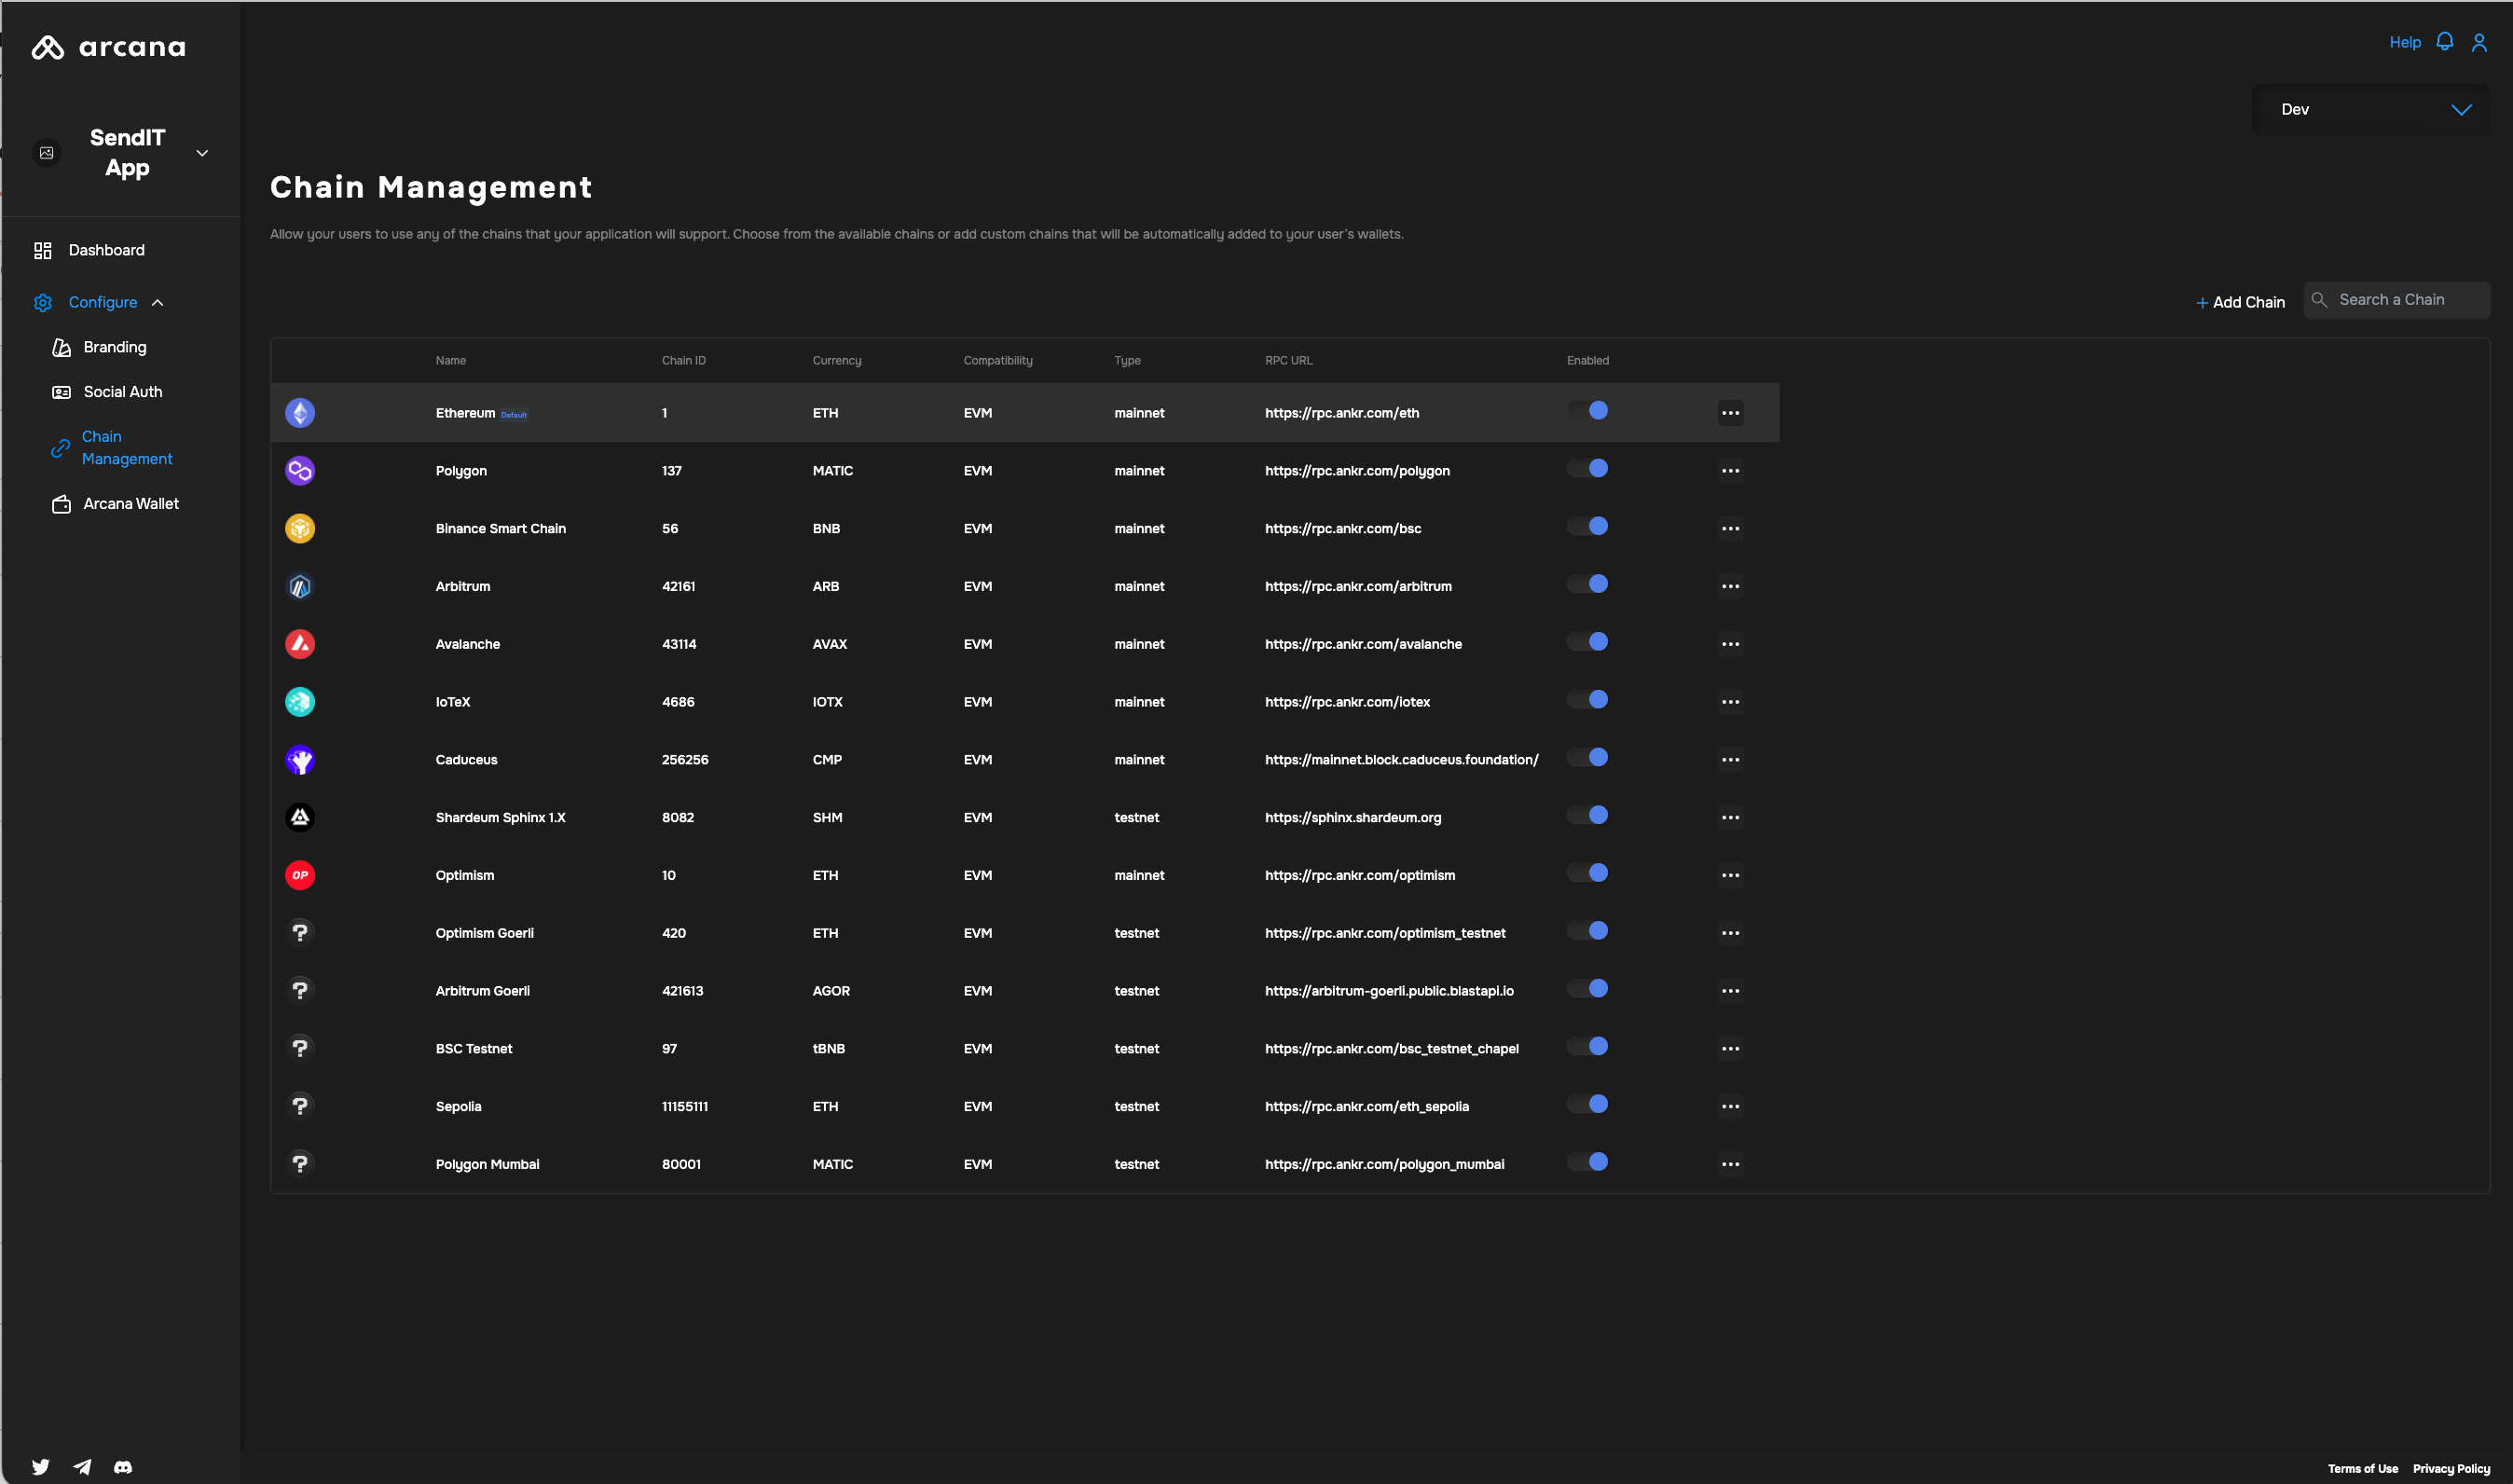
- Add Chains
- Edit Chains
- Set Default Chain
For details, see how to manage chains.
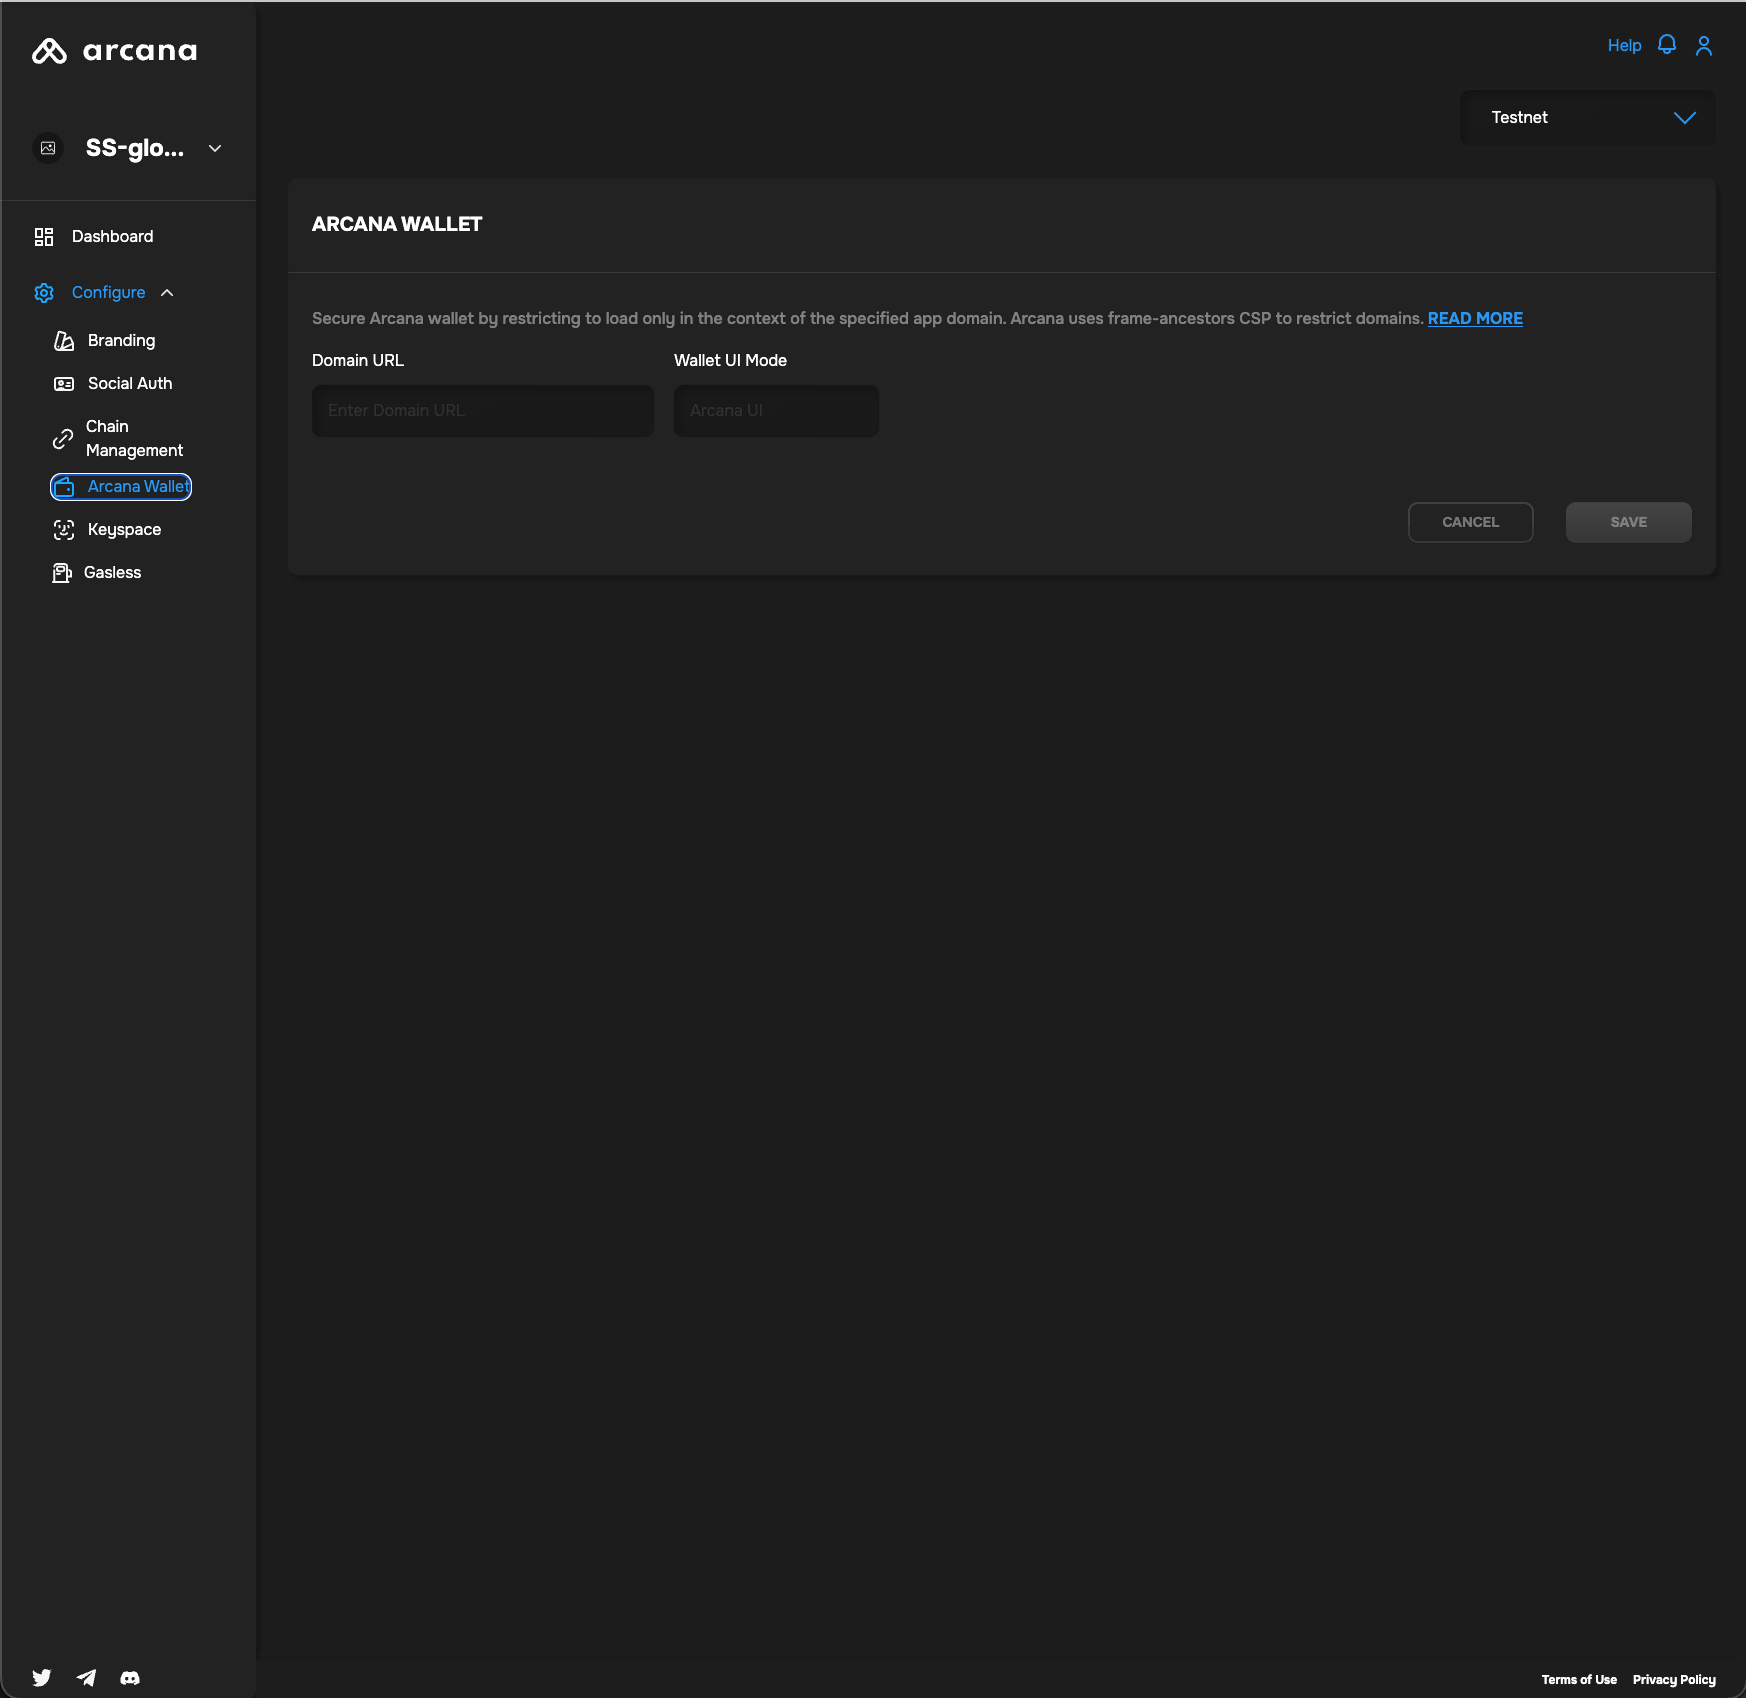
The Arcana wallet settings display whether the app is registered using the built-in, default wallet UI or a custom UI. It also allows for domain restriction whereby the Arcana wallet can be loaded successfully within an app's context.
- Wallet Domain
- Wallet UI
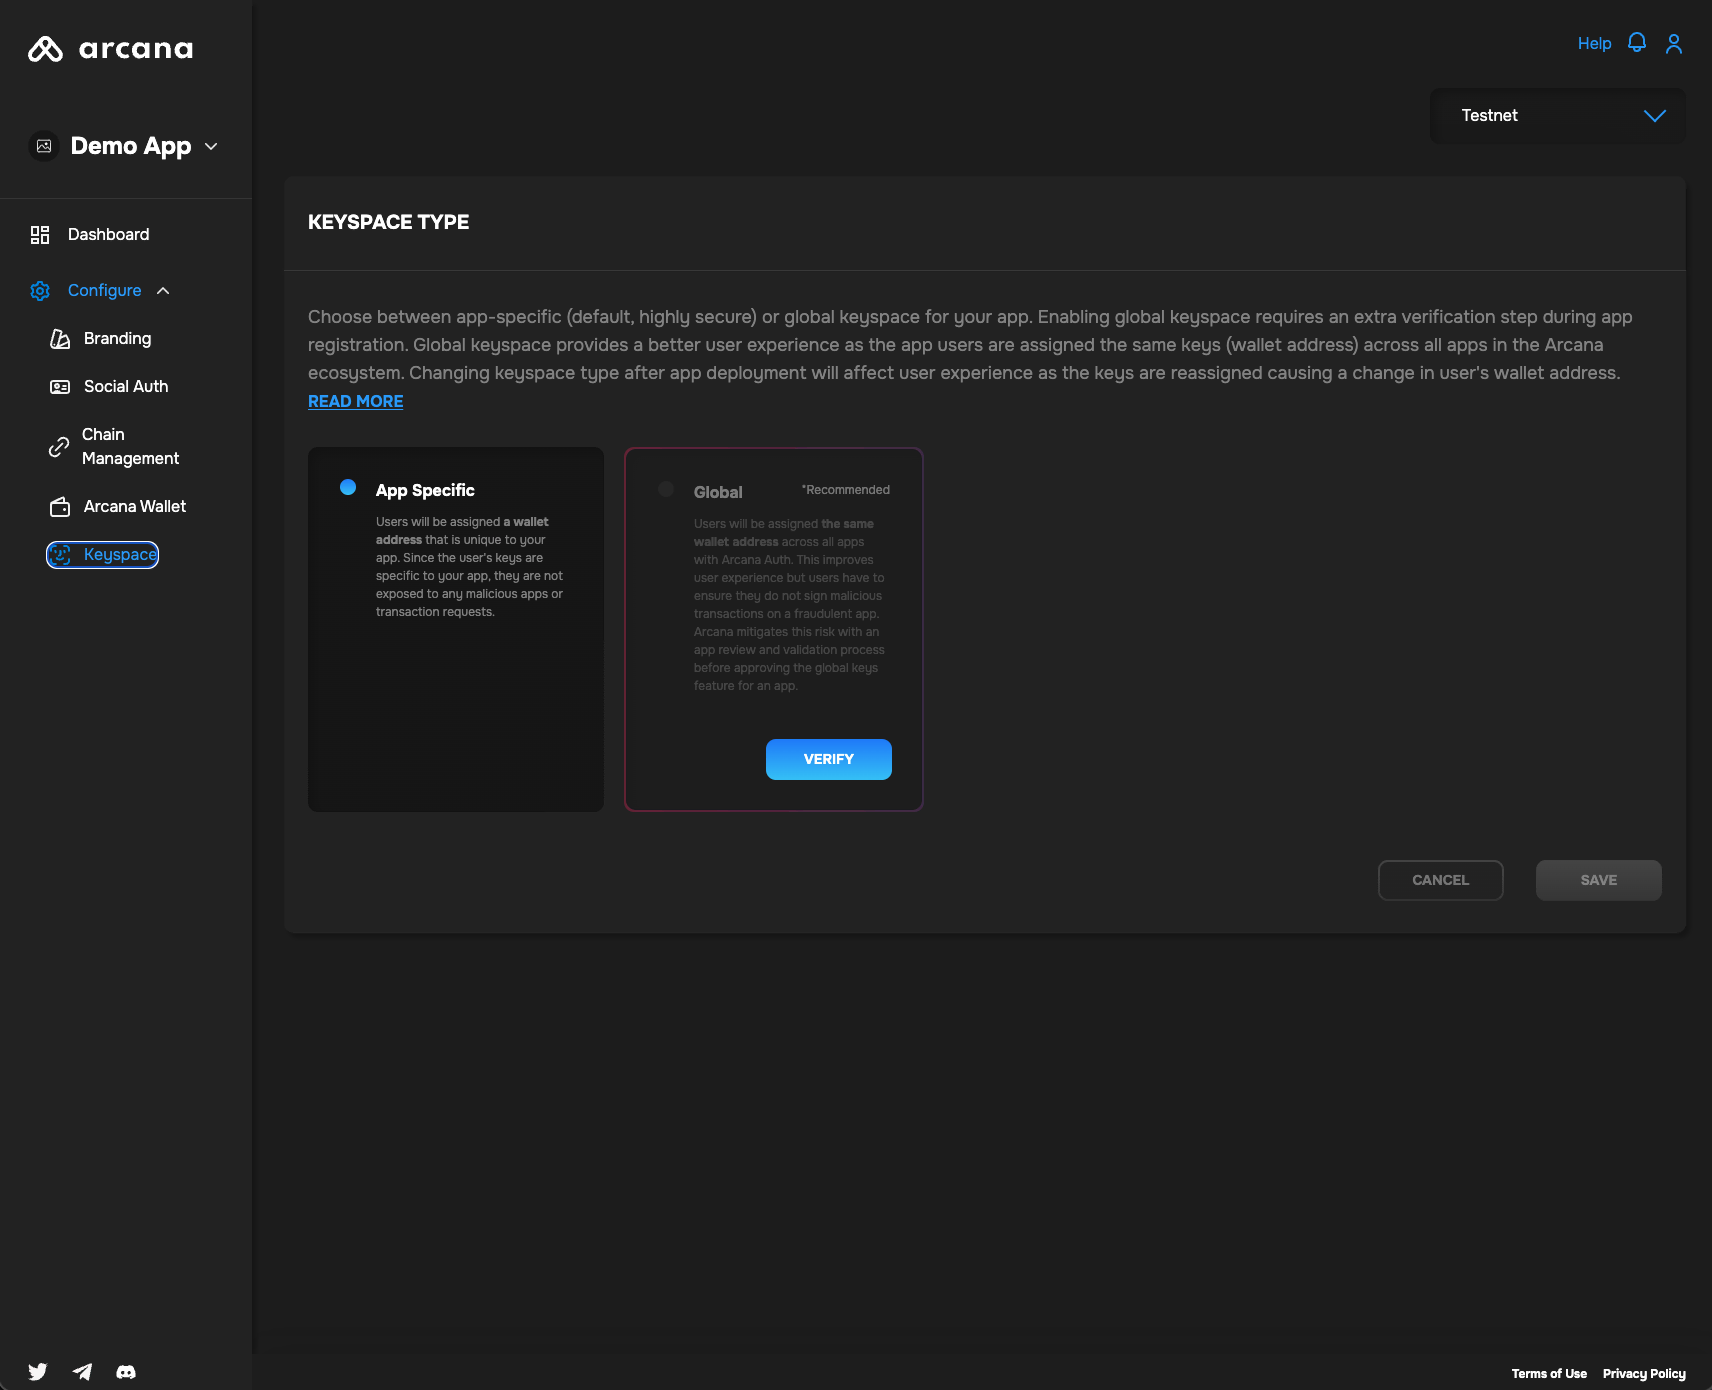
The following Keyspace settings control whether the wallet address for the user remains the same across all the apps that are integrated with the Arcana Auth SDK or are unique for each app.
- App-Specific Keys (default)
- Global Keys
Learn more about App-specific and global keys and how to set up keyspace.
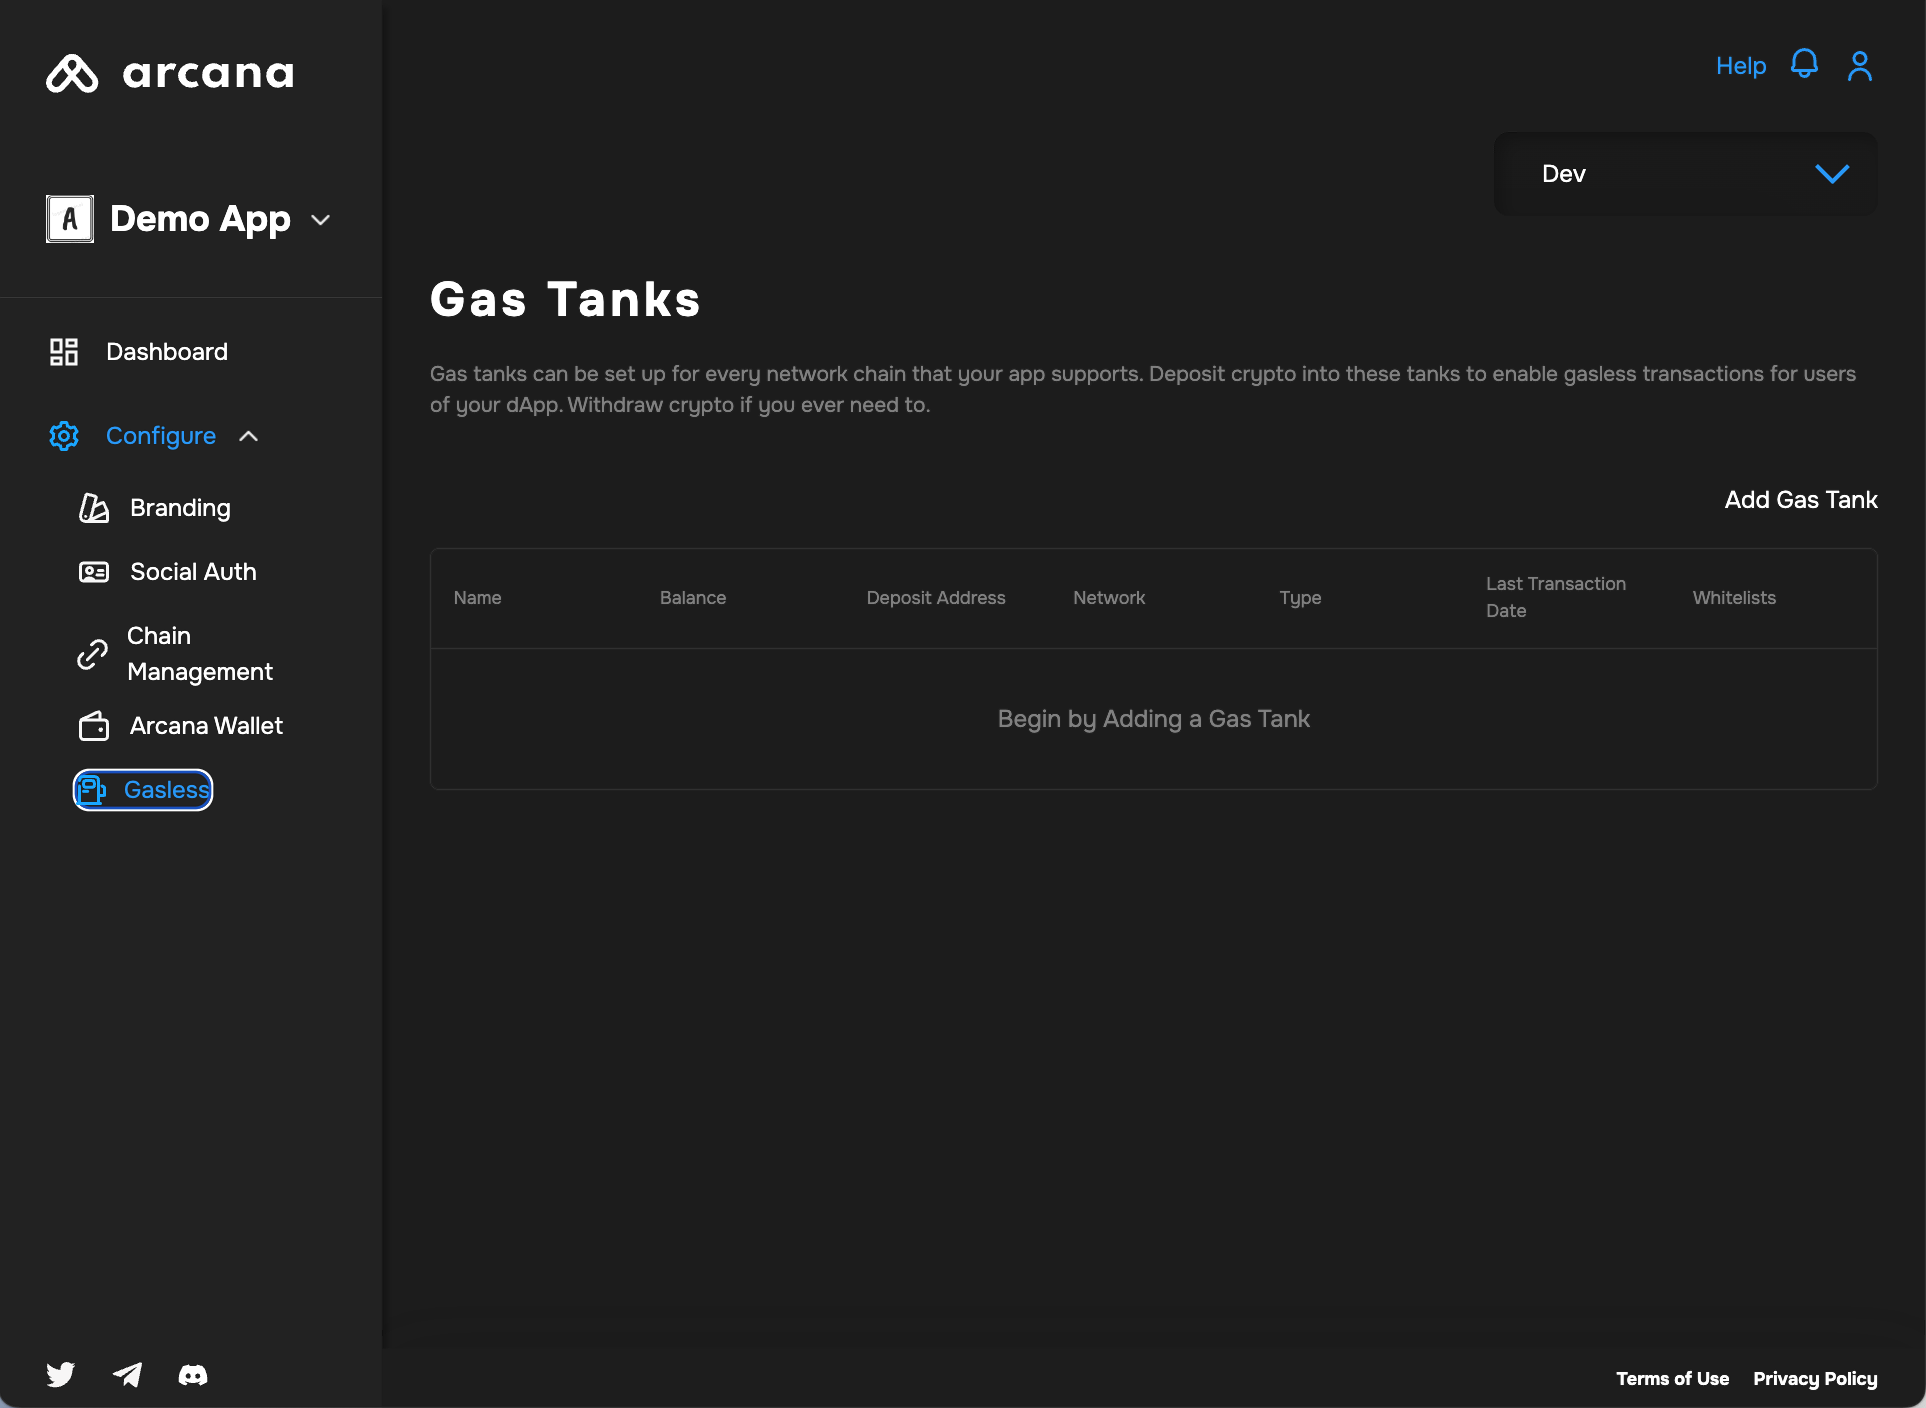
The following Gasless settings control the establishment of gas tanks for selected blockchain networks, allocating funds in the gas tanks, whitelisting app operations for enabling gasless transactions through the Arcana wallet or third-party wallets.
- Add Gas Tank
- Deposit/Withdraw Gas Tank Funds
- Enable/Pause Gas Tank
- Whitelist app operations
Account Abstraction: SCW Account
Gasless transactions require enabling SCW user accounts or 'gasless accounts' that are different from the typical EOA user accounts.
Developers must explicitly set up gas tanks per blockchain network to enable paymasters to bear gas fees for sponsored transactions for that specific chain. The gas tanks should have sufficient crypto assets deposited to fund the app user's transactions. Also, developers must whitelist one or more app operations for gasless transactions. Only the gas fees for the whitelisted operations will be paid via the gas tank as long as there is sufficient credit in the gas tank. For all the non-whitelisted app operations, or in case the gas tank assets run out, the transaction gas fees will have to be paid by through the user's smart contract wallet. For details, see how to configure gasless transactions in apps integrating with the Arcana Auth SDK.
Save the configuration settings to make sure the setting changes take effect.
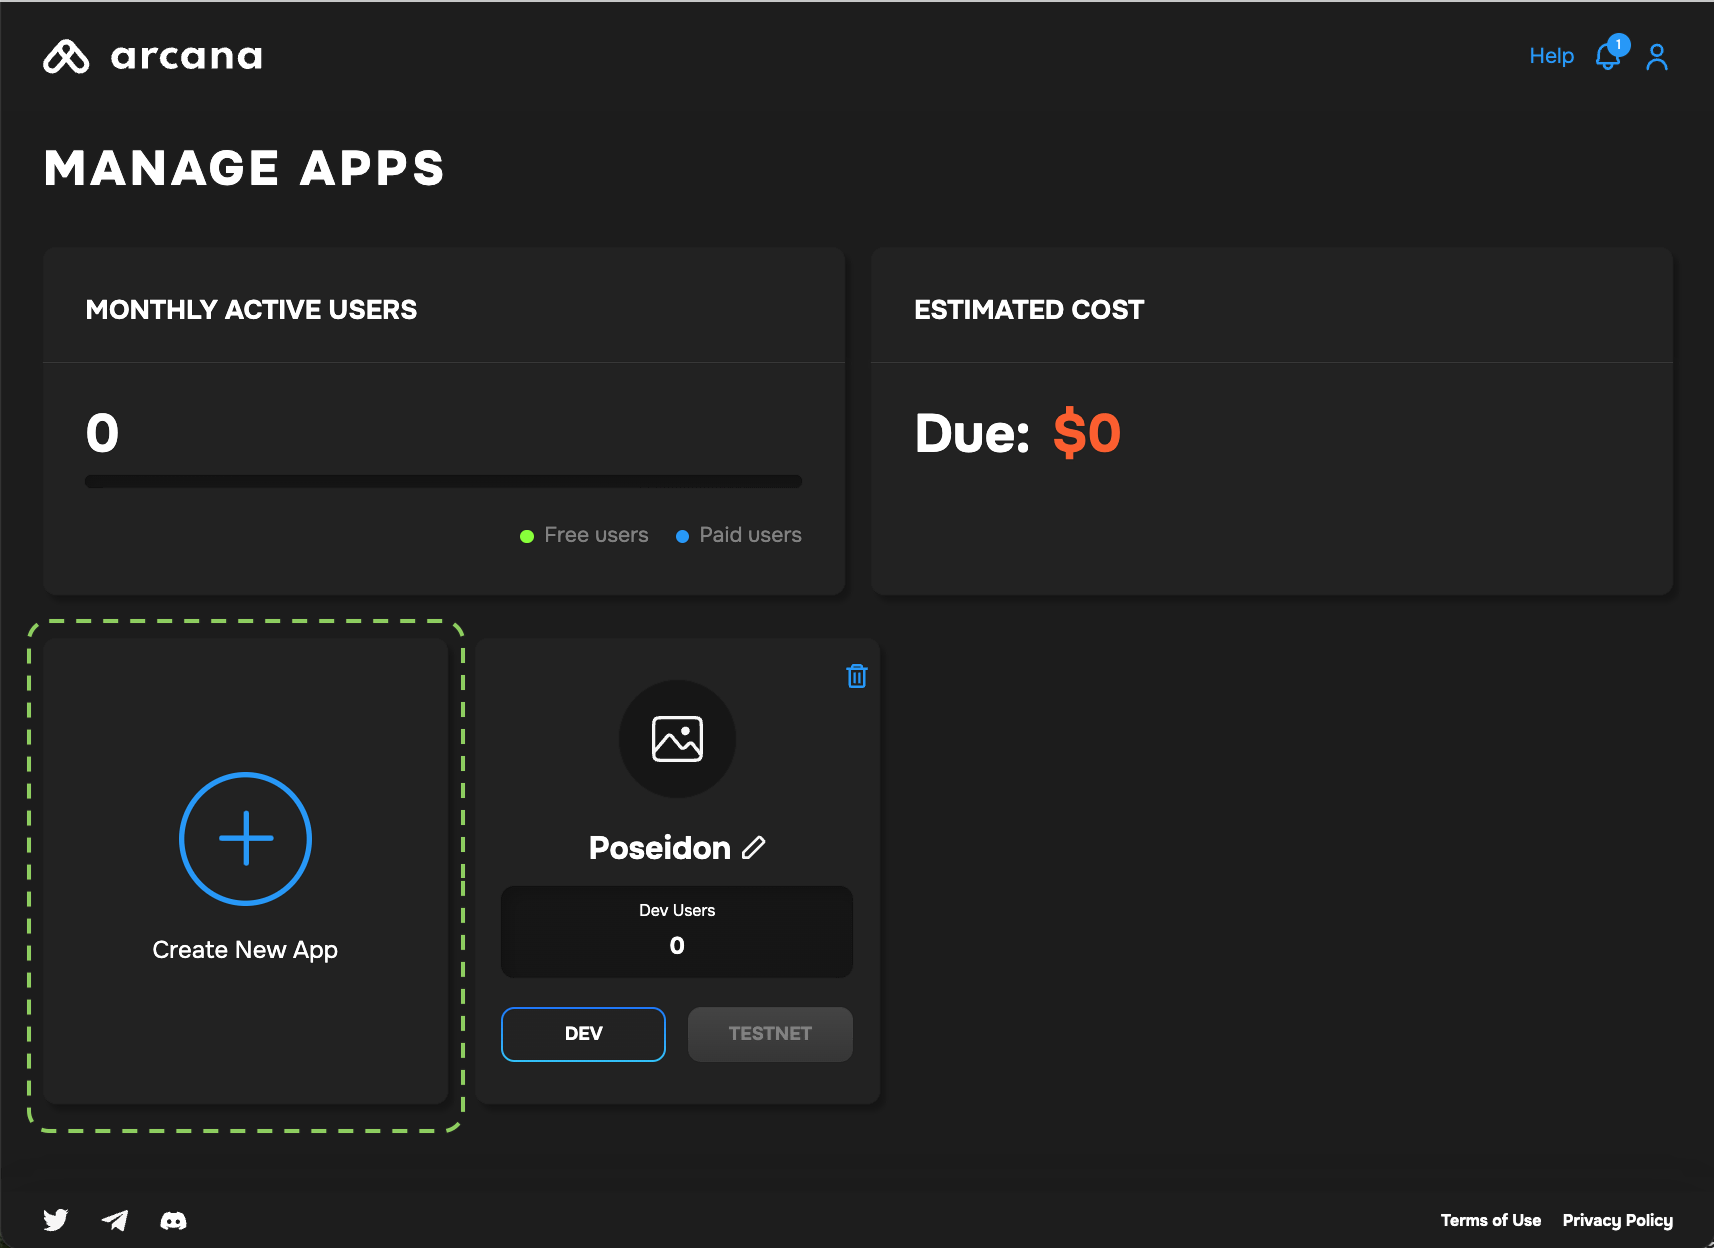
Manage Configuration Profiles
Every application registered using the Arcana Developer Dashboard is represented by a single card displayed in the 'Manage Apps' screen, next to the 'Create New App' wizard. Click on the application card to view the application dashboard screen. By default, the application dashboard screen shows application usage details for the 'Testnet' configuration profile and some links to the Arcana Auth documentation.
To view configuration details for an application, use the LHS navigation menu and click Configure to view/edit the application configuration settings as described in an earlier section of this guide.
Each application can only be associated with two configuration profiles, 'Testnet' and 'Mainnet'. Both these configurations are maintained separately and each is associated with a unique Client ID.
Testnet
By default, all newly registered applications are enabled for using the Arcana 'Testnet'. Developers can view or edit the default configuration settings by clicking 'Testnet' on the application card displayed in the 'Manage Apps' dashboard screen. This will bring up the application dashboard screen with various navigation options in the LHS pane.
After validation on the 'Testnet', the application can be configured to use the Arcana 'Mainnet'. To do this, developers must create a corresponding 'Mainnet' configuration profile.
Mainnet
To use the Arcana Mainnet, the developers must first create a 'Mainnet' configuration profile using the Arcana Developer Dashboard.
A newly registered application does not have any 'Mainnet' profile associated with it, it has to be explicitly created by the developer. The application card displayed in the 'Manage Apps' screen will show the 'Mainnet' configuration as disabled for all newly registered apps. To create a 'Mainnet' configuration profile, the developer must use the application dashboard screen displaying the Testnet profile, use the LHS navigation pane and select the Social Auth settings.
In the social authentication settings screen, refer to the dropdown on the top right next to 'Testnet'. Use this dropdown to select and switch to the 'Mainnet' configuration.

When 'Mainnet' is selected from the dropdown, a new 'Mainnet' profile creation wizard gets activated and displays a pop-up screen asking the developer to choose one of the options to create the 'Mainnet' configuration. You can either copy the exact 'Testnet' configuration or create a new blank configuration for 'Mainnet' settings.
After the selection is made and the developer confirms, the 'Mainnet' profile is created and automatically registered with Arcana.
Mainnet Client ID
The newly created 'Mainnet' configuration profile is associated with a brand new unique Client ID. Developers must specify this new Client ID while integrating the application with the Arcana Auth SDK and deploying it on Arcana 'Mainnet'.
Copying Testnet Profile
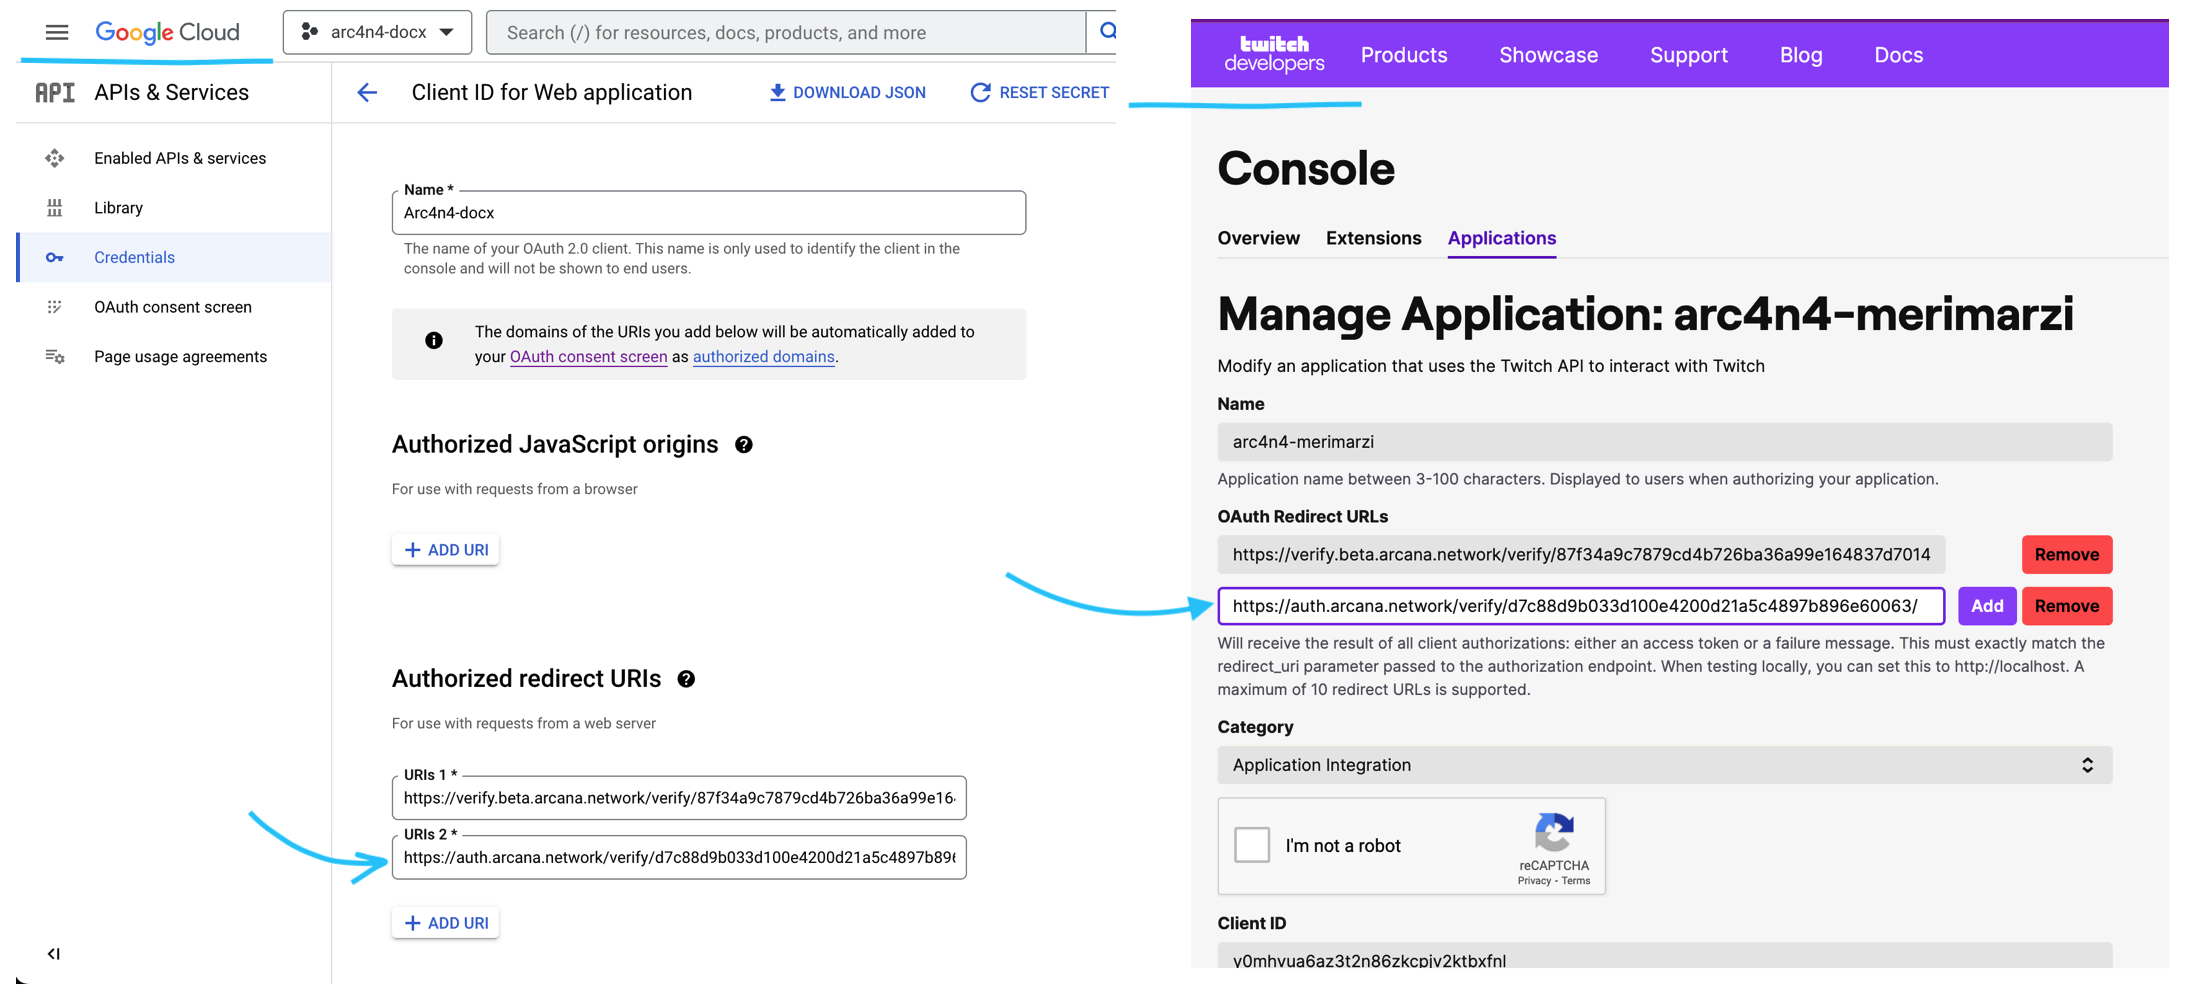
If the developer chooses to create the 'Mainnet' profile by copying the 'Testnet' profile, there is an additional setup required to update the configuration of the authentication provider settings. Once the 'Mainnet' profile is created, click the application configuration in the LHS nav of the Arcana Developer Dashboard and choose Social Auth section. Then copy the 'Redirect URI' displayed for the 'Mainnet' profile. You need to update this 'Redirect URI` value in the respective social login provider developer console.
Example: Copying Google Profile
If Google is enabled in your app's 'Testnet' profile, then during the configuration of the social login provider through the Google Developer console, the Testnet redirect URI was added. Copy the 'Mainnet' profile redirect URI value from the Arcana Developer Dashboard and update them in the Google Console OAuth settings.
Make sure that you add the 'Mainnet' redirect URI value for the other social login providers that are enabled in the 'Testnet' profile. This is required for enabling your app to use the Arcana Mainnet.
The figure below shows how the 'redirect URI' is different from the Testnet Settings where Google and Twitch were configured and the 'Testnet' profile was copied to create a 'Mainnet' profile.
Switch Profiles
There are multiple ways to switch an application from using Testnet to Mainnet.
-
To switch from Testnet to the Mainnet profile, use the application dashboard screen, and select Configuration >> Social Auth in the LHS navigation pane. Refer to the dropdown next to 'Testnet' on the top RHS of the screen and choose 'Mainnet'. If there is a preexisting 'Mainnet profile, the app is automatically switched to it. You can view the social authentication settings and the assigned Client ID for the 'Mainnet' profile. If there is no 'Mainnet' profile associated with the app, then on selecting 'Mainnet' from the dropdown, the app wizard gets activated and assists in creating a 'Mainnet' configuration profile for the application. Once the profile is created, a new Client ID is automatically assigned and the configuration switches to 'Mainnet'.
Switch to Testnet/Mainnet Profile -
If a 'Mainnet' configuration profile is already created for an application, you can also switch between Testnet/Mainnet configuration profiles by using the 'Manage Apps' dashboard screen. Simply select the application card and click on 'Testnet' or 'Mainnet'. This will bring up the application dashboard screen for the selected configuration profile.
Switch to Testnet
An-caution
Depending upon whether the 'Testnet' Client ID value or the 'Mainnet' Client ID value is used to integrate an application with the Arcana Auth SDK, deployment of the app happens on the respective Arcana Network. "Testnet" usage is not billed but if an application chooses 'Mainnet' while integrating with the Arcana Auth SDK, it will be billed in the forthcoming releases.
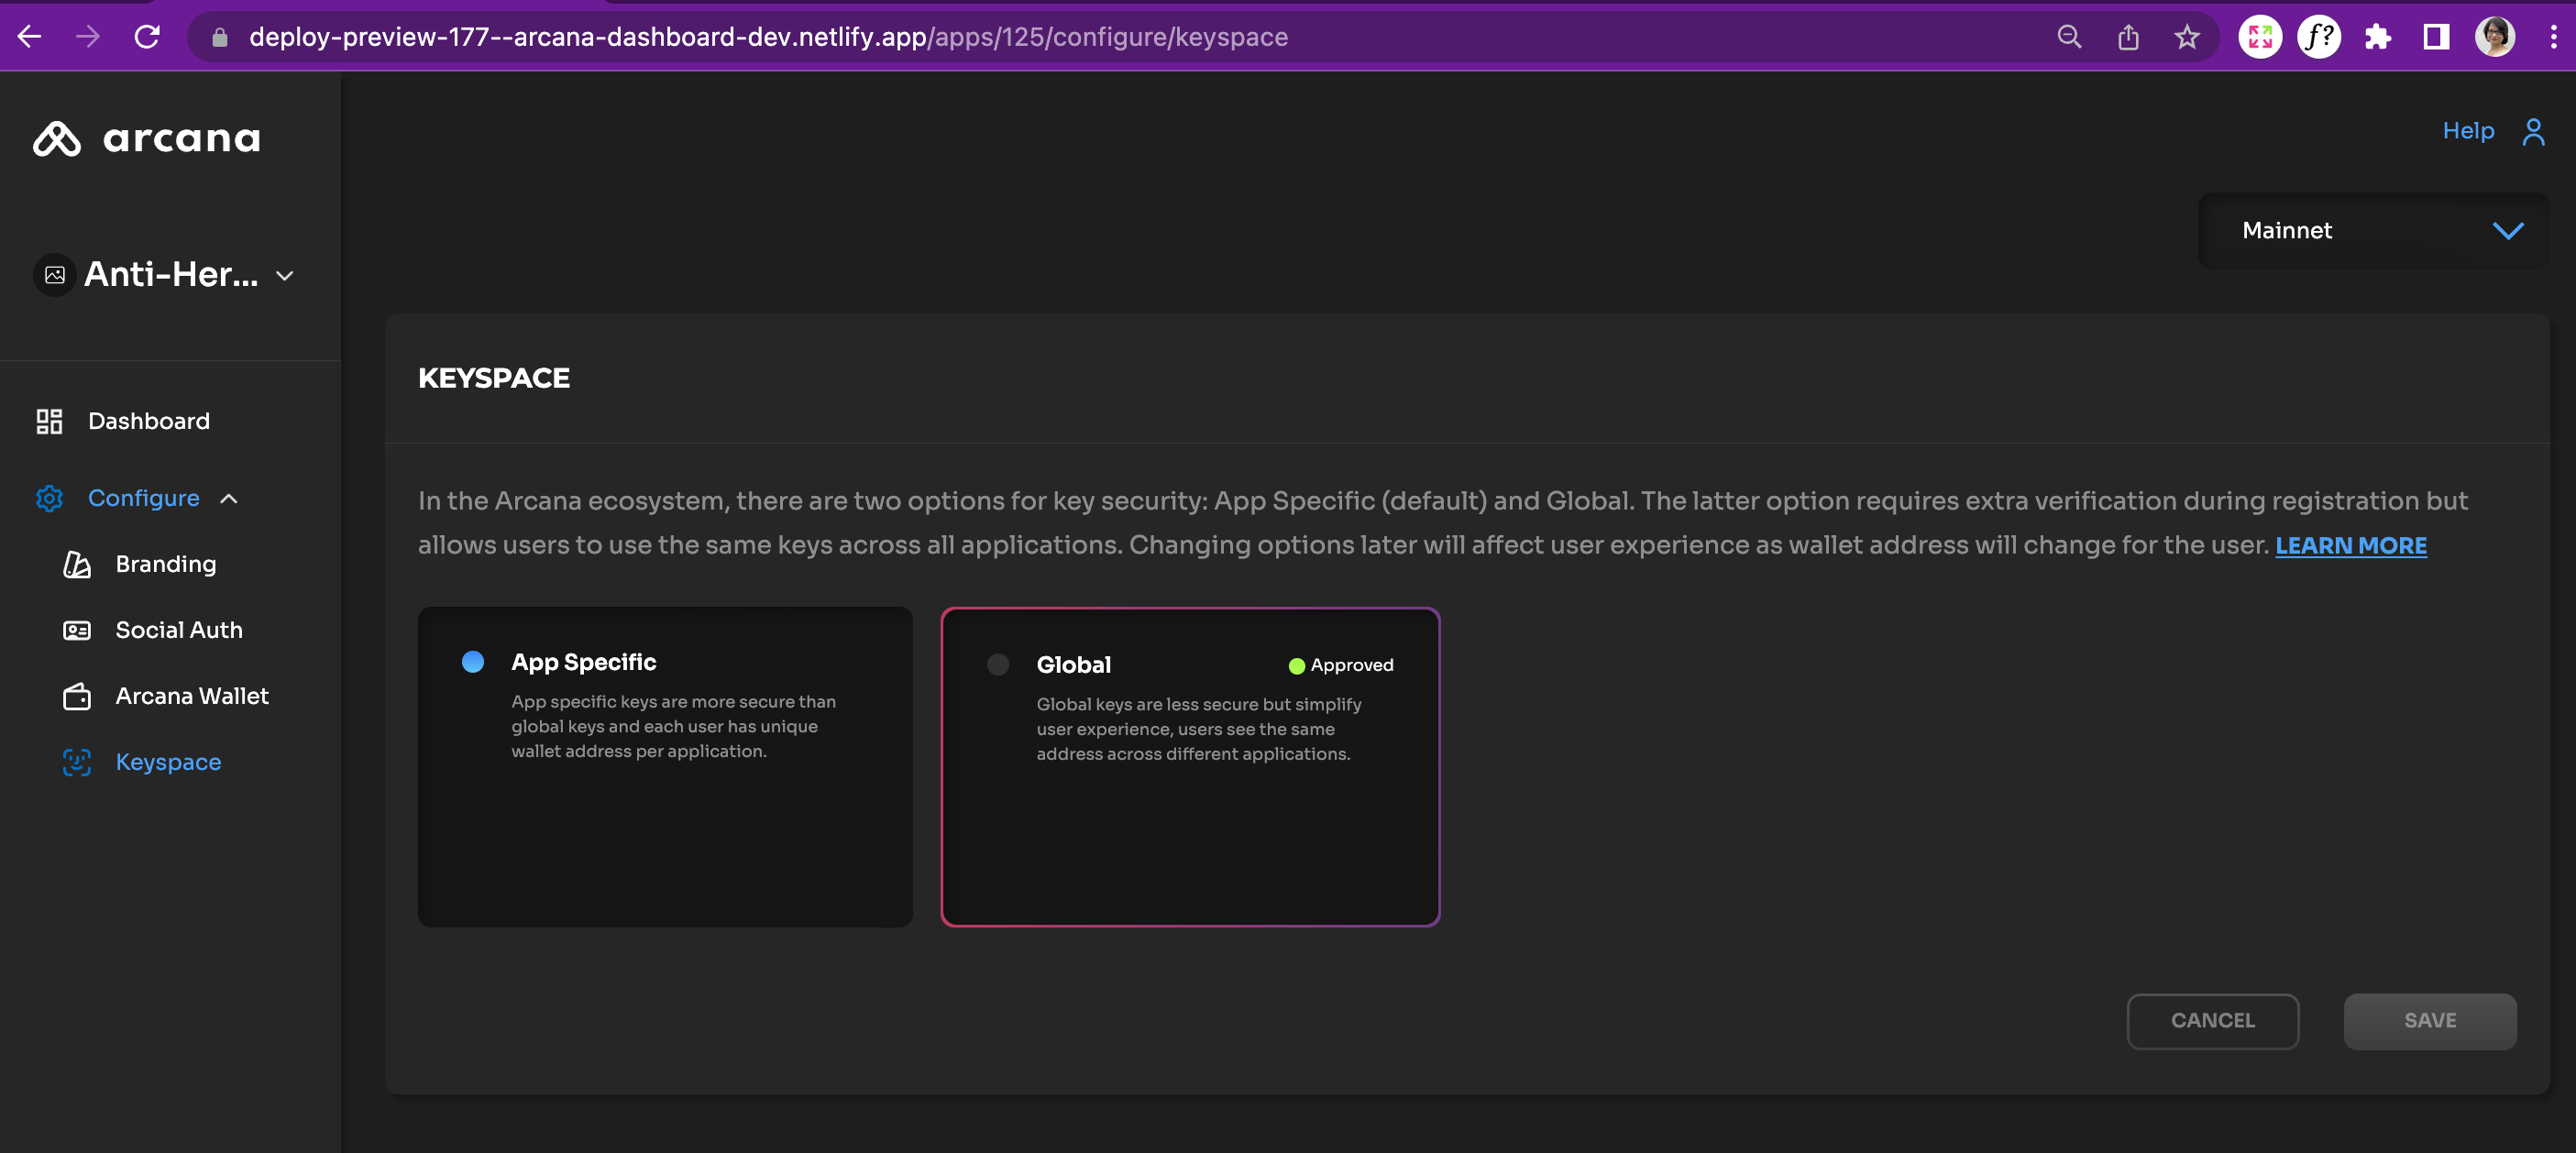
Configure Keyspace
There are two keyspace options: App-specific and Global Keys.
You can either use the default, highly secure App-specific keyspace option or Global keyspace depending upon the desired level of security and user experience required for the application.
Select Global Keyspace and click Verify. This will bring up a verification form. Fill out the verification form, and click Submit.
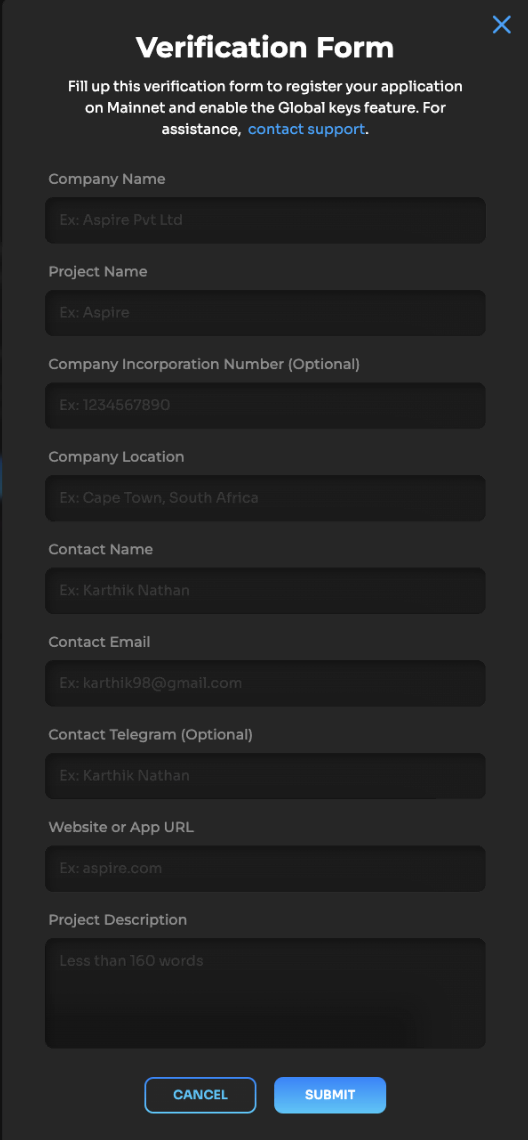
You can check the status of Global Keyspace verification by using the Keyspace screen. After submitting the form, you will see the status as In Review.
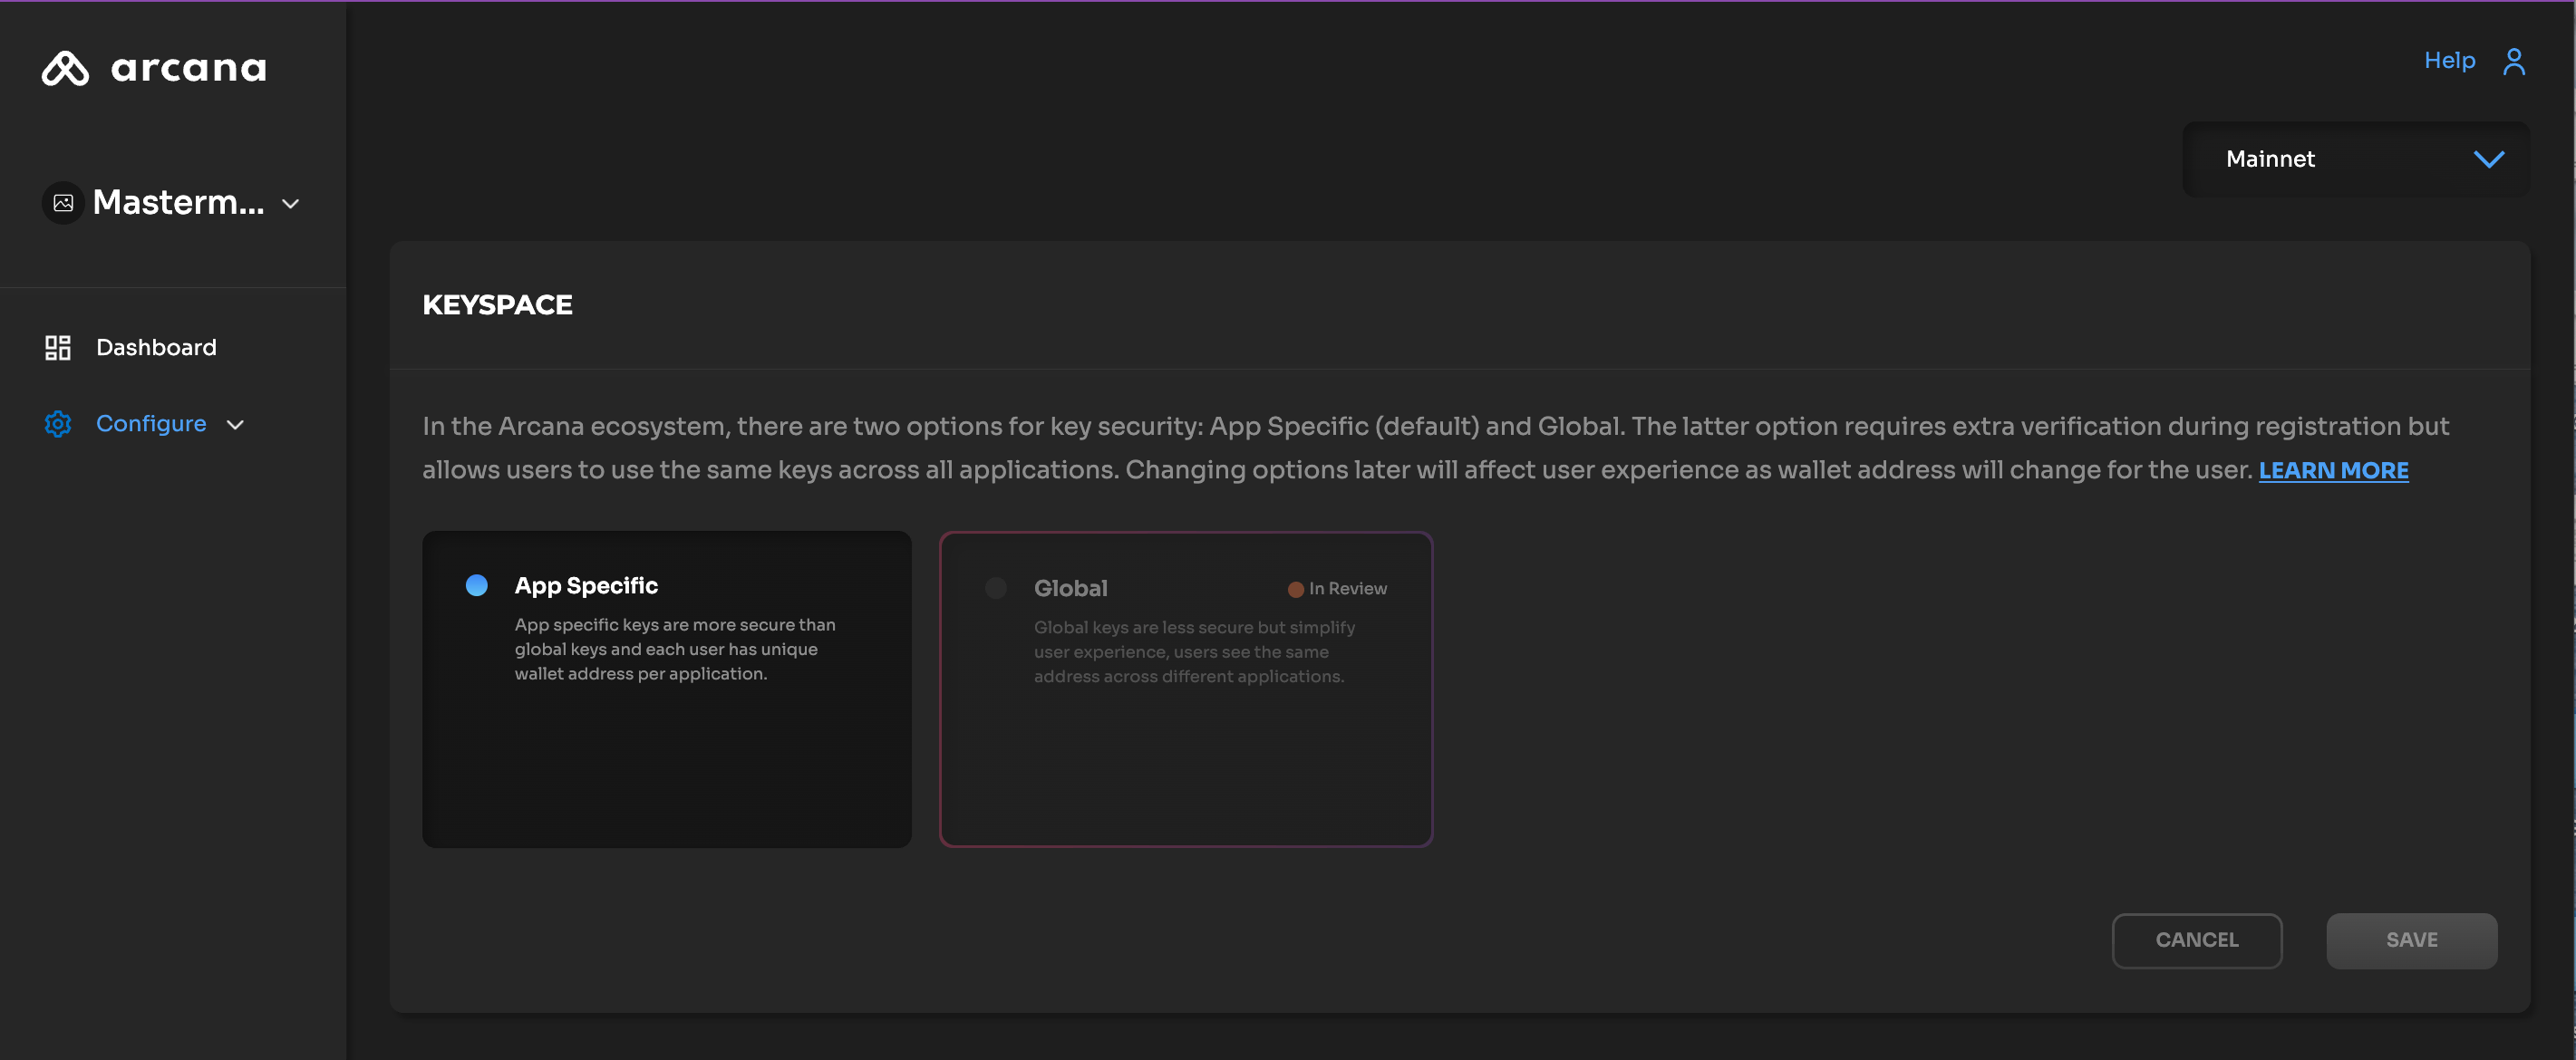
The status will change to Approved once verification is complete. You can integrate your application with the Arcana Auth SDK but do not deploy it until the verification is complete. Otherwise, users that log in before verification is complete may see different wallet addresses after the process is complete.
Configuring the Arcana wallet
Arcana Auth SDK allows developers to manage the app user experience for signing blockchain transactions with Arcana wallet.
The user experience with the Arcana wallet is configured programmatically through the alwaysVisible option. Install the Arcana Auth SDK and as part of the integration, add code in the app to create a new AuthProvider instance. Specify the appropriate wallet visibility mode via the alwaysVisible option. See the Arcana wallet configuration guide for details.
Client ID
The Client ID assigned to your application can be found on the top right of the Arcana Developer Dashboard screen. 
Switch Application
Developers can switch from one application configuration profile screen to another application by using the 'Manage Apps' screen and clicking on the requisite application card.
Alternatively, you can use the LHS navigation pane in the configuration screen and click on the dropdown next to the application name in the top left. The dropdown displays a list of all the applications registered by the developer and a link to navigate to the Manage Apps dashboard screen. Select a different application from the drop-down list and you will be switched to a different application dashboard screen.
Monitor Usage
Developers can monitor their registered application usage statistics via the Arcana Developer Dashboard. The Manage Apps screen displays the account-level usage metrics. Application-specific usage details are available on the application dashboard screen.
Account Usage Metrics
The Manage Apps screen displays Monthly Active Users (MAU) for the developer account. This is an aggregate score across all the applications that are registered for a developer account and configured to use the Arcana Mainnet. Any application using the 'Testnet' is not billed and not included in the overall account usage statistic.
An-caution
The billing data is only applicable for Mainnet usage and will be made available in the forthcoming releases.
Usage per Application
Arcana Network maintains per-application usage statistics separately for both the 'Testnet' and 'Mainnet' configuration profiles.
In the Manage Apps dashboard screen, all registered applications are listed as cards. Each application card displays the 'Total Users' statistic. This refers to the total monthly active application users that are utilizing the Arcana Testnet/Mainnet. To view per application usage details, you need to select 'Testnet' or 'Mainnet' profile and look at the application dashboard screen that displays the following usage statistics:
- Number of logged-in users
Use the 'Daily' and 'Monthly' tabs to see the respective usage statistics.
You can use the dropdown in the top right of the application dashboard screen to select Testnet/Mainnet usage details.
Billing
Arcana tracks the Mainnet app usage in terms of MAU for every developer account. At the end of every month, an invoice is generated. The chargeable amount against the invoice is auto-deducted using the payment method configured by the developer in their profile section.
To begin using the Arcana Auth SDK, the app developers don't need to update the profile details including the billing information. Once the apps consume the free tier of Arcana Mainnet usage, the developer must provide the billing details via the profile section of the Arcana Developer Dashboard. Otherwise, the registered apps will be suspended and users will not be allowed to log in to any app that is registered using the developer account.
For details on current pricing and free tier limits, contact our support team.
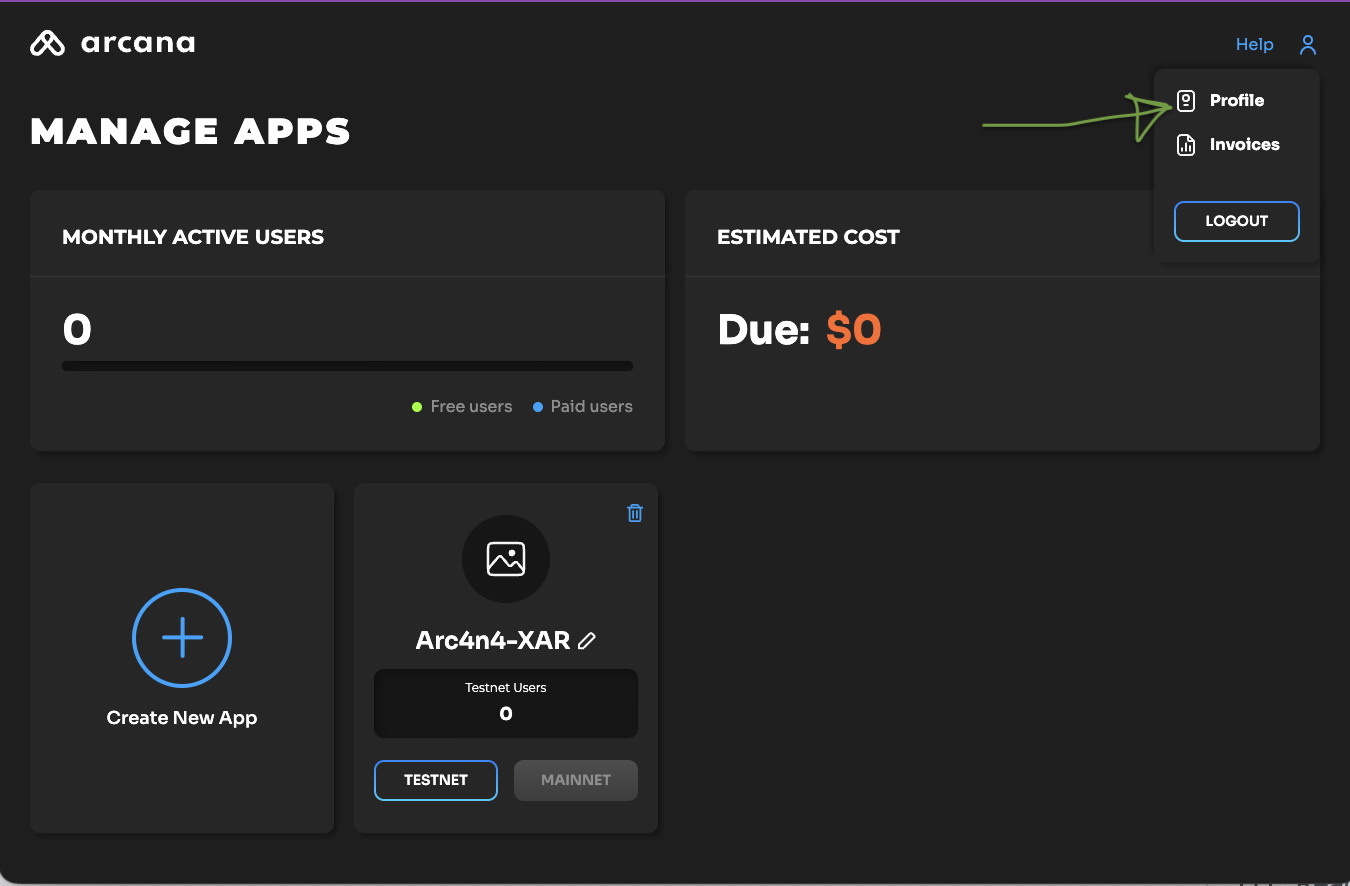
Payment Method Setup
Click on the user icon on the top right of the Arcana Developer Dashboard screen. Select Profile in the dropdown.
You will see the developer's Arcana account profile details. The developer account name and public identifier (email) are automatically retrieved based on the account used to log into the Arcana Developer Dashboard.
Developers are required to update the following profile details and then click Save.
- Organization
- Billing Address Details
- Payment Method
Payment Method
By default, the 'Payment Method' section is disabled.
The payment method section is enabled once the billing address details are configured.
View Invoices
Click on the user icon on the top right of the Arcana Developer Dashboard screen. Select Invoices in the dropdown.
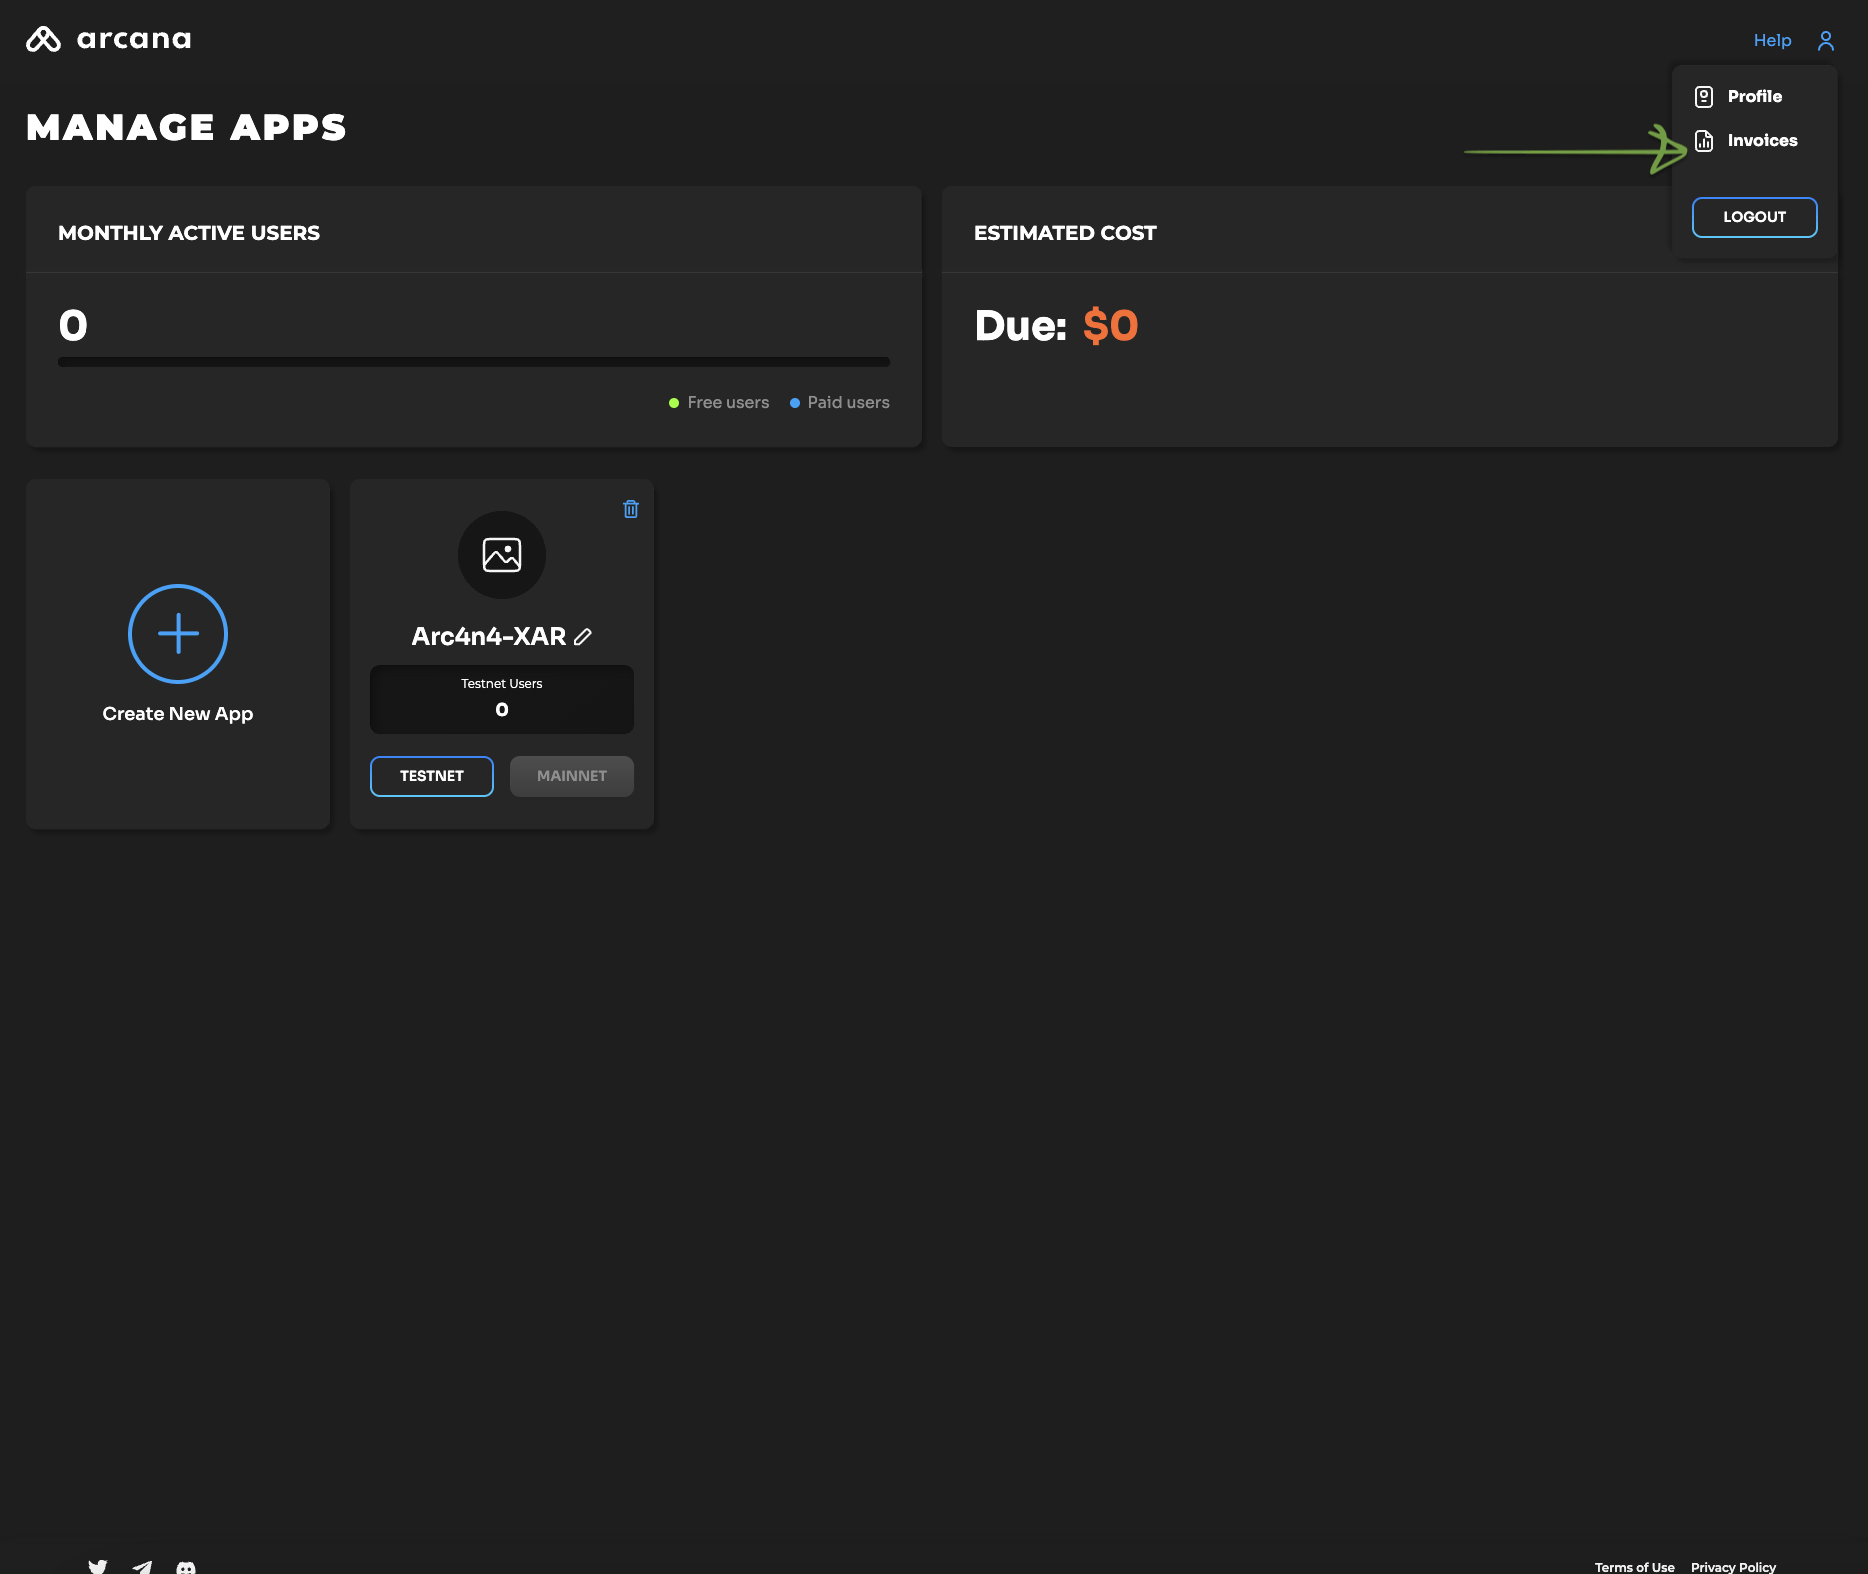
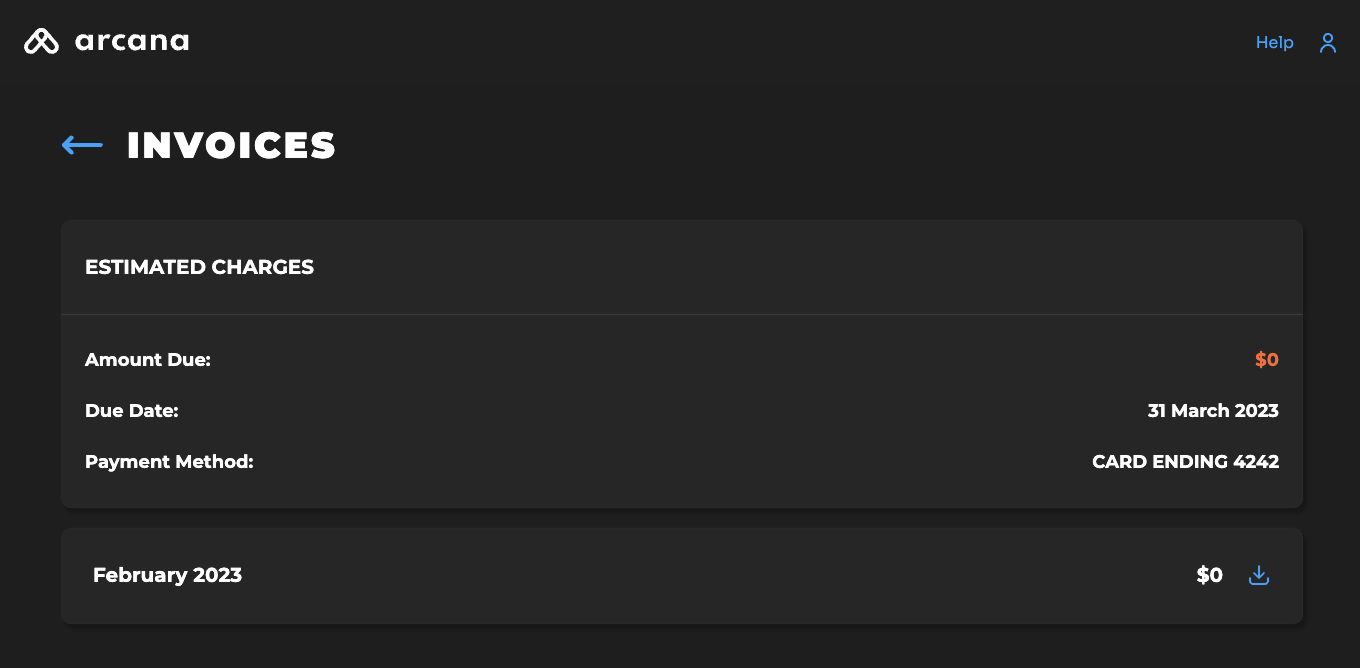
On the Invoices page, you will see the details of the current pending dues, followed by the billing history of previous invoices that can be downloaded for reference.
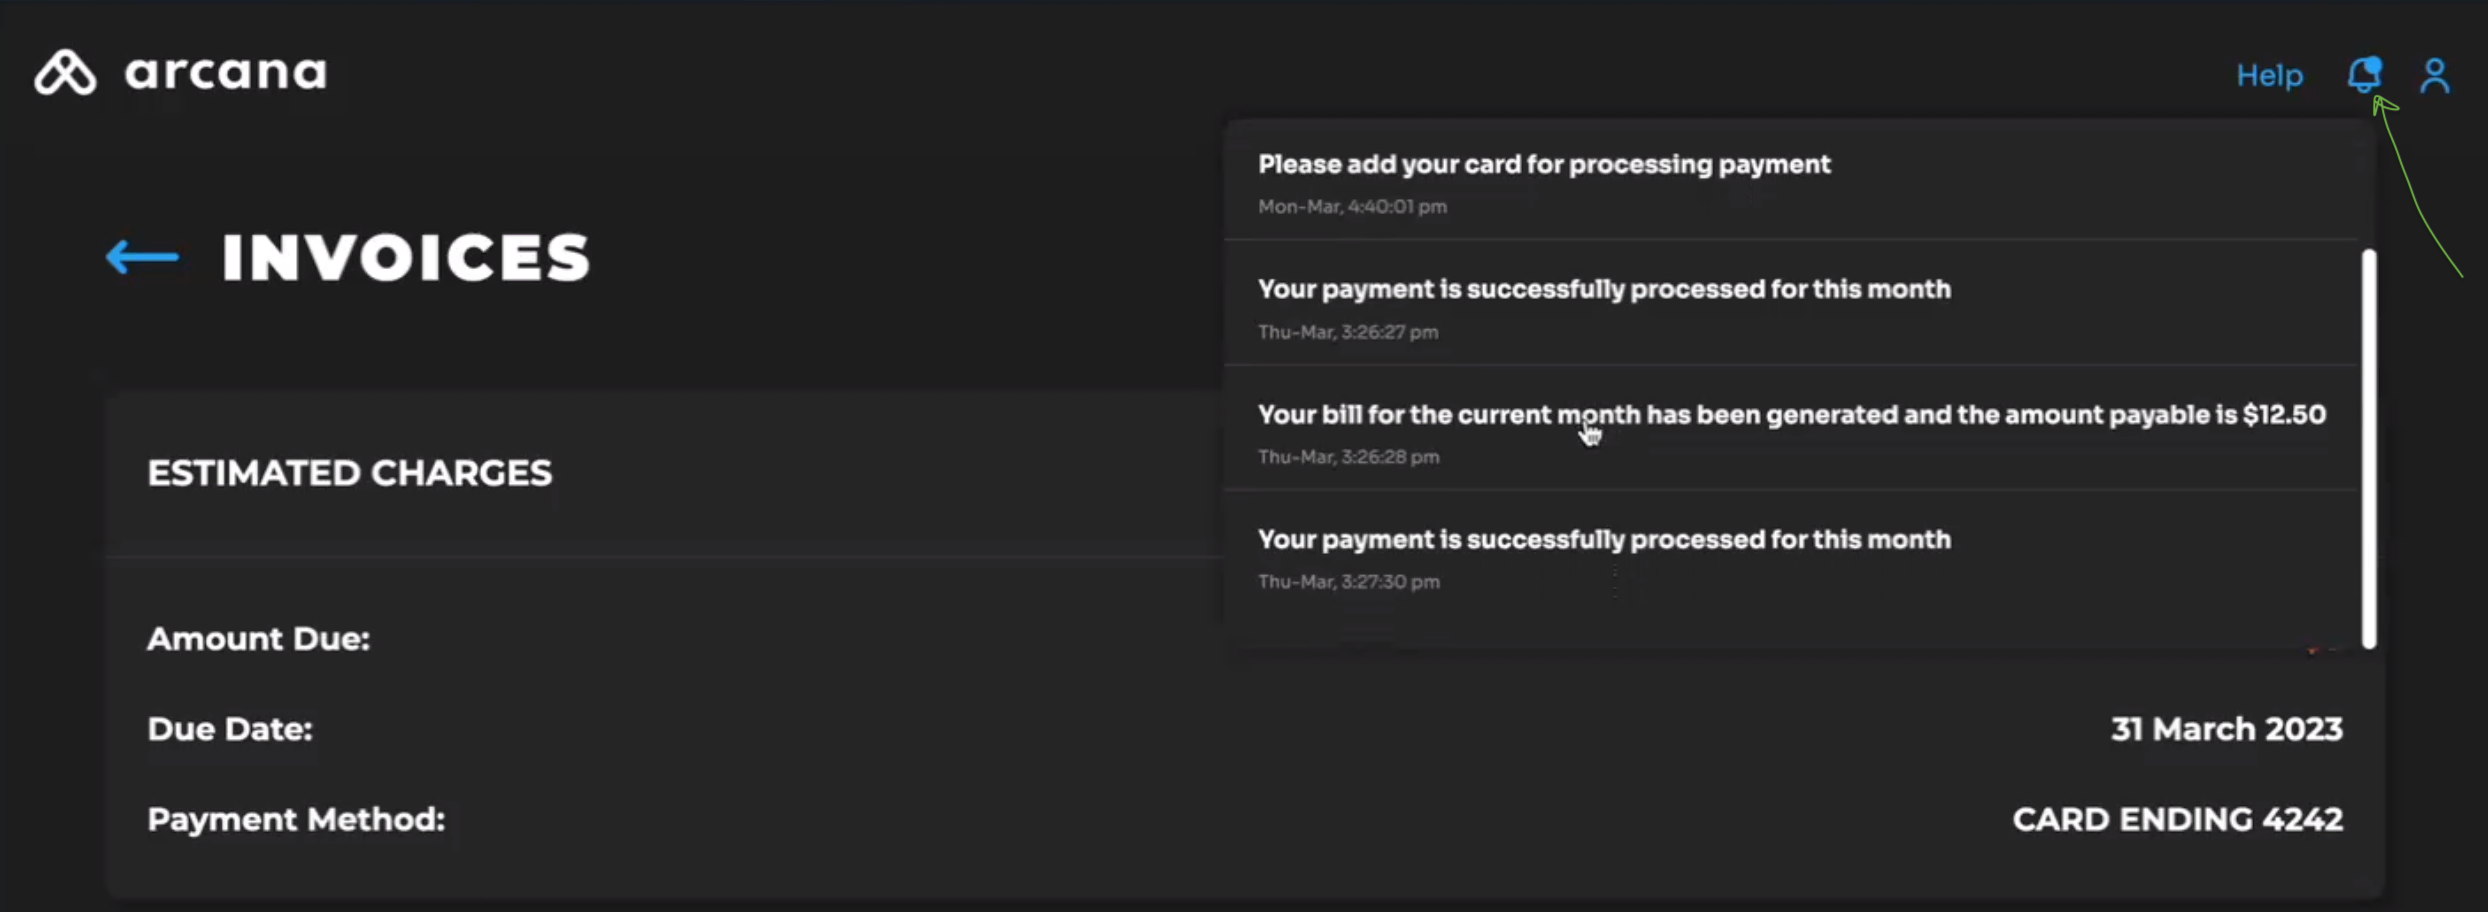
View Billing Notifications
Click the bell icon to view all notifications for the developer account. Check the billing notifications list for details.
Configure Non-EVM Chains
Use the dashboard to enable non-EVM chains in your Web3 apps.
- Solana
- Other non-EVM chains (Coming Soon!)
Delete Application
To de-register an application, the developers must delete the entry using the Arcana Developer Dashboard. Go to the 'Manage Apps' dashboard page, which lists all the registered applications.
Select the application you wish to de-register and choose Delete.
FAQ: Arcana Developer Dashboard
New users can get help with Arcana Auth SDK configuration and Arcana Developer Dashboard usage by consulting the Arcana Developer Dashboard FAQ or contacting 📨 support@arcana.network.